


Ingredient Notes
You only need a handful of pantry staples, plus the turkey drippings. For the full list of ingredients and measurements, refer to the recipe card below.
Here are a few notes on the ingredients that need a little guidance.

Turkey drippings (aka liquid gold): I use the pan drippings from my herb-roasted turkey, so most of the flavor comes from the roasted aromatics.
It usually yields about 1 ½ cups of drippings, while my Roasted Turkey Breast yields only 3-4 tablespoons. That said, every turkey is different, so the exact amounts may vary. However, this method works with any turkey recipe.
Taste the drippings before adding any salt, especially if you brined your turkey, because the salty liquid collects at the bottom of the pan as the turkey roasts.
Chicken stock: I use homemade chicken stock (or store-bought) because it is light and provides a clean flavor. However, turkey stock works too. If you brined your turkey, use low-sodium stock. That way, your gravy will not be too salty.
Butter: I recommend unsalted butter to control the saltiness. You can make the roux with skimmed turkey fat instead, but I find butter gives a smoother, creamier gravy.
Plus, the drippings already have a rich, deep turkey taste, and butter mellows it just enough for a well-balanced gravy.
All-purpose flour: It is what thickens the gravy. Use 1:1 gluten-free flour if needed.
Flour vs. cornstarch: Both will thicken the gravy, but I use flour because it gives turkey gravy a silky and rich texture.
How To Make Gravy From Turkey Drippings
I always make this gravy right after I take the turkey out of the oven, while it is resting. This way, by the time everyone sits down to eat, the gravy is warm.
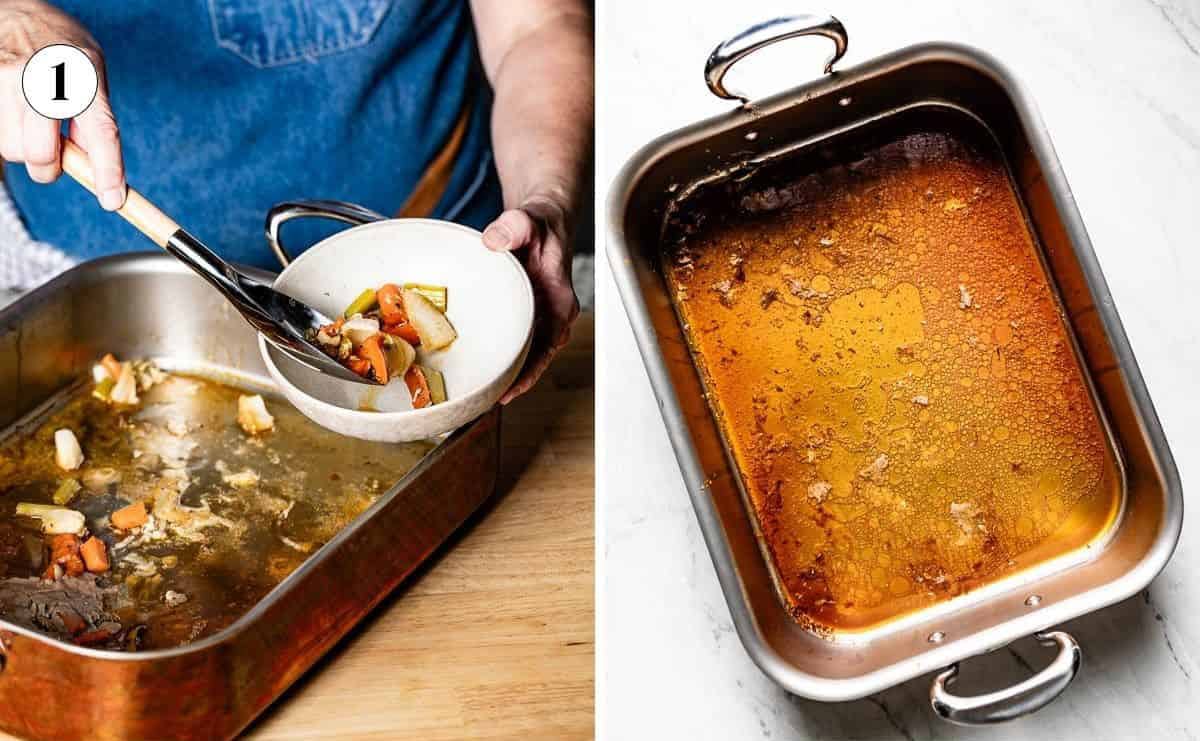
Step 1 – Remove the veggies: While the turkey rests, use a slotted spoon to remove the large pieces of vegetables (onions, celery, carrots) from the roasting pan.
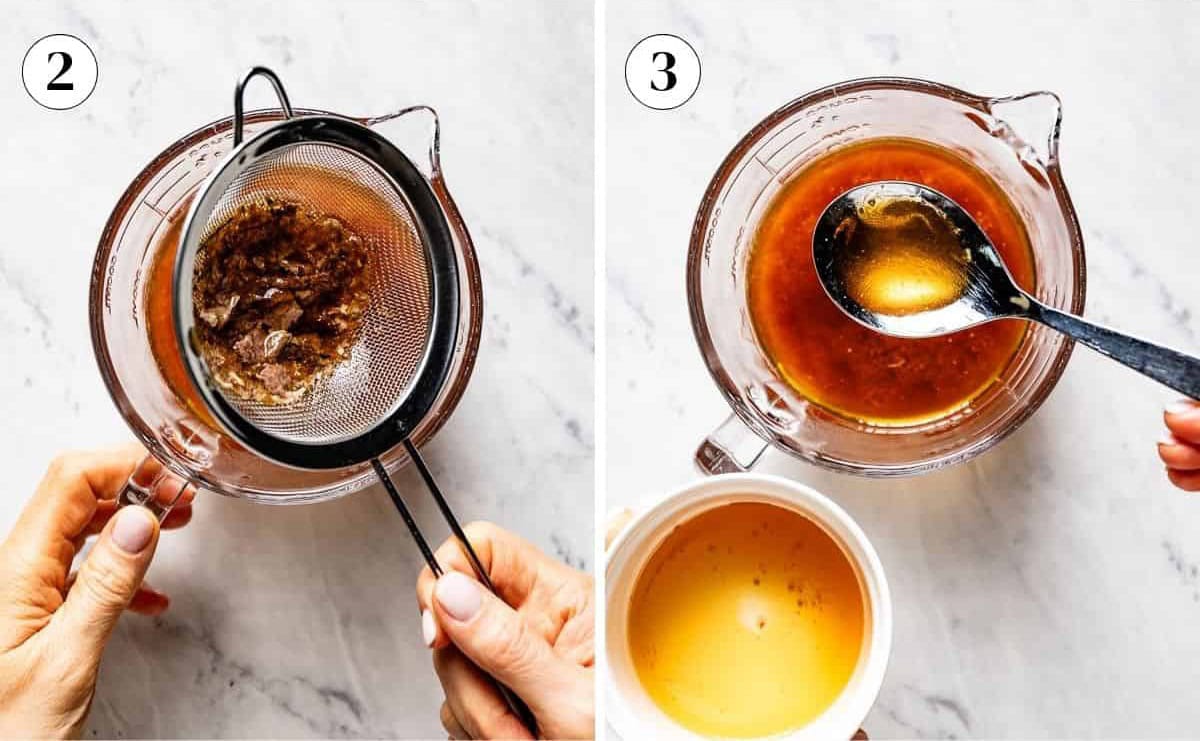
Step 2 – Strain the juices: Strain the juices through a fine-mesh strainer into a measuring cup and let them sit in the fridge for 10 minutes so the fat can firm up.
If you have a fat separator, strain drippings into it instead and let them sit on the counter for about 5 minutes or until the fat rises to the top.
Step 3 – Remove the fat: Use a spoon or turkey baster to remove as much of the top fat layer as you can.
If you are using a fat separator, pour off the drippings, leaving the fat behind. Skimming the fat is crucial to keep the gravy from separating.
Add the chicken stock to bring the liquid to 3 cups.
What to do with skimmed fat? Do not throw it away. Pour it into an ice cube tray and freeze. Use it anywhere you want a bit of turkey flavor, like roasting vegetables, cooking rice, or even mixing it with butter for mashed potatoes.
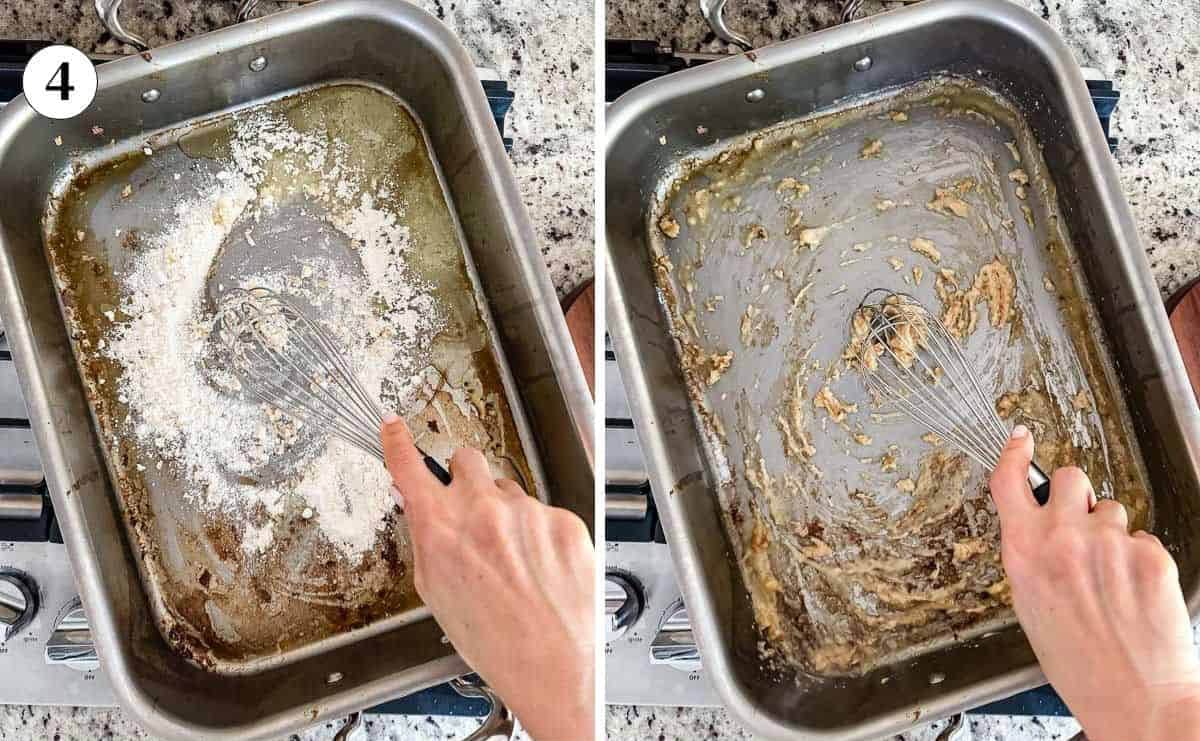
Step 4 – Make the roux: Set the now empty roasting pan over medium heat. Melt the butter, add the flour, and whisk for about 3 to 5 minutes, or until the flour is lightly browned and smells like popcorn.
Toasting the flour cooks out the raw flour taste and gives the gravy a slightly nutty flavor.
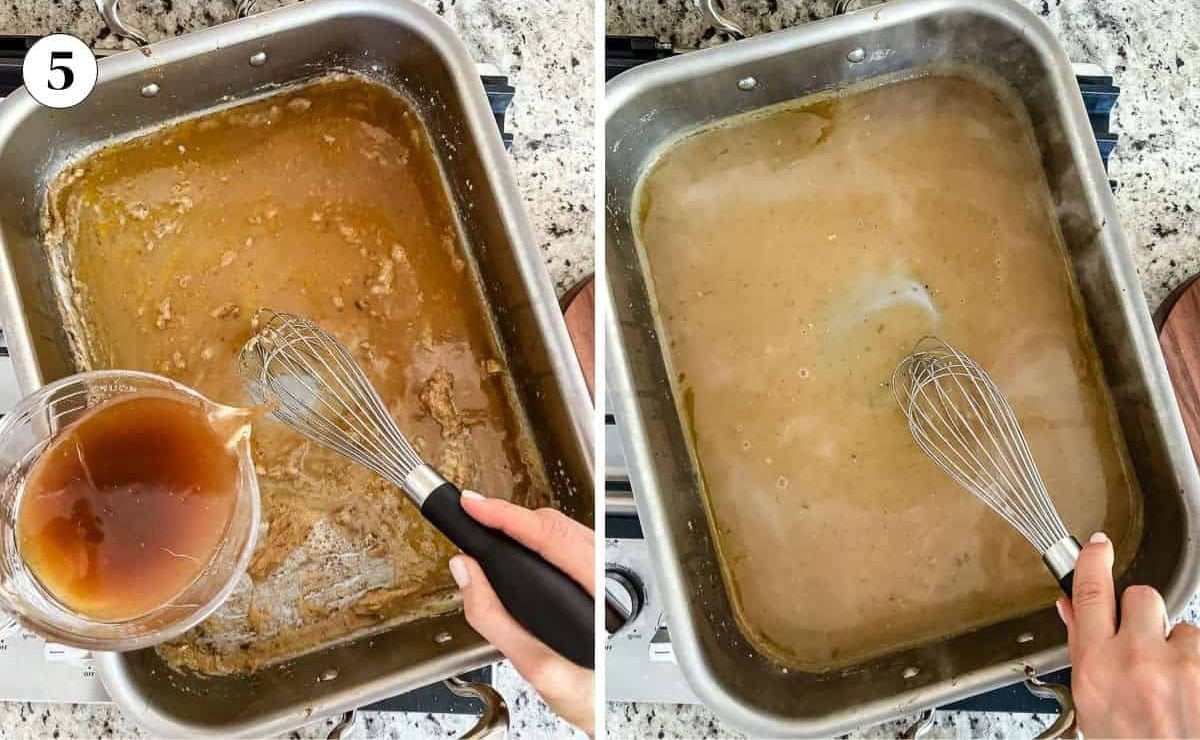
Step 5 – Add the liquid: Slowly pour the drippings and the stock into the roux, whisking constantly to avoid clumps. As you whisk, scrape up the browned bits from the pan because they carry a lot of flavor.
Start over medium heat, bring it to a boil, and keep whisking until it thickens, about 7 to 10 minutes. Adjust the heat as needed so it does not burn and keeps thickening at a steady rate.
The cooking pan matters:
I use the same roasting pan I cooked the turkey in, and its wide surface lets the liquid evaporate faster, so the gravy thickens faster. If you use a smaller saucepan, it will take longer.
If you do end up with any lumps, strain the gravy through a fine-mesh strainer or use an immersion blender to make it silky.
Adjust for consistency:
Cooking the gravy longer will reduce and thicken it, so if yours came out too thin, let it simmer a few more minutes to evaporate the excess liquid.
However, remember that gravy thickens as it cools, so leave it a little thinner than you want it if it will be sitting for a while.
If it comes out too thick, add a splash more stock to thin it to your desired consistency.
Step 6 – Add seasonings: Sprinkle in the thyme, parsley, and black pepper. Taste and add the salt. Taste again and adjust if necessary. I always add the salt last because the saltiness intensifies as the gravy thickens.
Whisk the gravy well, pour it into a gravy boat, and serve alongside the turkey. It is normal for a thin skin to form as it sits. Give it a quick stir before serving.

If you try this Easy Homemade Turkey Gravy with Drippings recipe or any other recipe on Foolproof Living, please take a minute to rate the recipe and leave a comment below. It helps others who are thinking of making the recipe. If you take some pictures, share them on Instagram using #foolproofeats so I can share them on my stories.

Turkey Gravy From Drippings (No Giblets)
Ingredients
- Turkey drippings, from the roasting pan
- Chicken stock, or turkey stock, enough to bring the drippings to 3 cups (use low-sodium if you brined the turkey)
- 4 tablespoons unsalted butter
- 4 tablespoons all-purpose flour
- 2 teaspoons fresh thyme, chopped
- 1 tablespoon fresh parsley, chopped
- Kosher salt, to taste
- Ground black pepper, to taste
Instructions
- While the turkey rests, use a slotted spoon to remove the large pieces of vegetables from the roasting pan. Strain the juices through a fine-mesh strainer into a glass measuring cup.
- Chill in the fridge for 10 minutes so the fat can firm up. Then spoon off(or use a turkey baster) as much of the fat on top as you can. If you have a fat separator, strain into it instead. Let it sit on the counter for 5 minutes or until the fat rises to the top. Pour off the drippings, leaving the fat behind.
- You will likely end up with 1 1/2 to 2 cups of drippings. Use chicken stock to bring it to 3 cups. Set it aside.
- Melt the butter in the now-empty roasting pan over medium heat. Add the flour and whisk constantly until lightly browned and smelling like popcorn, about 3 to 5 minutes.
- Gradually pour the drippings and stock into the roux while whisking constantly. Scrape the browned bits from the pan as you whisk. Bring to a boil over medium heat and whisk until thickened, about 7 to 10 minutes. Adjust the heat as needed to prevent burning. If it gets too thick, add a splash more stock.
- Stir in the thyme, parsley, and black pepper. Taste and add the salt. Taste again and adjust as necessary.
- Whisk well, pour into a gravy boat, and serve with the turkey. If a thin skin forms as it sits, give it a quick stir before serving.
Notes
- Yields: This recipe makes about 2 ½ to 3 cups of gravy, ideal for eight servings.
- Storage: Cool the gravy to room temperature within 2 hours. Store in an airtight container in the refrigerator for up to 5 days.
- Freeze: Once cooled to room temperature, transfer to a freezer-safe container or freezer bag; label, date, and freeze for up to 1 month. Thaw overnight in the fridge.
- Reheat: Reheat in a saucepan over medium heat, with a splash of chicken stock, stirring regularly, until it comes to a boil. Or, microwave in 30-second increments, stirring in between. Cold gravy is thick, but it loosens as it warms.
Nutrition information is automatically calculated, so should only be used as an approximation.











Please forgive me if this is a dumb question, but would it also work to make the roux with the strained fat mixed with flour rather than butter mixed with flour?
I just found your website recently and subscribed to your emails. You have such beautiful photos, clean ingredients, and a lovely website overall. Well done!
Hello Charlene,
I am happy to hear that you liked the site. I hope you enjoy cooking from it.
It is not a dumb question at all. The answer is yes, but I find that roux/gravy made with butter tend to be smoother and creamier. Still, it would still work.
Hope this answers your question.
Wishing you and yours a happy Thanksgiving.