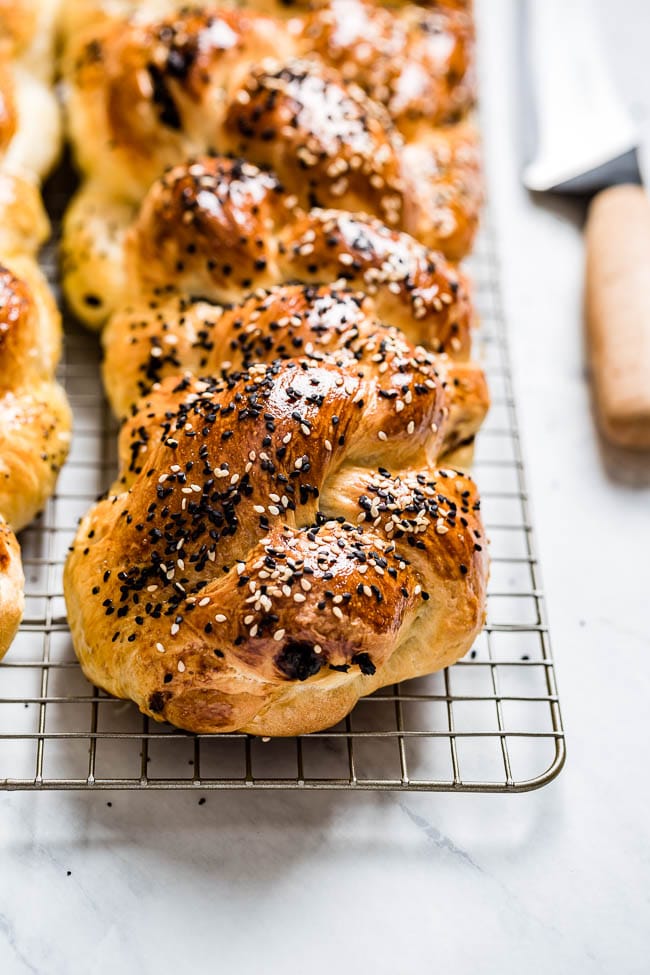
I think we can all agree that there is something so satisfying about baking bread at home. Kneading the dough, letting it rise, and baking it to perfection is an easy way to reach the pinnacle of instant gratification that we are always craving. And when it comes to bread recipes, for me, this homemade Challah bread recipe is at the top. This is not only because it looks gorgeous but also because it is one of the easiest bread recipes to make.
Looking at the pictures you might not think so (and even feel intimidated), but I assure you, after reading this post with all my tips and tricks and watching the video I made on making Challah from scratch, you will succeed in making this Jewish braided bread in your very own kitchen, even if this is your first time.
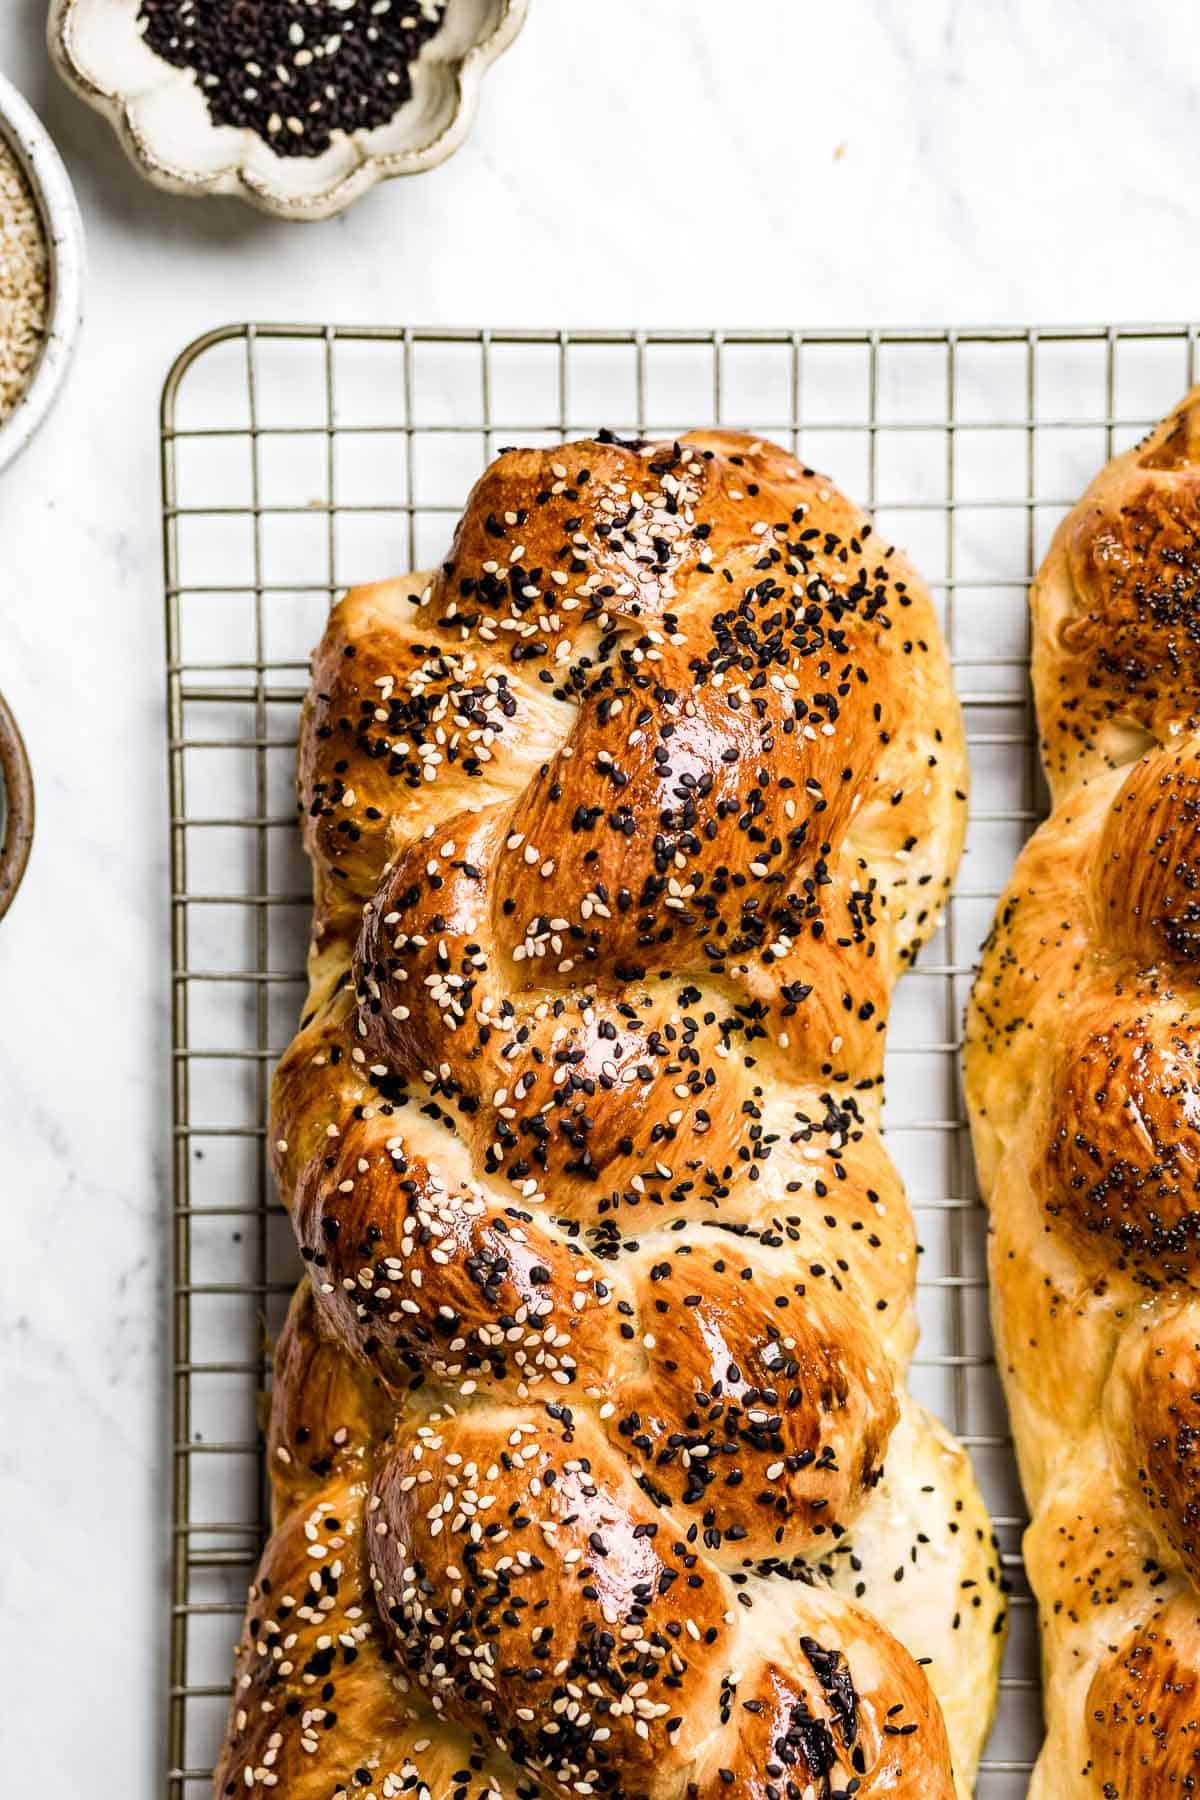
Table of Contents
- What is Challah bread?
- Ingredients
- How to make it using my easy foolproof method?
- Challah Baking Instructions
- Can you make the dough the night before?
- How to store & how long will it keep?
- Can I make Challah using a standing mixer?
- Recipe Variations
- A Few final tips for the best Challah bread recipe:
- FAQs:
- Other bread recipes you might also like:
- Challah Bread Recipe
What is Challah bread?
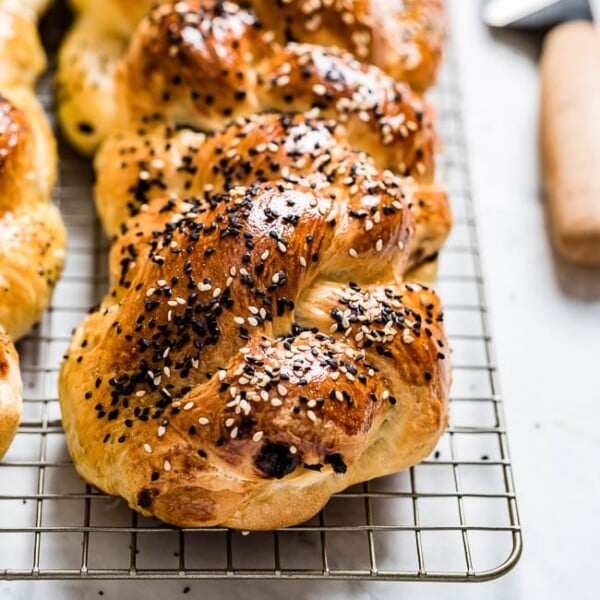
Challah is a traditional Jewish yeast-risen egg bread served on Shabbath or throughout the year on Jewish religious holidays. What makes it different is that it is traditionally made by braiding strands of dough and it is surrounded by tradition and loaded with symbolism.
While most people refer to this bread as Challah bread, the proper name for this Jewish bread name is Challah. It is pronounced as haa.luh.
Throughout the history, it has also been referred to as:
- Shabbath Bread
- Jewish Celebration Bread
- Jewish Knotted Bread
- Hollow Bread
- Kitke Bread
- Rosh Hashanah Celebration Bread
- Jewish Sweet Bread
Ingredients
The list of ingredients for my easy dairy-free challah recipe is as follows:

- All purpose flour
- Kosher salt
- Dry rapid rise yeast (not active dry yeast)
- Large Eggs (at room temperature)
- Vegetable oil – I find that the best oil for Challah is an oil with very minimal flavor like avocado, grapeseed, or canola oil.
- Lukewarm Water (80-90 degrees F)
- Honey or sugar
- Egg wash & optional toppings like sesame seeds and poppy seeds
- Nonstick cooking spray or more oil to grease the bowl
How to make it using my easy foolproof method?
The process of making this braided Challah bread recipe has 6 steps:
- Prepare and mix the ingredients following my recipe for Challah dough
- Knead the dough
- Let it rise (twice)
- Roll the dough and braid
- Brush it with egg wash and let it rise
- Bake
Below you will find step-by-step instructions on how to make my honey Challah with helpful photos.
Prepare & Mix The Ingredients:
Start with the dough. To do so:
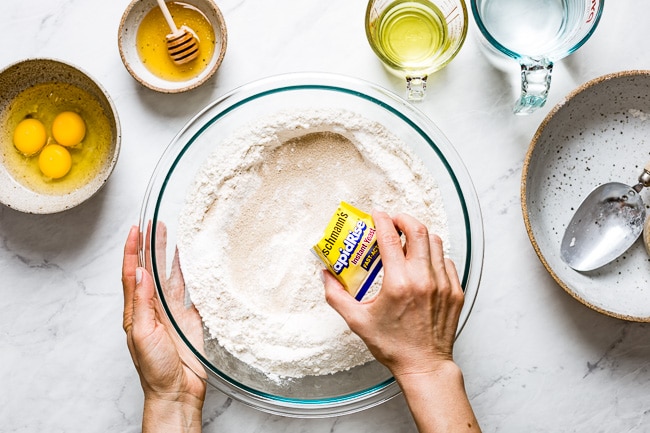
- Place flour, salt, and rapid rise yeast in a large mixing bowl.
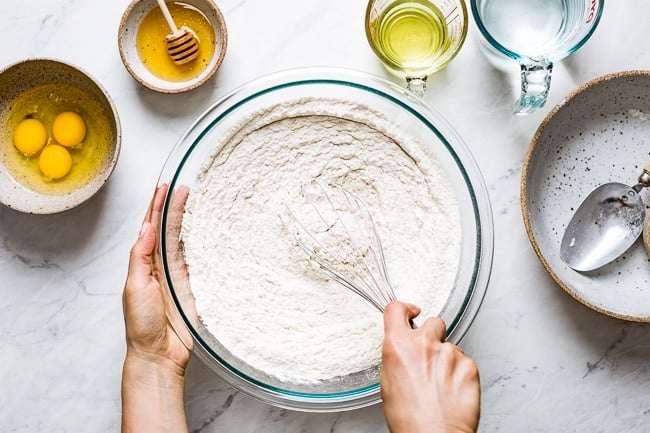
- Give it a whisk to make sure it is thoroughly mixed.
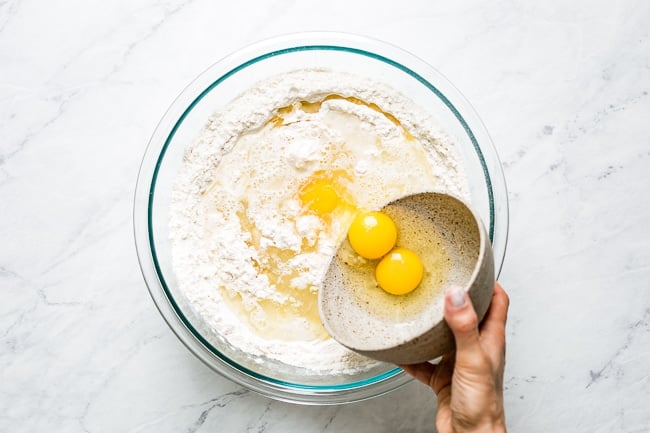
- Add in the wet ingredients; eggs, vegetable oil, honey, and luke warm water.
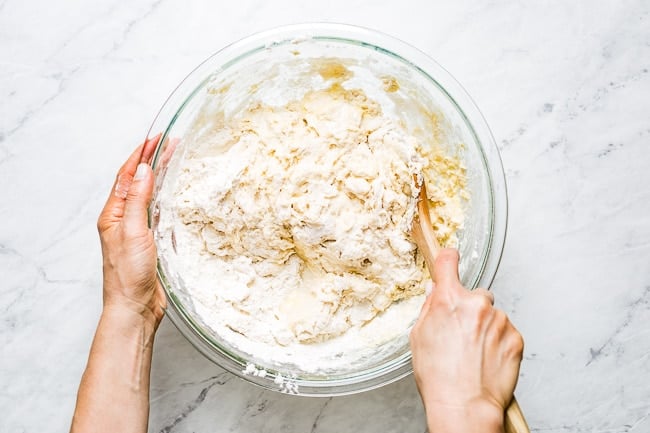
- Using a wooden spoon stir until combined. It will be sticky and messy but do your best to incorporate as much as you can.
How to knead the dough?
To knead Challah dough:
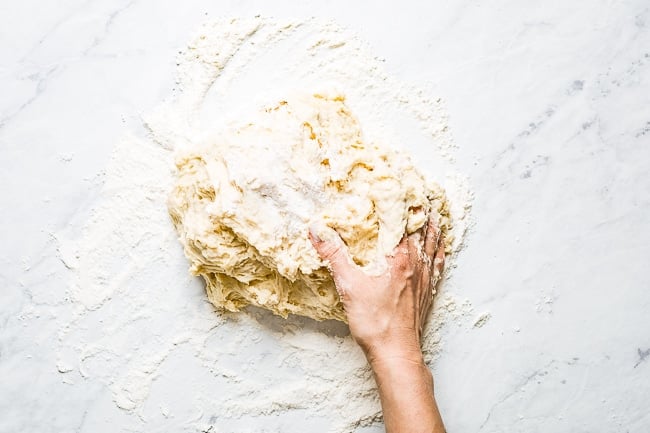
- Sprinkle your kitchen counter with flour and scrape the dough out of the bowl onto the countertop.
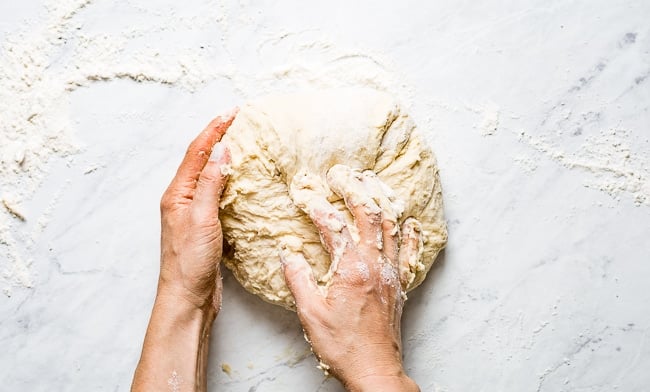
- Begin kneading by pushing it down using the heels of your hands. Fold it in half towards yourself, press down, and continue kneading all the while lengthening and stretching to activate the gluten.
If it is getting sticky, add a little more flour. This is why I always set aside a cup of flour on the counter.
- Continue to knead, fold and turn dough for about 10-12 minutes or until it is smooth and no longer sticky adding flour as needed.
How much additional flour should I use during the kneading process?
The answer to this question depends on a few things like the temperature of your kitchen, the humidity, and how large your eggs are. However, I find that for two loaves of Challah, 6 cups of flour with an additional cup on the side to use during kneading is a good place to start.
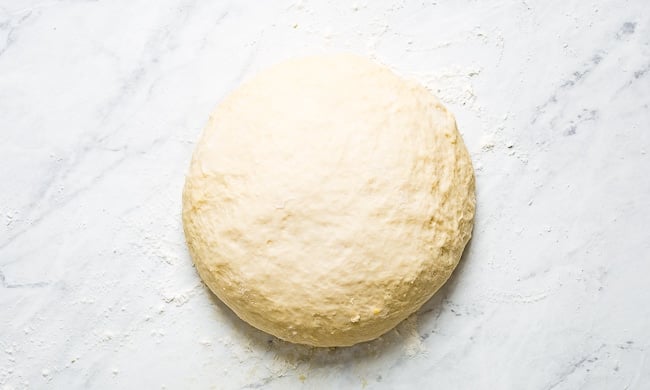
As you are kneading, you can add in a little bit more flour at a time until the dough is easily rolling without sticking to the counter. At the end of 10 minutes, what we are looking for is a soft dough that is easy to knead without sticking to the surface.
And remember, we are not trying to incorporate more flour into the dough. Rather, using just enough to make sure it is no longer sticking to the counter as we are kneading it.
Let The Dough Rise
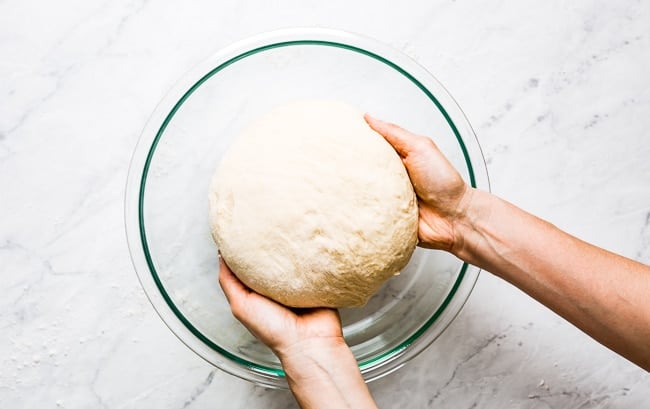
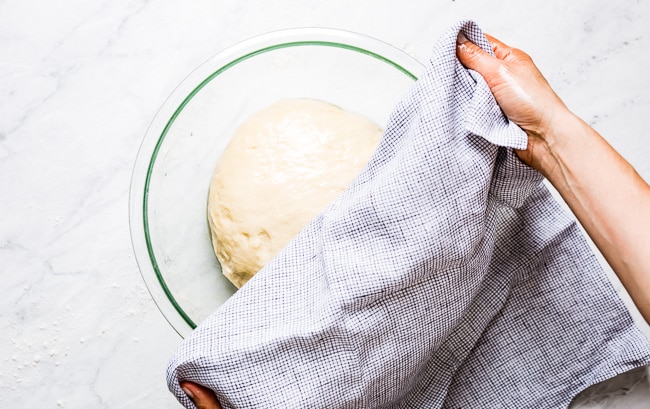
- Place dough into a lightly oiled large bowl, turn it around to make sure it is coated with the oil, cover it with a clean kitchen towel (or plastic wrap), and let it rise in a warm place that is also a draft-free spot for about an hour and a half to two hours or until doubled in size.
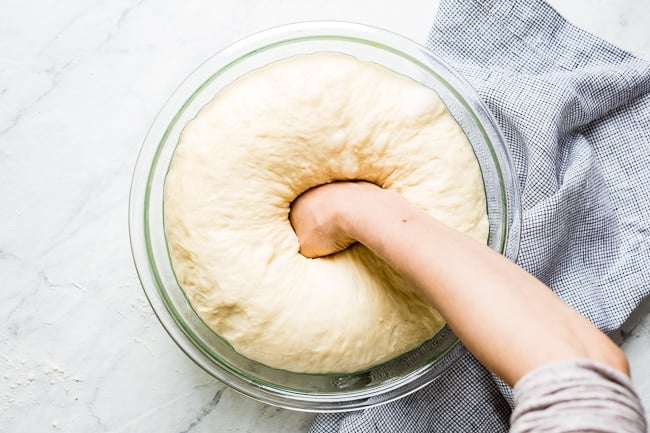
- When ready, punch the dough to get all the air bubbles out pressing it and kneading it in the bowl, cover it with a kitchen towel and let it rise for a second time.
PRO TIP: While I highly recommend the second rise, I made this bread several times without letting it rise twice. If you are short on time, you can omit this step and move on to braiding after the first rise.
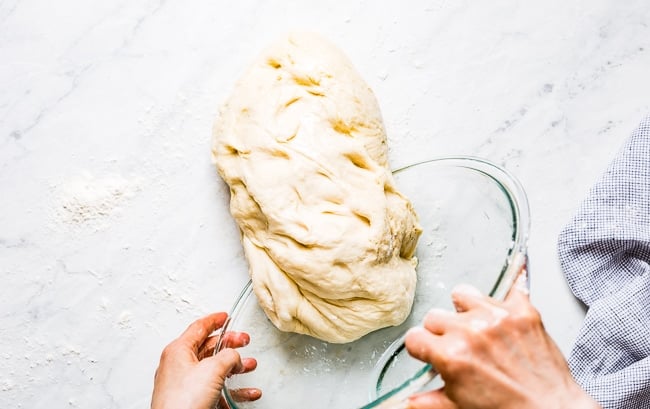
- Transfer dough onto a lightly floured work surface, knead it for a few more minutes before rolling out the strands.
Divide and roll the dough to prepare for braiding:
I find that the best way to get even strands is to use a kitchen scale, measuring the initial weight of the dough and dividing it into equal pieces to get even strands.
My egg challah recipe here makes two loaves. Since I am planning to make two six-strand braid loaves, I will need twelve strands. We would have to do a little math here, but I promise it is worth your time.
The total weight of the dough is 54.4 oz (1542 gr), which means I need each strand to be 4.5 oz (127 grams).
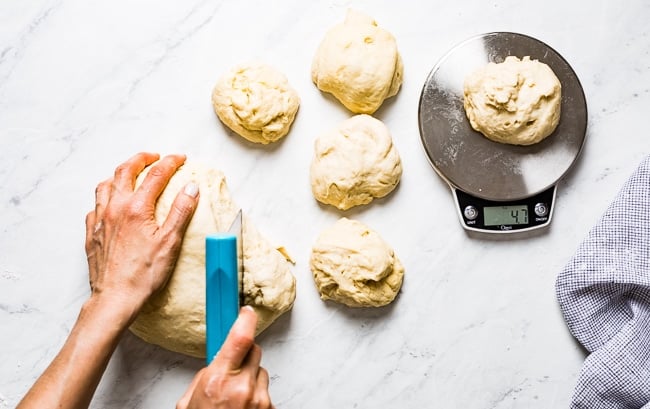
On a lightly floured surface, divide the dough, measure one by one on a kitchen scale, and put them aside.
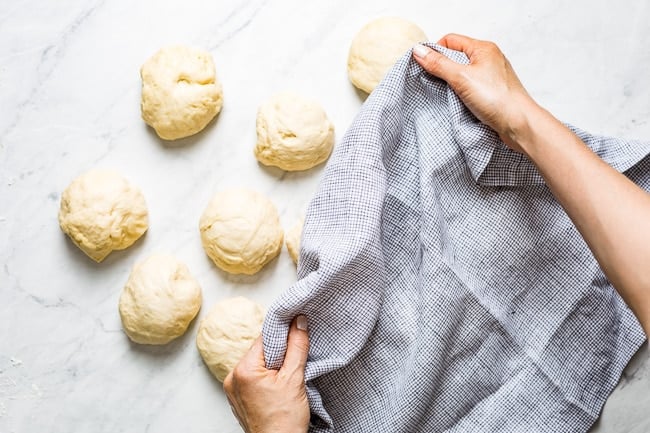
When completed, roll each piece into a small ball, set aside, and cover with a clean kitchen towel to prevent them from drying as you are working on rolling out the strands and braiding.
If you do not have a kitchen scale, you can eyeball it as well. Do the best you can to cut them in equal portions.
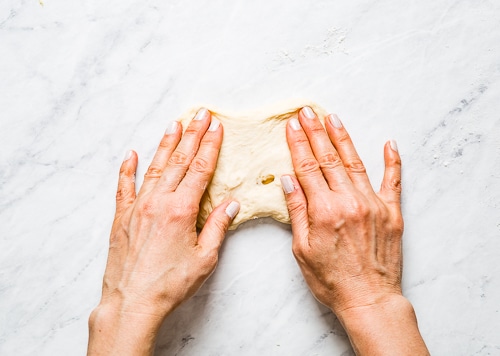
How to roll the strands?
When ready to roll, take each piece, gently push it into a small rectangular (using the heel of your palm) and roll it out by starting in the middle and toward the edges. Gently pinch the seam and continue to roll out.
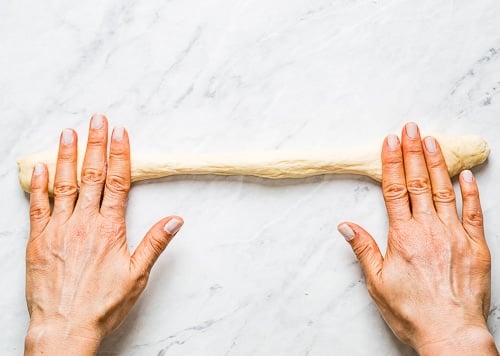
If at any point it becomes difficult to roll out just let it rest for 5 minutes and roll it again. In the end, we want our strands to be around 12 to 13 inches long.
How to shape it? (6-Braid Challah Shaping)
Challah is made in various sizes and shapes, all of which have a meaning. Braided Challah is the most common of all those shapes. Braids can have two, three, four, or six strands, which all have different meanings.

In this post, I am featuring my six-braided Challah recipe. Follow the written instructions below to braid or watch the quick how-to video below:
To braid:
- Lay the strands lengthwise on the counter, pinch them together at the top.
- Start from the strand that is on the very left and bring over to the very right.
- Then take the one next to it and bring it to the very left.
- Next, bring the outside right strand in between the four strands that are at the bottom.
- Move the second one from the left to the very right and then bring the on the very left into the between the strands at the bottom.
- Continue with repeating the same steps until you are no longer able to move strands.
- When you reach the end, bring them in, tie together underneath and pinch ends to make sure that they won’t come undone.
Step by step video showing you how to braid six braided Challah bread:
Challah Baking Instructions
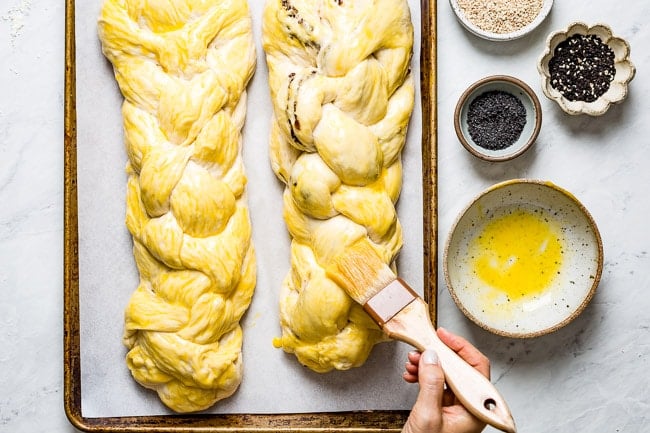
When your Challah is braided, transfer it onto a parchment paper-lined large baking sheet and brush it generously with an egg wash (one egg mixed in with 1 tablespoon of water).
Let it rise, uncovered, in a warmer part of your house for 45 minutes to an hour or until it is almost doubled in size.
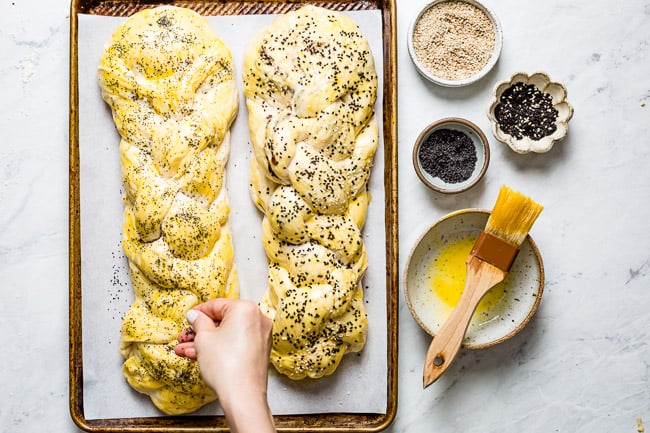
Before baking, brush it with the egg wash one last time and sprinkle it with sesame or poppy seeds, if using.
Place it in a preheated 350-degrees F temperature for 35 to 40 minutes or until golden brown. When you thumb the bread, it should make a hollow sound.
Immediately transfer it onto a wire rack and let it cool for at least 45 minutes before serving.
Can you make the dough the night before?
In his book, Artisan Bread Every Day (affiliate link), Peter Reinhart recommends letting the dough sit in the fridge overnight for a more flavorful Challah recipe.
If you decide to refrigerate your Challah dough, follow the below steps that I learned from his book:
- Place the dough in a lightly greased bowl.
- Cover with stretch film and immediately place in the fridge. Let it rest overnight.
- When ready to bake, take it out of the refrigerator and let it rest for at least 2 hours.
- Prepare the strands and braid it as I did in this recipe.
- Transfer onto a parchment-lined baking sheet, brush it with an egg wash and let it rise for an hour.
- Brush it again with the egg wash and let it rise again for one hour. In the end, it should increase by 1 ½ of its initial size.
- Follow the recipe for the rest of the Challah baking instructions.
How to store & how long will it keep?
I think this Challah bread recipe is best on the day it is baked. However, it will still be good for the next 2-3 days if you keep it in an airtight container.
If you want you can freeze leftovers. To do so:
- Bring your braided loaf to room temperature on a wire rack.
- You can freeze Challah as a whole loaf or slice before freezing.
- Place in a freezer bag, get the air out as much as possible, and store in the freezer for up to a month.
When ready to serve, to defrost:
- Remove Challah from the freezer 4-5 hours before serving. Let it come to the room temperature on the counter.
- Preheat the oven to 300 degrees F. Heat it in the oven for 15-20 minutes or until it is warmed thoroughly.
I do not recommend freezing raw braided Challah bread.
Can I make Challah using a standing mixer?
You sure can. Simply place all the ingredients in the bowl of a stand mixer attached with the dough hook. Mix in medium-low speed (8-10 minutes) until the dough is fully mixed and no longer sticky. You may have to add in more flour based on the temperature of your kitchen and the humidity levels.
Recipe Variations
Challah recipe with honey versus granulated sugar:
Most people use honey as the sweetener and make a round Challah during the Rosh Hashanah celebrations. I prefer using honey as my sweetener as we follow a diet made with natural sweeteners only.
If you want to use granulated sugar instead of honey, you would have to make a few simple adjustments. In the recipe below, you will find instructions to make it with granulated sugar as well.
Can I incorporate raisins or nuts into my Challah?
You sure can. Honestly, until recently I have never made Challah with raisins but after I was introduced to it by a local baker, now I am hooked.
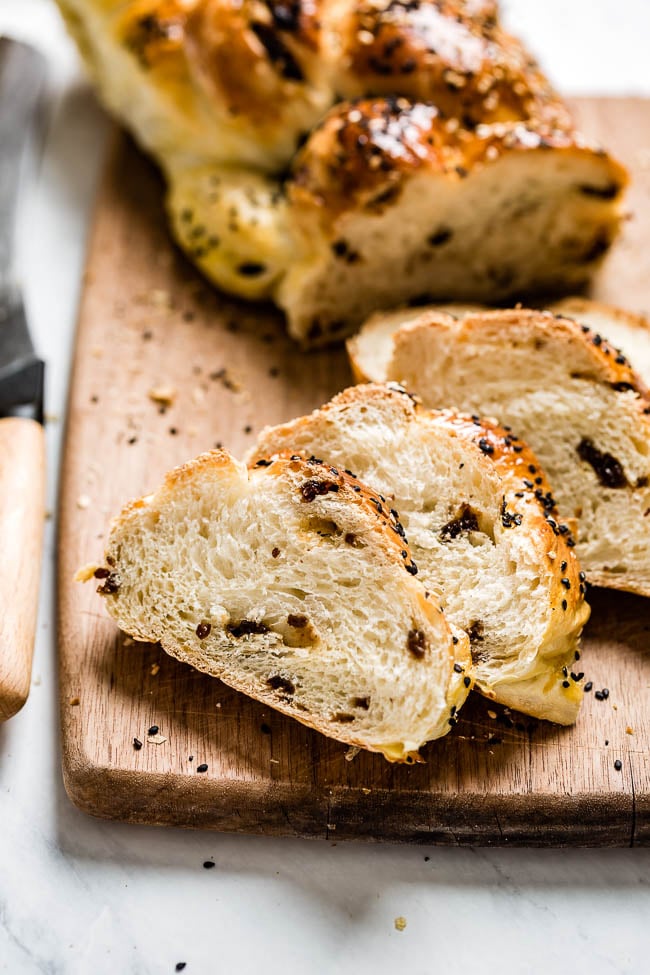
If raisins are not your thing, you can also fill your braids with chopped nuts, chocolate or go in the savory route and use chopped olives or even sun-dried tomatoes.
You can add the raisins to the dough during the kneading process or better yet incorporate them into the strands as you roll each one. To do so:
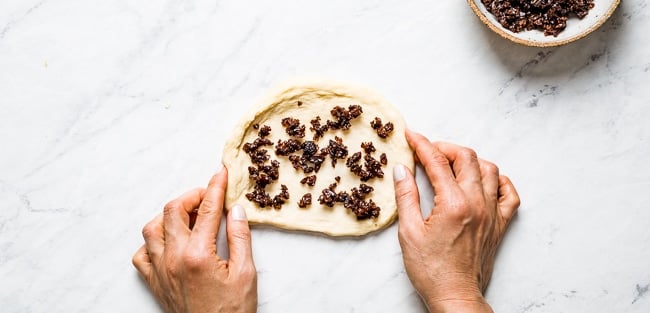
- Take each piece of dough, gently push it into a small rectangular (using the heel of your palm) and fill it with 2 tablespoons of chopped raisins (or whatever you are using).
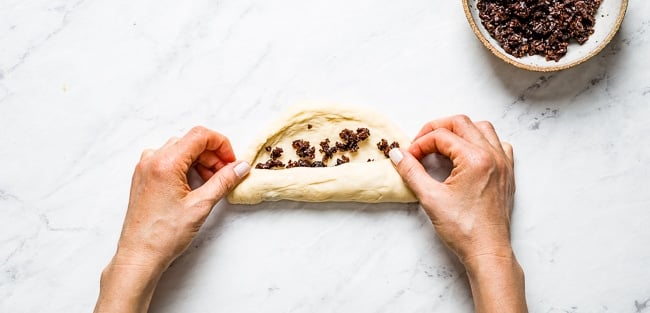
- Roll it onto itself and pinch the ends to seal tightly.
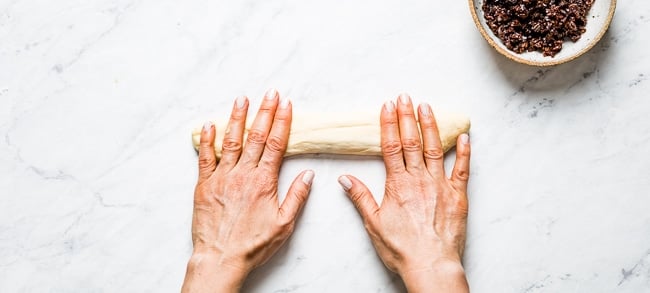
- Roll it out gently by starting in the middle and toward the edges until it is 12 inches long.
If, at any point, it becomes difficult to roll, let it sit for a few minutes and roll it again. And keep in mind that this is not going to be perfect, some raisins will bulge and that is perfectly fine.
A Few final tips for the best Challah bread recipe:
- Still feeling intimidated? Remember one thing: this is a very forgiving dough. You see it, the strands for my bread and the braiding are not perfect. I shot the photos and filmed the video on a hot August day when the humidity was very high. However, even with not so perfect strands and braiding, my Challah turned out beautifully. So please know that even if it doesn’t look perfect, after it is risen and baked, it will look and taste great.
- The rising time: The exact rising time depends on the temperature of your kitchen. If you are making it on a hot summer day, your bread will rise much quicker than when you make it on a cold winter day. However, regardless of the time, for the best challah recipe, you want to make sure you let your bread rise fully.
- How would I know when it is ready to bake? You will know when it looks puffed up and at least, doubled in size. It should also slightly wobble as you are placing it in the oven.
FAQs:
The closest bread to challah is brioche as it is also made with eggs and oil so you can use substitute challah bread with brioche.
Challah has a soft texture with a mild slightly sweet egg flavor with every bite.
It takes about 35 to 40 minutes in a preheated 350 degrees F oven. To check doneness, you can thumb the bottom of the bread if it makes a hollow sound it is fully baked.
Use it to make Challah French Toast or use it in any of your bread pudding recipes.
As it is with most bread recipes, Challah tastes best on the day it is baked. However, if you store it in an airtight container after it is completely cooled to room temperature, it should retain its flavor and texture for up to 3 days.
Brioche is usually made using melted butter whereas most challah recipes use vegetable oil.
Some other terms used for Challah are Shabbath Bread, Jewish Celebration Bread, Jewish Knotted Bread, Hollow Bread, Jewish Sweet Bread, and Rosh Hashanah Celebration Bread.
Other bread recipes you might also like:
If you loved this recipe for Challah bread, be sure to check out the bread recipes below to up your bread baking game:
- Simit
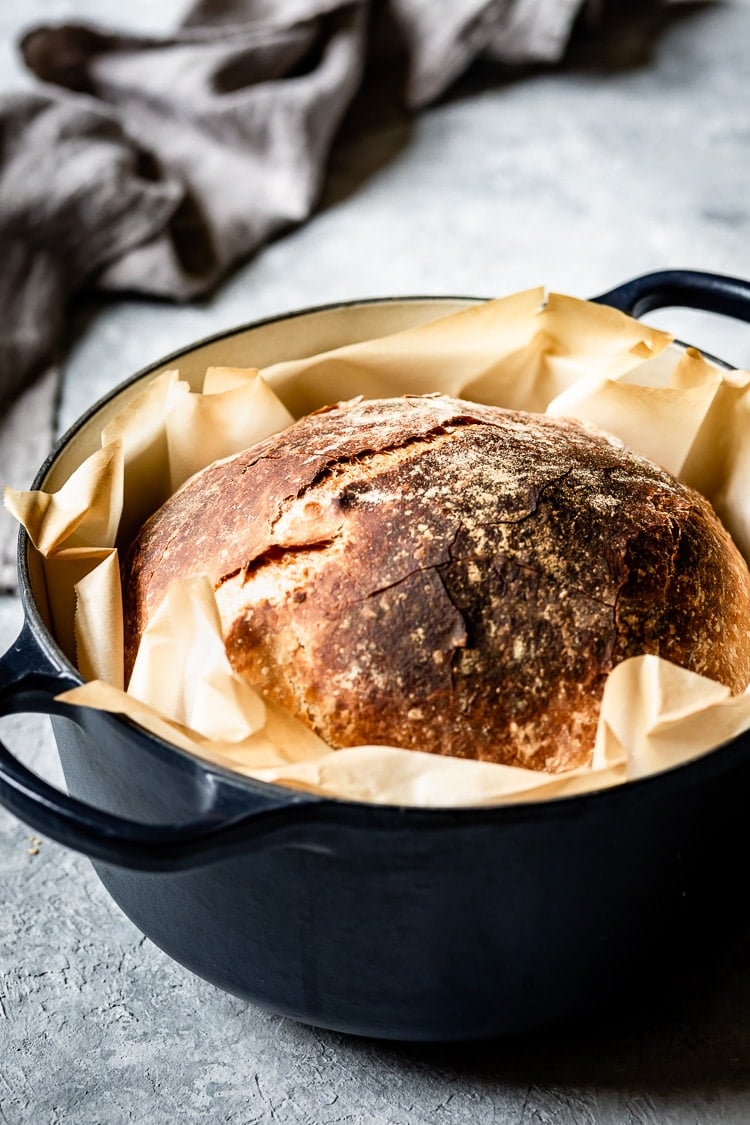
- No Knead Bread
- Brioche Bread
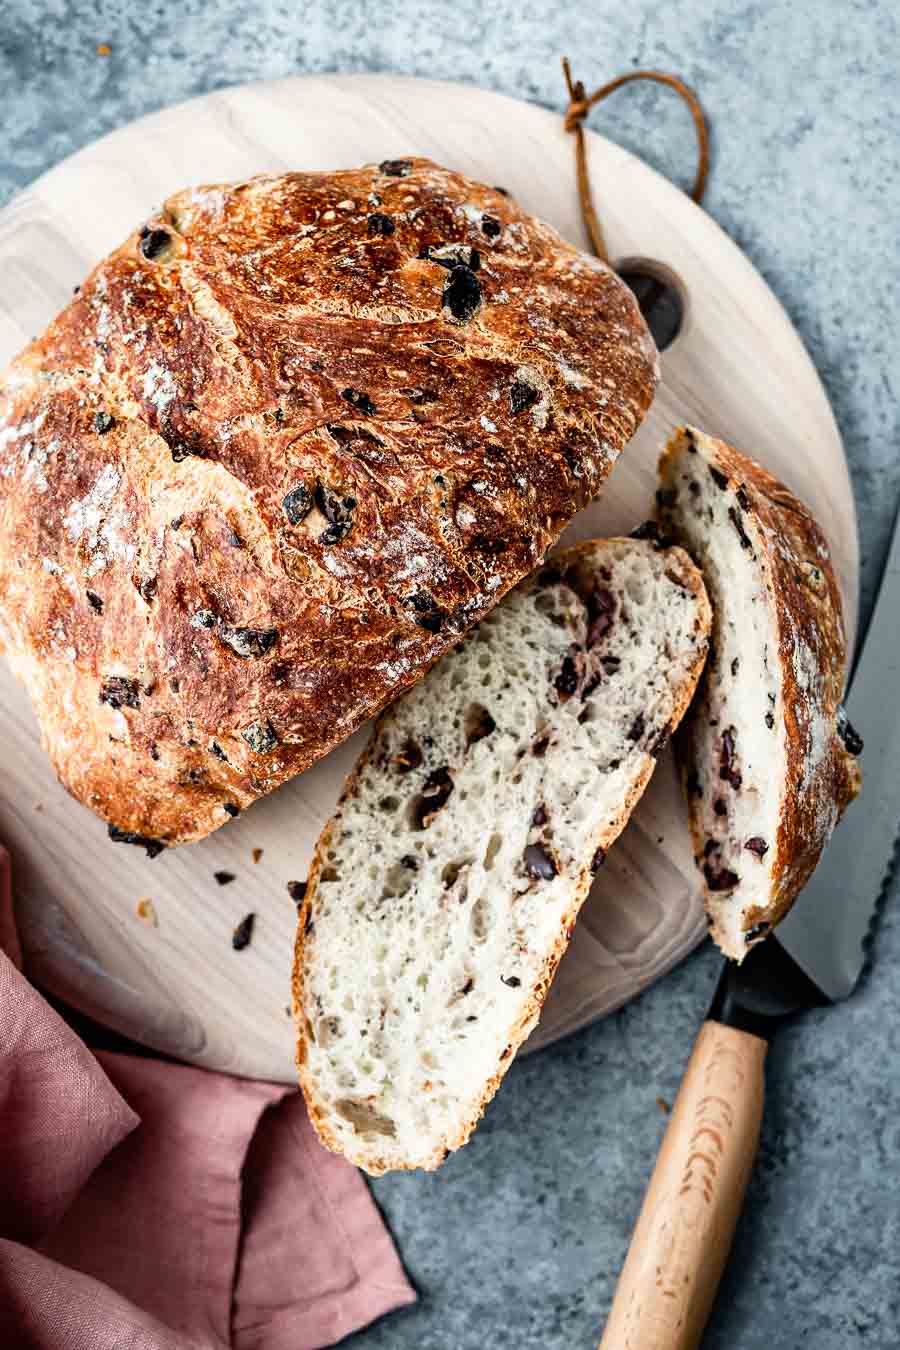
- Olive Bread Recipe
- Pumpkin Bread Pudding Recipe
- Need more inspiration? Check out all our homemade bread recipes
If you try this somewhat Easy Challah bread recipe or any other bread recipes on Foolproof Living, please take a minute to rate the recipe and leave a comment below. It helps others who are thinking of making the recipe. And if you took some pictures, be sure to share them on Instagram using #foolproofeats so I can share them on my stories.

Challah Bread Recipe
Ingredients
- 6 cups all-purpose flour (850 gr), Plus 1 cup to use during kneading
- 1 tablespoon Kosher salt (17 gr)
- 2 packets rapid rise yeast (14 gr), 1/2 oz.
- 3 tablespoons honey
- 1/3 cup vegetable oil , Plus 1 tablespoon for greasing the bowl
- 1 3/4 cup water , (412 ml) – lukewarm to the touch – somewhere between 80-90 degrees F.
- 3 large eggs, at room temperature
For Egg Wash & Topping
- 1 large egg, at room temperature
- 1 tbsp water
- 3 tablespoons black and white sesame seeds, optional
Instructions
Prepare the dough:
- Place 6 cups of flour, salt, and yeast into a large mixing bowl. Give it a quick whisk.
- Add honey, oil, water, and 3 eggs into the bowl.
- Using a spatula (or a wooden spoon), mix until they are incorporated.
Knead the dough:
- Transfer the dough onto a lightly floured kitchen counter and knead for 10-15 minutes.
- Grease a clean bowl with 1 tablespoon of vegetable oil. Place the dough seam side down into the greased bowl. Turn the dough a few times to make sure it is coated with oil.
- Cover it with a clean kitchen towel and let it rest in a warmer part of your house for one and a half hours until it doubles in size.
- Punch down the dough to get all the air bubbles out. Cover it with a kitchen towel and let it rise again for 45-minutes to an hour.
Prepare the strands (for braiding):
- Divide the dough into 12 equal pieces. I used a kitchen scale to weigh the dough and then to cut it into equal pieces. However, you can also eyeball it.
- Roll each piece into a small ball and set them aside. Cover with a towel to make sure they won't dry out while you are working on the braiding.
- To roll, take each piece, gently push it into a small rectangular (using the heel of your palm) and roll it out by starting in the middle and toward the edges. Gently pinch the seam and continue to roll out. If at any point it becomes difficult to roll out just let it rest for 5 minutes and roll it again. In the end, we want our strands to be around 12 to 13 inches long.
To Six Braid:
- Lay the strands lengthwise on the counter, pinch them together at the top.
- Start from the strand that is on the very left and bring over to the very right.
- Then take the one next to it and bring it to the very left.
- Next, bring the one that is at the very right in between the four strands that are at the bottom.
- Move the second one from the left to the very right and then bring the on the very left into the between the strands at the bottom.
- Continue with repeating the same steps until you are no longer able to move strands.
- When you reach the end, bring them in, tie together underneath and pinch to make sure that they won’t come undone.
- Transfer the braided Challah onto a parchement lined baking sheet.
- Repeat the same process for the second set of strands (for the second Challah loaf)
Egg Wash & Rise & Toppings
- Mix an egg with a tablespoon of water to make egg wash.
- Brush each loaf with the egg wash and let it rise in the warmer part of your house for an hour.
To Bake Challah
- Meanwhile, preheat the oven to 350 degrees.
- Right before baking, brush it with the egg wash one last time and sprinkle it with sesame or poppy seeds, if using.
- Bake for 35-40 minutes or until the top turns to golden brown. Remove it from the oven and let it cool on a wire rack for 30-45 minutes before slicing.
- Serve.
Video
Notes
- Challah with raisins: If you’d like to make Challah with raisin, incorporate raisins into the strands as you roll them. Please check out the photos in the blog post for more information. I would start by 1 cup chopped raisins (2-3 tablespoons for each strand) and use more if needed.
- To use granulated sugar instead of honey: Use 5 tablespoons of sugar instead of honey and increase the amount of oil to 1/2 cup. The rest of the ingredients and the process is the same.
- To store leftovers: Place leftover bread in an airtight container. It should be fresh for up to two days.
- To freeze Challah: Bring your braided loaf to room temperature on a wire rack. You can freeze Challah as a whole loaf or slice before freezing. Place in a freezer bag, get the air out as much as possible and store in the freezer for up to a month.
Nutrition
Nutrition information is automatically calculated, so should only be used as an approximation.
Recipe adapted (and scaled down) from Leah Cooks Kosher’s Challah recipe with changes to her recipe.
This recipe was originally published in August 2014. It has been updated with new photos, information and minor changes to the originally published recipe in September 2021.


SO much helpful challah bread making tips and techniques, Ayse! I love how you discuss how much flour to use and why it could be different from time to time. I just want to rip into it, then make French toast with it! A triumph!
Ha ha.. Yes, Challah French Toast recipe is next for sure because (1) we have so many loaves in the freezer and (2) it is literally the best breakfast ever. 🙂
Thanks my friend. So happy to hear that you liked it.
Sending you the warmest hugs.
Cheers!
Wow! What an absolutely thorough instruction for challah!! Your instruction definitely makes this bread recipe seem much less intimidating!! We’ve added this one to our list as we love fresh homemade baked breads!
YAY! That is music to my ears. So happy to hear that you found it helpful.
Thanks for coming by!
Cheers!
Hi . Looks good. I have one question , how many cups of water should be used? It says 13/4 cup . So, i am guessing it’s 1a 3/4 cup of water, right? Thank you so much in advance.
Hi Alex,
Yes, you are right.
It is 1 3/4 cups of lukewarm water. I made the changes in the recipe to correct that typo.
Thanks for pointing it out.
Cheers!
This challah is perfection, Aysegul! And the photos are absolutely stunning. I need to try this sometime soon.
Awww thank you Cynthia. I really appreciate your kind words about my photography.
Cheers!
Ice
I so want to try and make this! Have to do it with a friend though.
Great post! I loved reading about your process.
Thank you Ashley.
Come on over.. Let’s make it together.
First I have to say that this Challah is absolutely gorgeous! I so appreciate a post that shares the process of the recipe – even the failures, I think that really reinforces the concept of your amazing foolproof recipes. : )
Ahhh thank you Crystal.
Yep – it has been an adventure, for sure. 🙂