Why is This Recipe Awesome?
Soft, golden, and subtly sweet, this baked brioche loaf is nearly irresistible. Here are just a few other reasons why this is the best brioche bread recipe out there:
- There’s no need for a stand mixer or an arm workout in this overnight brioche recipe. Just like in my No-Knead Bread and Olive Loaf, time will do the work for you in this no-knead dish! Plus, you can use this exact dough to create delicious Homemade Brioche Buns with just a few small changes to the process.
- This brioche bread recipe yields two loaves, which means you can enjoy a slice right out of the oven and freeze the rest for later. Did I mention brioche freezes really well?
- There are countless brioche bread uses, whether you’re looking for mouthwatering sandwich bread, Thanksgiving stuffing (like my Wild Mushroom Stuffing), or even French toast!
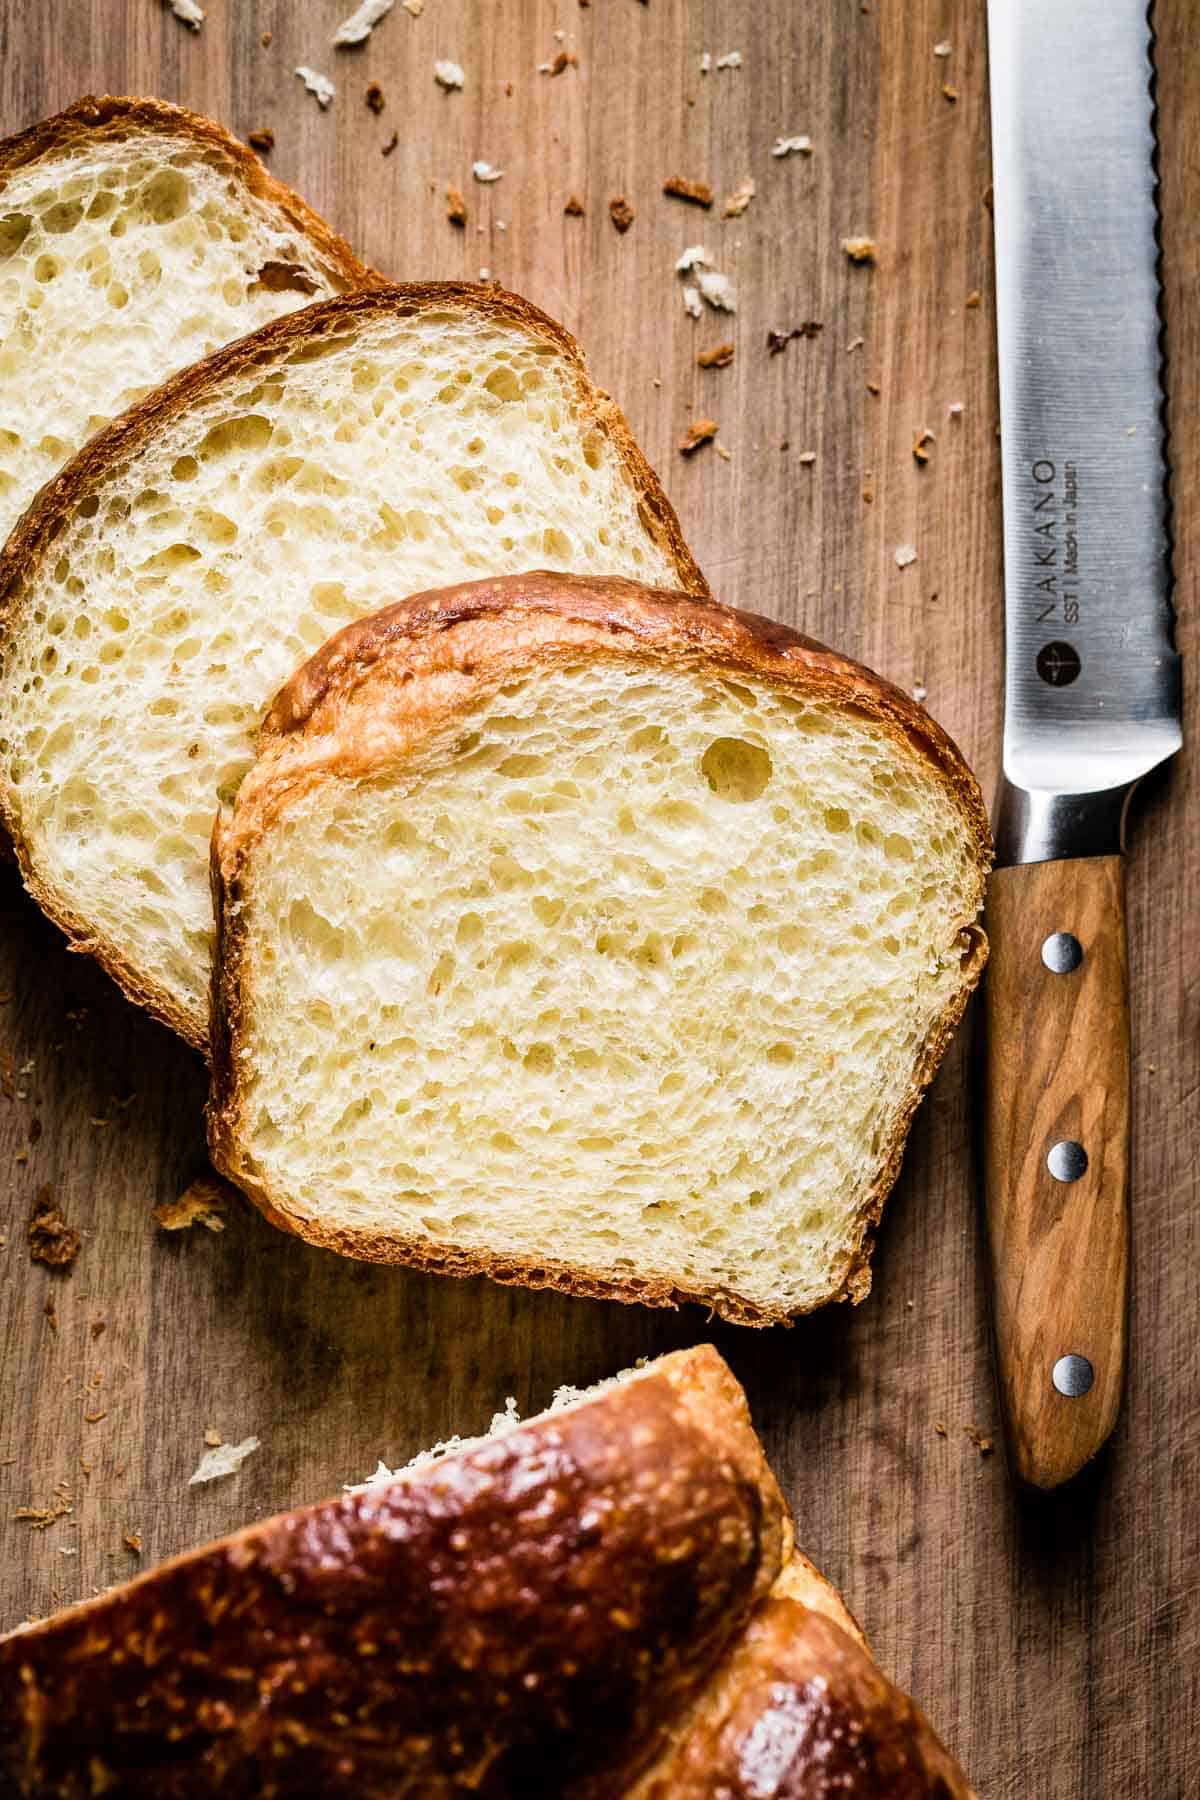
What is Brioche Bread?
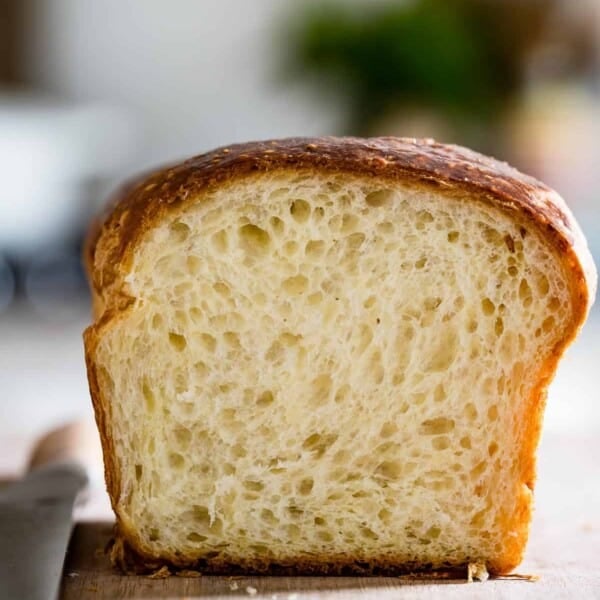
Containing many of the same ingredients as regular bread, brioche is a French bread made with eggs, sugar, and a healthy amount of butter. The traditional brioche recipe is known for its golden-brown coat, fluffy center, and rich taste, and it’s often used in breakfast and dessert dishes.
Perhaps it’s because of this versatility that there are so many names for brioche bread: French brioche, French brioche bread, French butter bread, French sweet bread brioche, and more!
Ingredients
Brioche bread ingredients are simple, inexpensive, and pantry-ready. All you need is bread flour, instant yeast, kosher salt, large eggs, water, sugar, and unsalted butter.
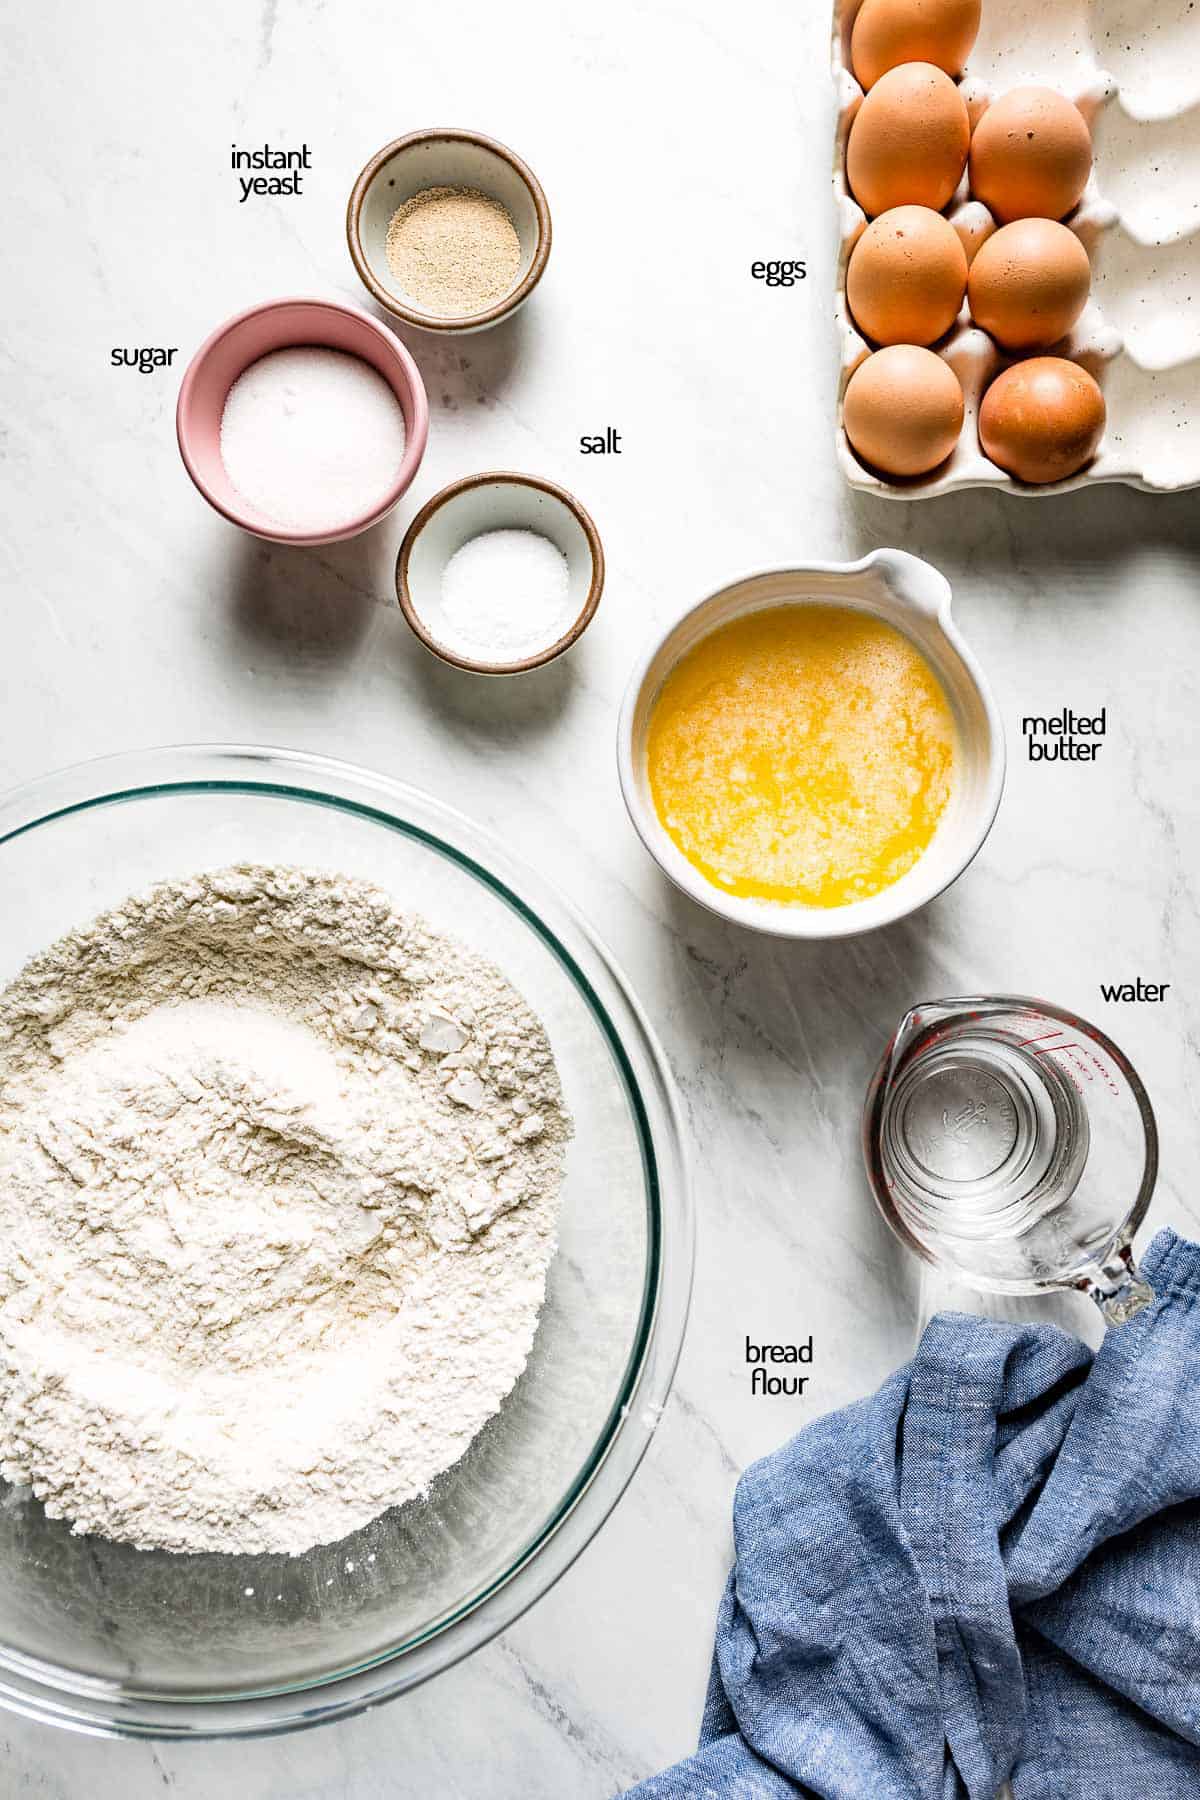
Helpful Ingredient Notes:
- Flour: I find that the best flour for brioche is bread flour. If you are living in the US, I highly recommend buying the King Arthur Flour brand. Because bread flour has more protein than all-purpose flour, it produces better-quality gluten, which helps bread rise.
- Butter: If possible, use European-style unsalted butter, such as butter from Vermont Creamery. Its higher fat content will give your brioche more richness, body, and flavor.
- Eggs: Make sure your eggs are at room temperature when adding them to your dough mixture.
- Rapid Rise Yeast: This recipe uses rapid rise yeast that is also known as instant yeast. When shopping for yeast, be sure to not pick active dry yeast instead. They are different from each other and will yield different results, especially when it comes to rising times.
How to Make Brioche by Hand?
Making brioche bread doesn’t have to be a struggle. Put the ease back into your oven with my foolproof instructions for making the perfect brioche.
Prep the Dough

- Combine the dry ingredients: In a large bowl, whisk together bread flour, instant yeast, and salt until they are thoroughly blended.
- Whisk the eggs: In a separate bowl, whisk together 6 eggs, water, and sugar. While whisking, add the melted, unsalted butter into the egg mixture. Continue whisking until the wet ingredients are fully combined.
- Combine the wet and dry ingredients: Pour the wet ingredients into the bowl of dry ingredients. Using a wooden spoon, stir the ingredients together until all the dry flour is integrated into a uniform mass (about 1 minute).
- Let the dough rest: Cover bowl with plastic wrap and leave it for 10 minutes.
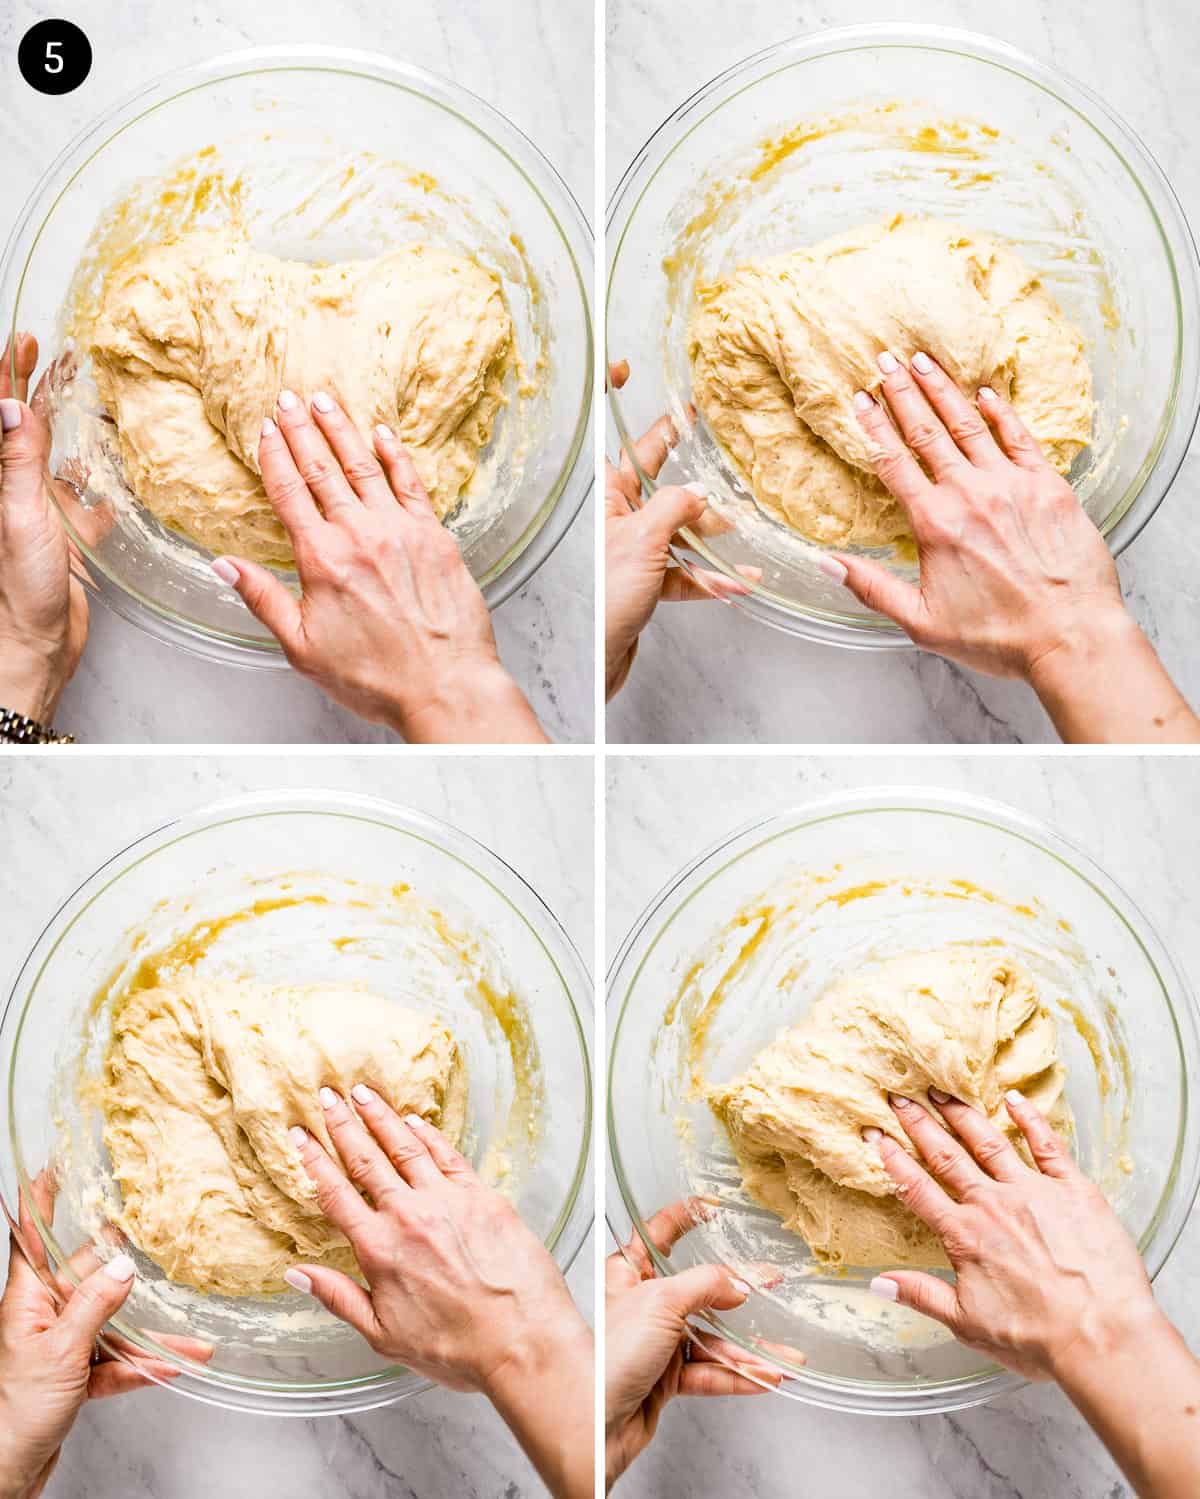
- Fold the dough: Grip one edge of the dough with your fingertips. Then, fold it over itself, toward the center of the dough. Turn the bowl 45 degrees and repeat the same folding motion. Continue rotating the bowl 45 degrees and folding the dough to its center until you have completed one full circle (there should be 8 folds in total). Wait 30 minutes. Then, repeat this folding process 3 more times, being sure to wait 30 minutes between each repetition.
Overnight Rest
- Let the dough rest: Once you complete the fourth round of folding, tightly cover the dough with plastic wrap and place it in the fridge. Let the dough sit for 16-48 hours.
Shaping the Brioche Loaf
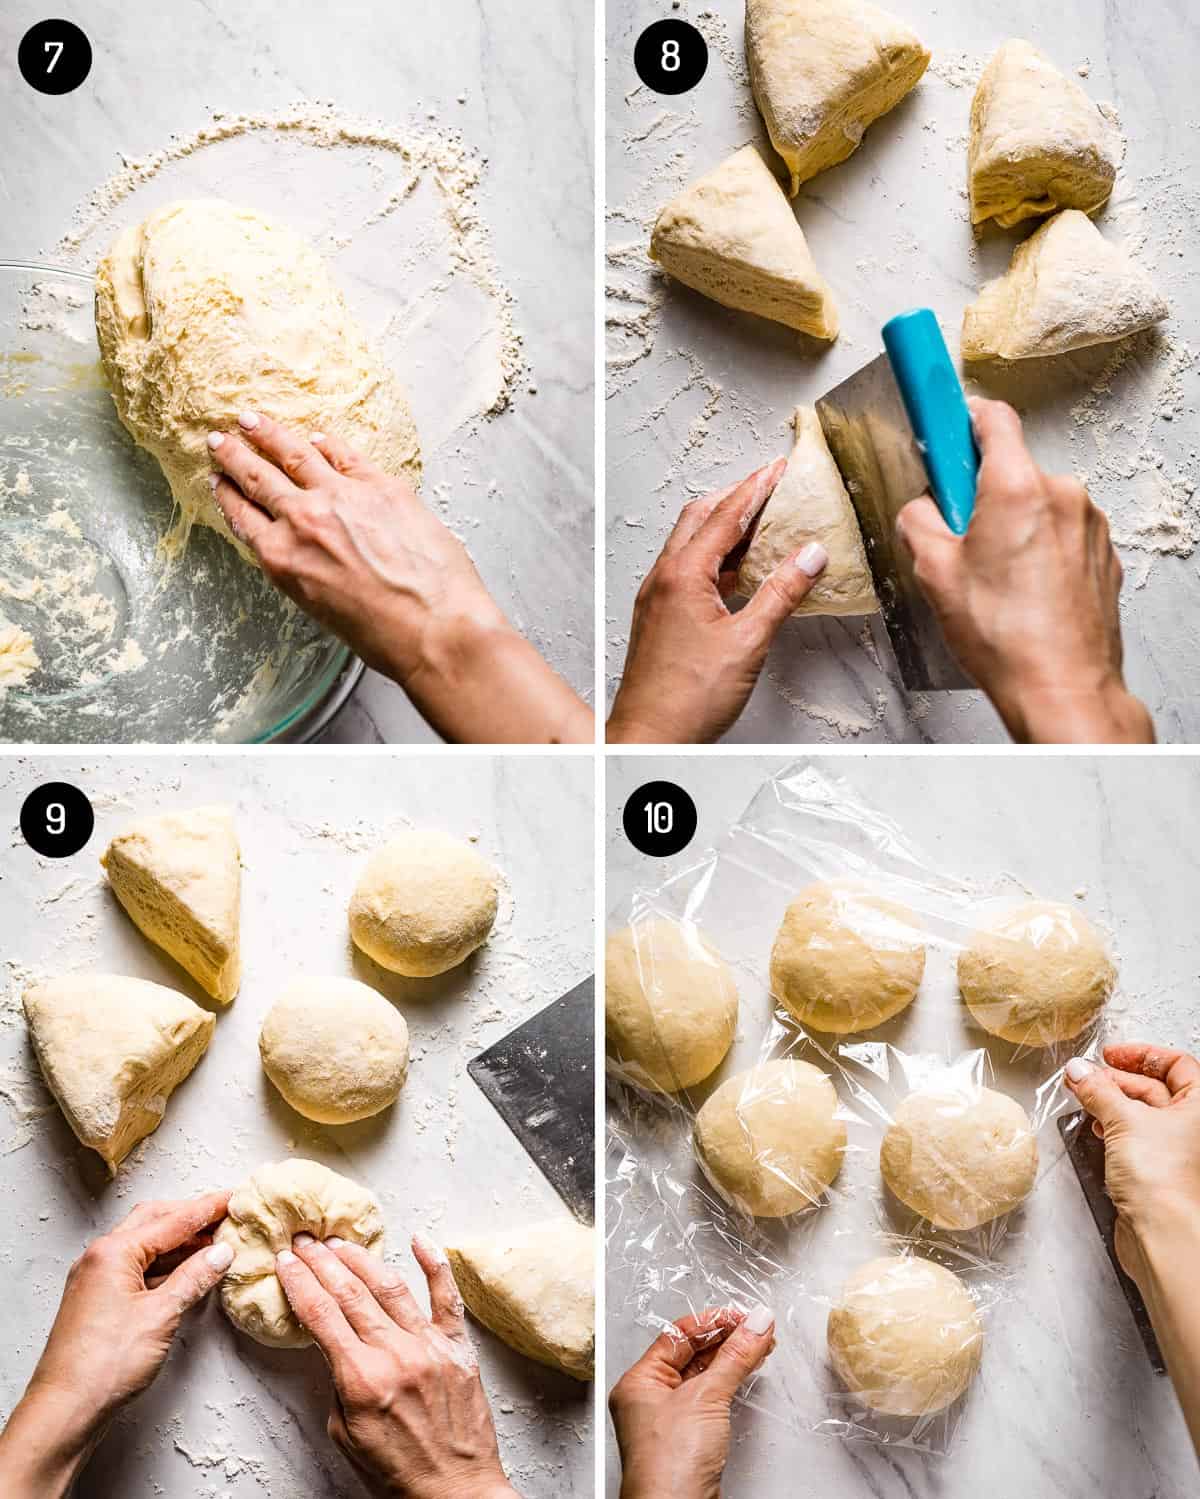
- Transfer the dough: Next day, remove the dough from the fridge and place it on a lightly floured work surface.
- Cut the dough: Divide dough into 6 equal pieces.
- Roll 6 balls: Take one piece of dough and fold its edges toward its center until it forms a round disk. Then, flip the disk over—folded side facing down—and roll your palm over its surface until the piece becomes a smooth ball. Sprinkle additional flour over the dough if it begins sticking to your hands. Repeat this shaping process for the remaining 5 pieces.
- Let the balls rest: Cover the six dough balls with plastic wrap, and let them rest for 5-10 minutes.
Bake & Cool
- Prepare the pans: Use melted butter to grease two loaf pans.
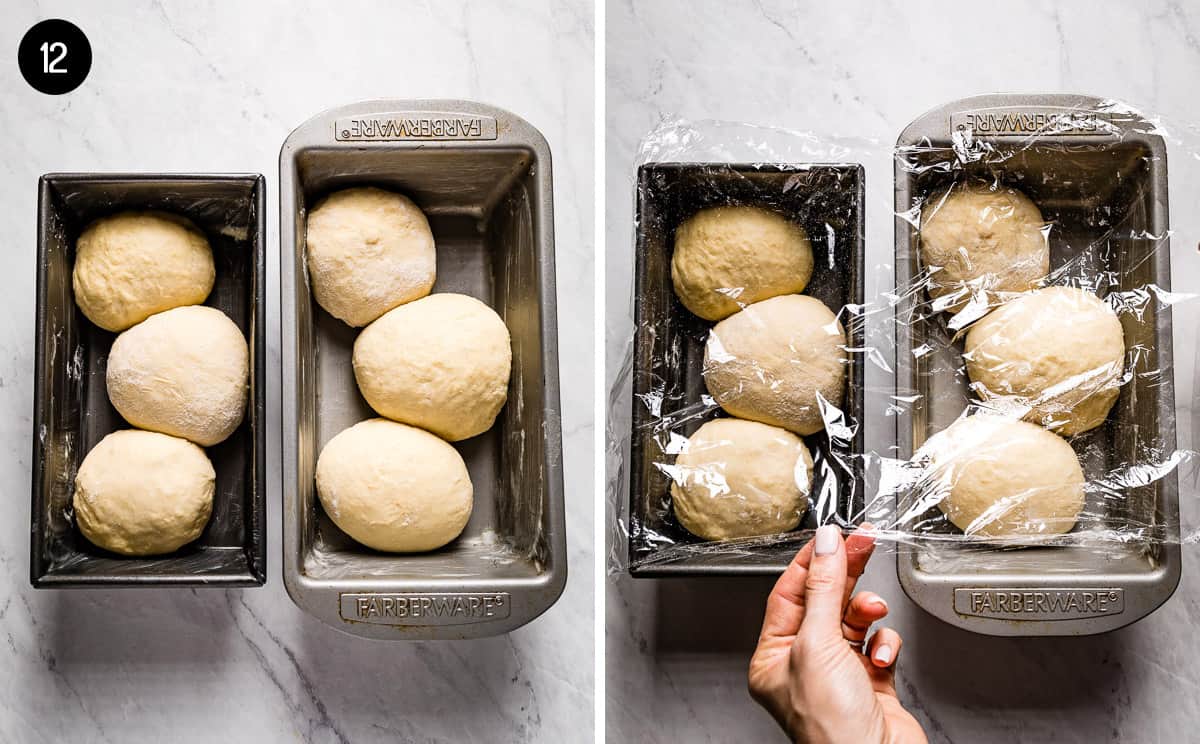
- Let the dough rise: Place three dough balls in each brioche bread pan, cover loosely, and let rise for 2 hours in a warm place in your house. Towards the end, you will see that they would double in size.
- Prepare the oven: 30 minutes before baking, adjust the oven rack to the middle position. Then, take a baking sheet, turn it upside down, and place it on top of the oven rack. Preheat the oven to 350 degrees F.
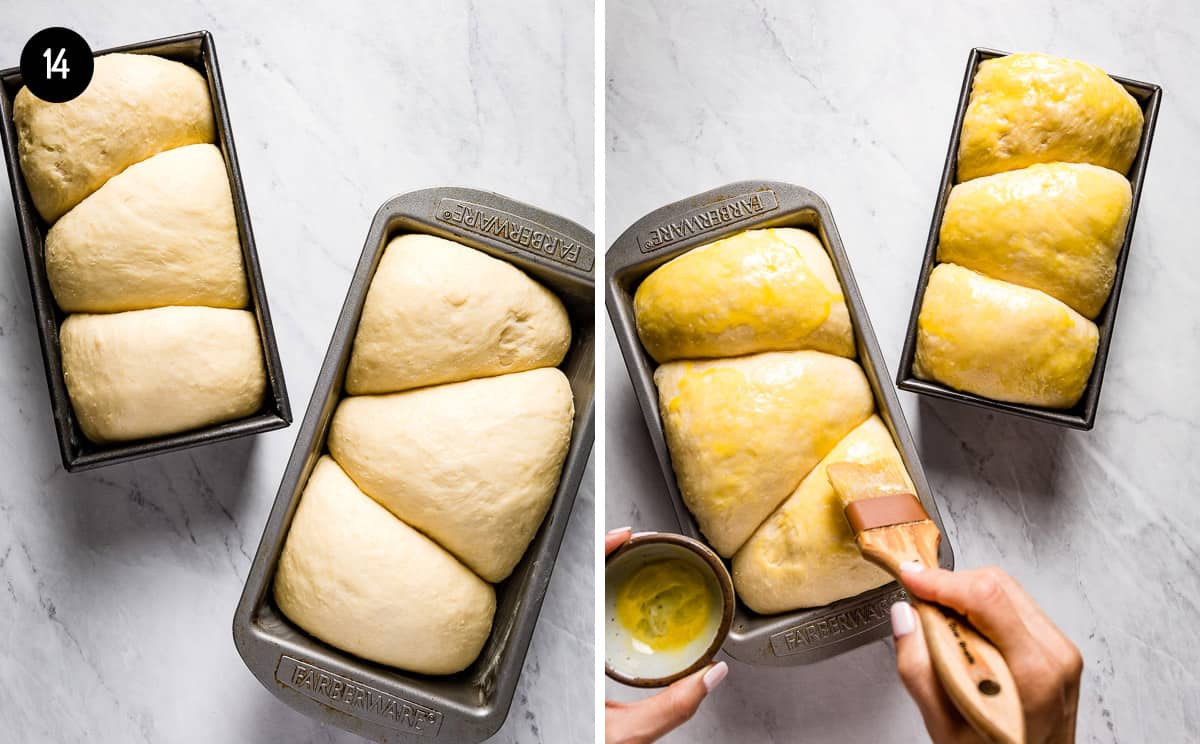
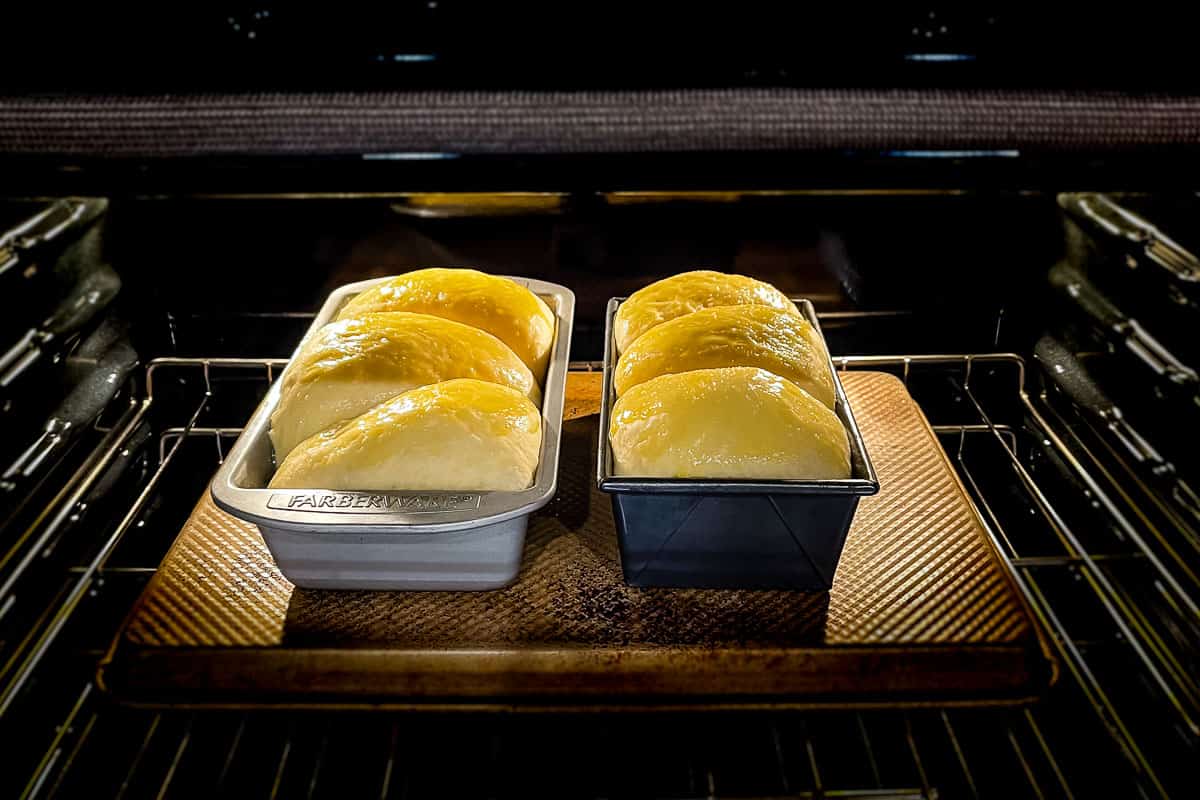
- Brush and bake the dough: Remove the plastic wrap from the loaf pans and brush both loaves with an egg wash. Then, set both pans atop the overturned baking sheet and bake them for 35-45 minutes, rotating each loaf pan halfway through. The loaves are done when they turn golden brown and the internal temperature reaches 190 degrees F.
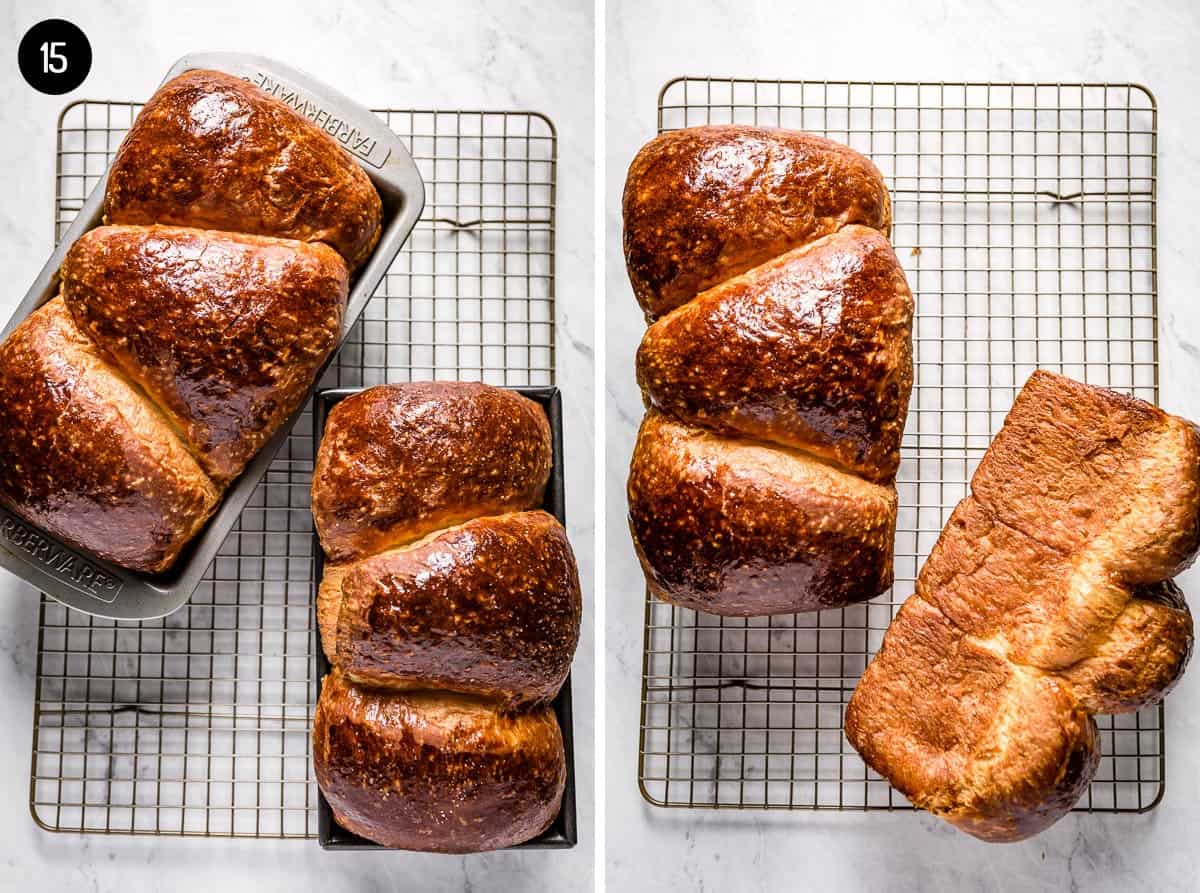
- Let the brioche cool: Remove both pans from the oven and let them rest for 5 minutes. Then, remove the brioche from each pan and let them finish cooling on a wire rack. Make sure each loaf is completely cool before slicing.
Equipment Notes
If you want to learn how to cook brioche, you’re going to need the right tools! These simple equipment tips will make sure every loaf comes out flawlessly.
- Baking stones and baking sheets can be used interchangeably in this recipe. Just make sure you use one or the other to bake your loaves evenly.
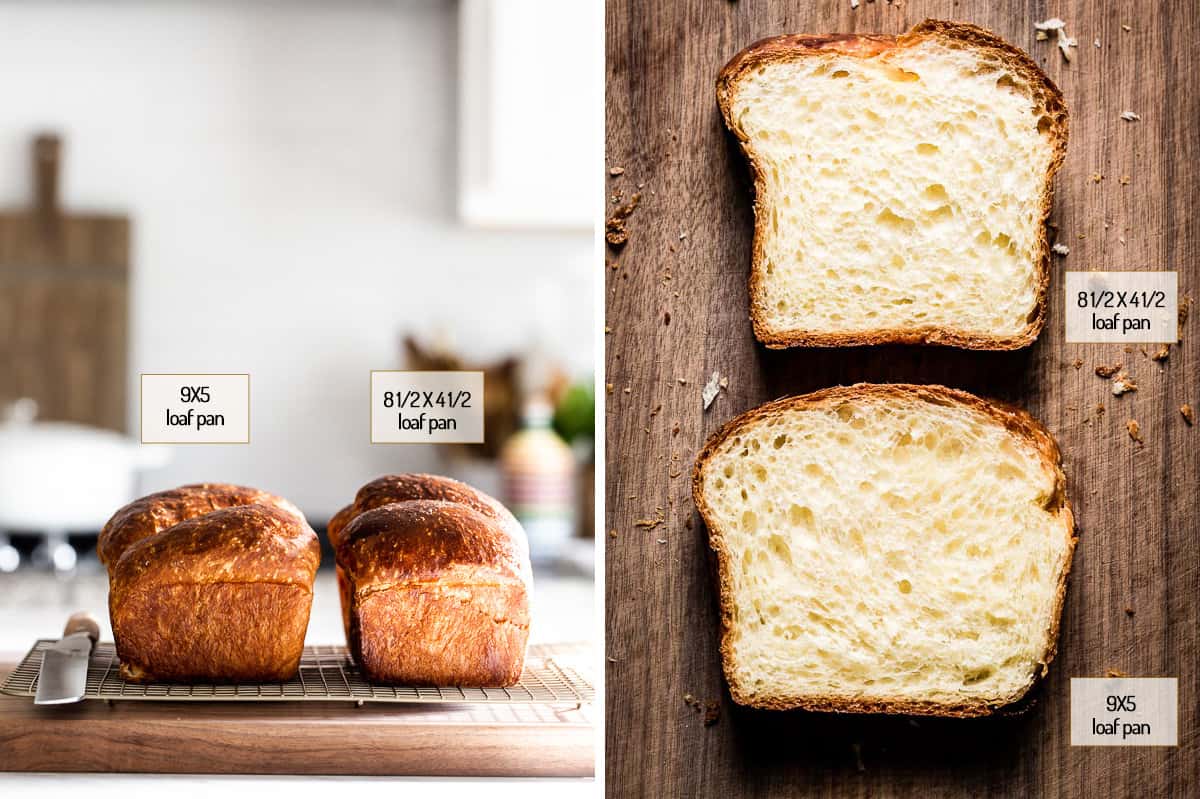
- Both 9’’ X 5’’ and 8½’’ X 4½’’ loaf pans will work for this recipe. Not only is there no difference in baking time, but they also result in similarly-sized brioche slices.
- Using a wire rack will cut your cooling time in half and ensure that every inch of your enriched dough cools evenly.
How to Store, Freeze, and Thaw
The best part about homemade brioche bread? How long it lasts! Whether you eat a warm loaf straight from the oven or save it for later, your taste buds will adore this buttery treat.
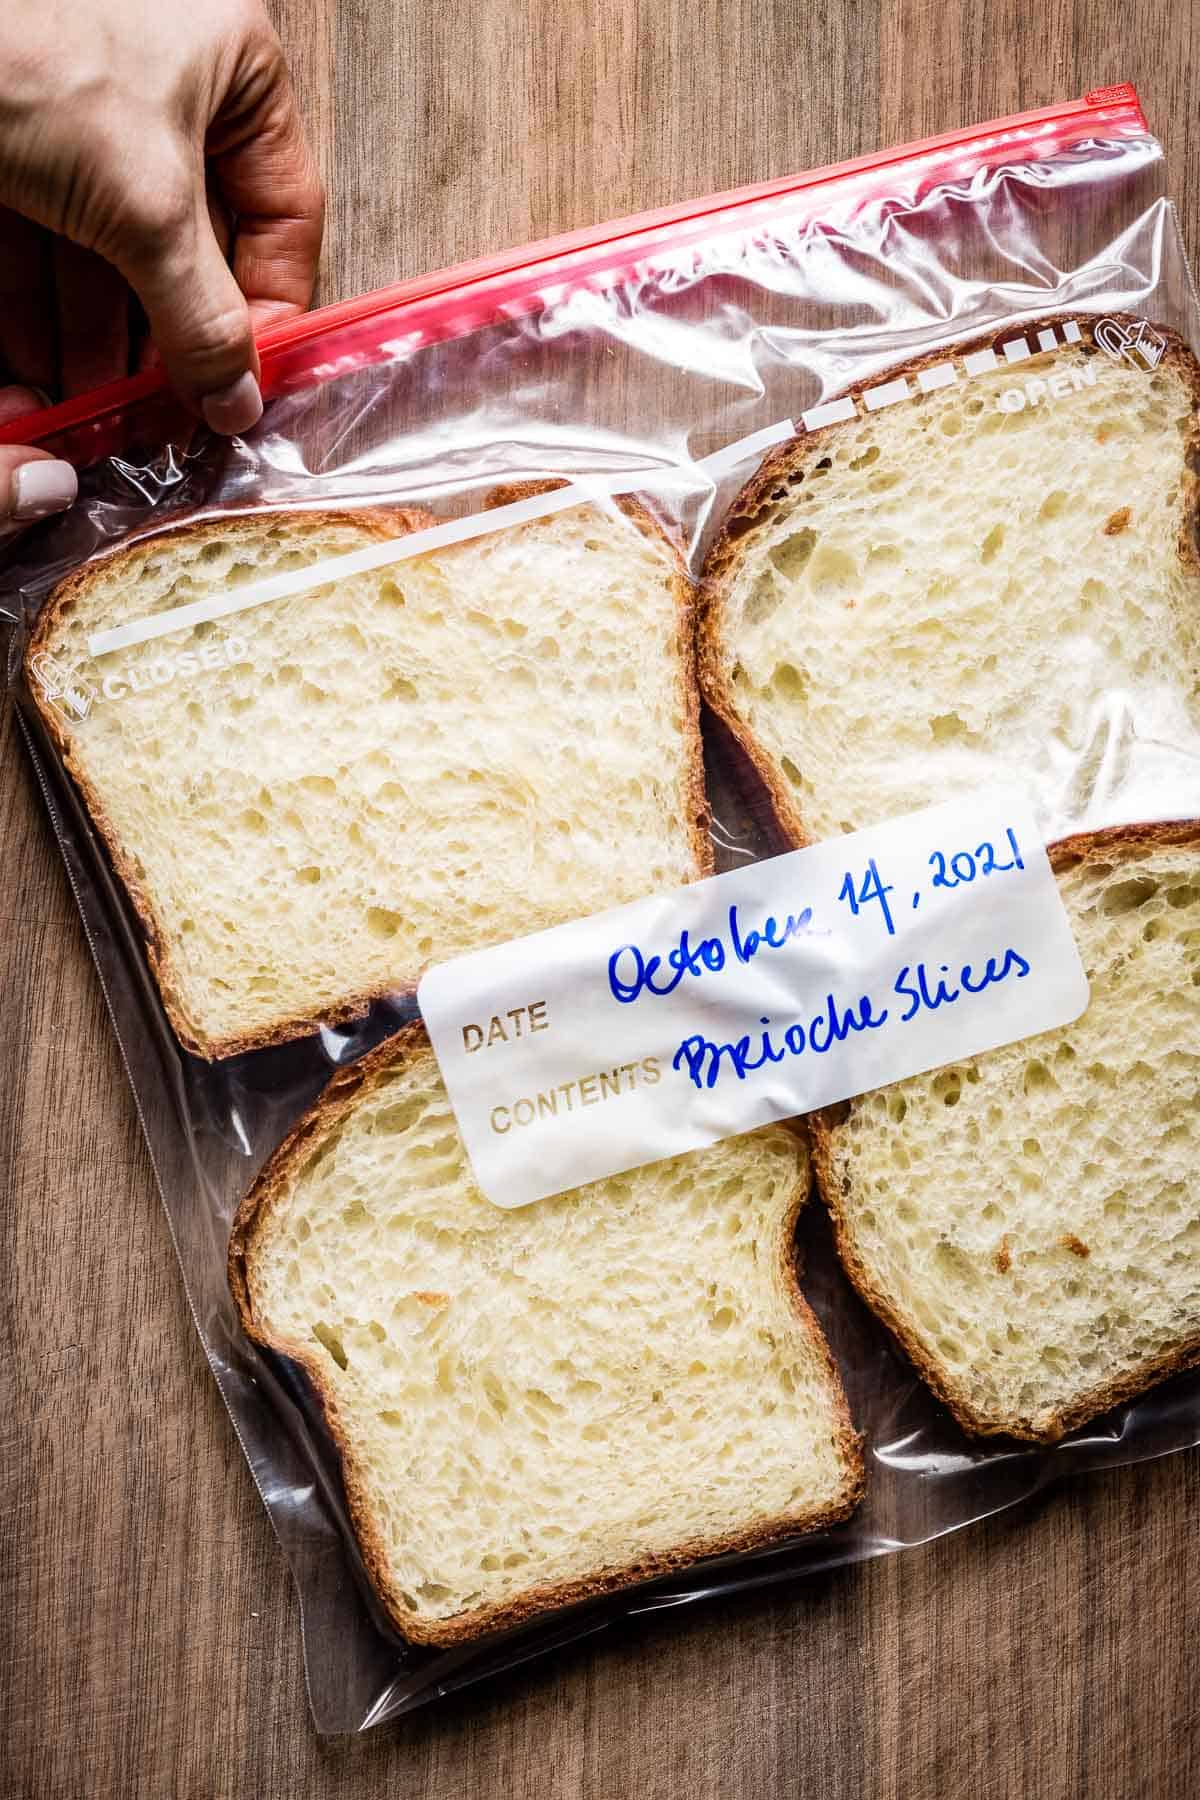
- Storage: To store this homemade brioche, wait until the loaves are fully cool. Then, cut the bread into thick slices and seal the slices in airtight Ziploc bags. Once placed in the fridge, these slices will stay fresh for up to a week.
- Freezing: Similar to most other bread recipes, brioche freezes exceptionally well. Just let the bread cool, slice it, and place the slices into airtight Ziploc bags 1-2 layers thick. The bread can then stay in the freezer for up to 3 months.
- To Thaw: You don’t need to thaw brioche bread once you take it out of the freezer. Just pop each slice into the toaster until it reaches the desired level of warmth.
PRO TIP: Take the guesswork out of food storage by writing the date of storage on each Ziploc bag. This is the best way to keep tabs on how long the bread has been in the fridge.
What to Make With Brioche Bread
If you’ve ever wondered, “What can I make with brioche bread?” then these recipe ideas are just what you need! Whether you’re indulging your sweet tooth or serving up dinner, you’ll find the perfect French brioche recipe right here:
- Brioche Waffles: Instead of spending hours in the kitchen mixing waffle batter, skip the hassle by using brioche bread instead. This morning fix is as easy as it is scrumptious.
- Mushroom Stuffing: No one should settle for bland stuffing. Bring your Thanksgiving to life with this buttery, lush, and savory brioche stuffing. Did I mention it’s vegetarian?
- Brioche French Toast: Sweet brioche dough, fresh-picked berries, and thick caramel sauce make for a breakfast impossible to resist. Who can say no to this buttery morning treat?
- Bread Pudding: Nothing pairs better than the soft bread of homemade brioche, warm cinnamon, and thick cream. You’ll be asking for seconds of this gooey pumpkin dessert.
Expert Tips:
Want to bake bread like a pro without spending hours in the kitchen? This homemade brioche recipe will be a piece of cake once you learn these no-fuss baking tips.
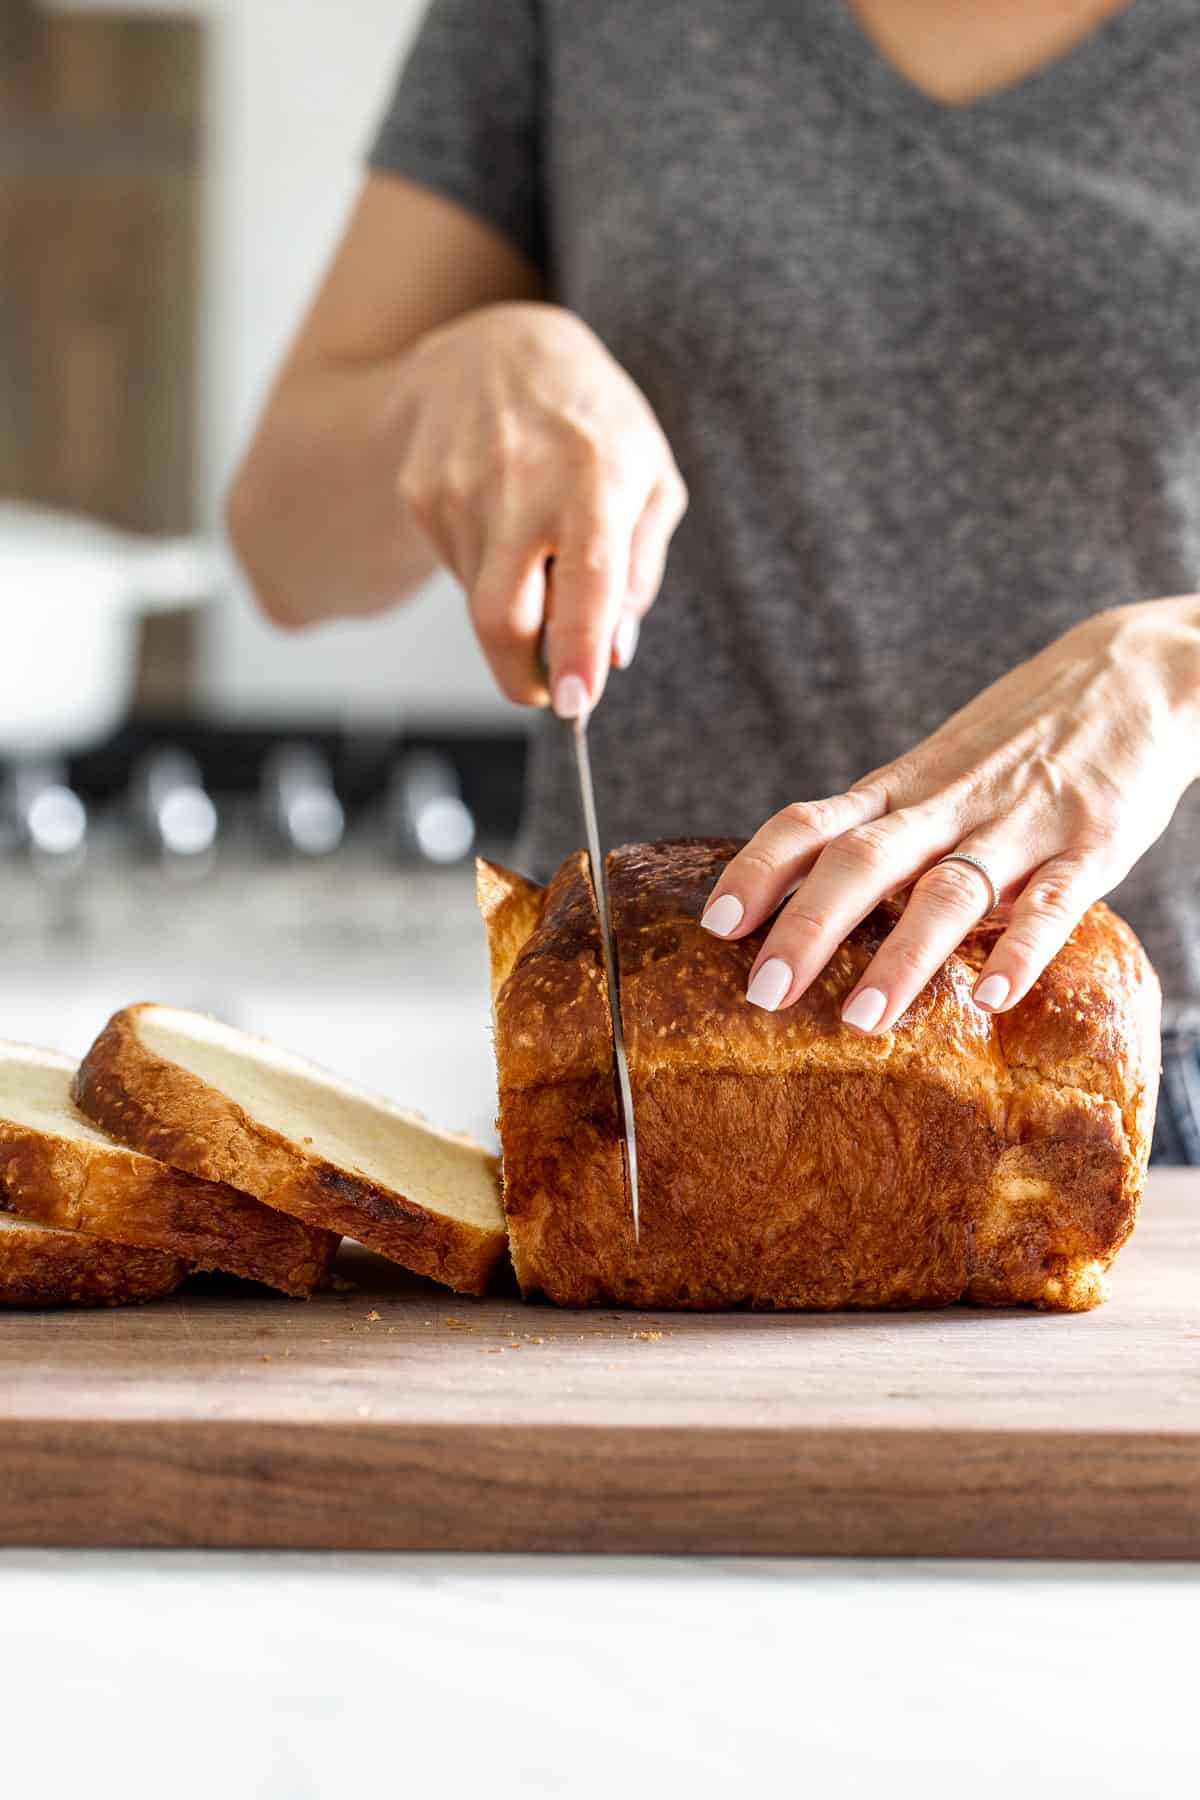
- Let your brioche fully cool before slicing it. This will ensure that your loaf maintains its shape and won’t lose any fluffiness during the cutting process.
- This brioche dough recipe is one of the most forgiving recipes in a baker’s arsenal. Simply follow my directions, and your five-star loaves are guaranteed to please!
- The egg wash in this recipe is optional, but it will help give your brioche its signature flakiness and golden-brown color.
- I recommend slicing your brioche thicker than you would other breads. Because the dough is so soft and puffy, thick slices ensure each portion is as satisfying as possible.
- When cutting your brioche dough into 6 equal portions, you can use a kitchen scale to weigh each piece to make sure they’re of equal size.
FAQs:
There’s no secret to learning how to make brioche dough by hand…but asking a few questions never hurts! Know all you need about this quick brioche recipe with a few fun facts.
The ideal brioche baking temperature is 350 degrees F.
Brioche bread can take many forms, from whole loaves to small brioche buns. However, the bread usually has a lustrous, golden-brown exterior and a light, spongy center.
The key difference between brioche and white bread is that brioche is enriched, meaning it contains eggs and butter. The high egg and butter content in brioche bread give it a sumptuous flavor and airy texture.
Brioche bread will last up to one week when stored in an airtight container in the fridge and up to 3 months in the freezer.
Yes! Toasting sliced brioche bread is one of the most delicious and simple ways to serve this effortless loaf.
Yes, frozen brioche bread can last up to 3 months when sealed in an airtight container. I also recommend slicing the bread before freezing it to make defrosting it even easier.
This French brioche bread recipe uses only 1/3 cup of sugar for 3 1/4 cups of bread flour so the level of sweetness is very minimal.
Other bread recipes you might like:
[/su_note]This French Brioche recipe is adapted from The Cook’s Illustrated’s No-Knead Brioche recipe with minor changes to their original recipe.
Brioche Loaf Recipe
Ingredients
- 16 tablespoons unsalted butter, (8 oz) – plus more to grease loaf pans
- 3 ¼ cups bread flour, (17 ¾ oz)
- 2 ¼ teaspoons instant yeast, aka rapid rise yeast – (One 1/4 oz. packets)
- 1 ½ teaspoons kosher salt*
- 6 large eggs, Plus one more egg to brush before baking
- ½ cup water, room temperature
- ⅓ cup sugar, (2 ⅓ oz.)
Instructions
- Place unsalted butter in a small sauce pan over medium heat. Cook until fully melted. Set it aside and let it cool to room temperature.
- Whisk together bread flour, instant yeast, and salt in a large bowl. Set aside.
- In a separate bowl, whisk together 6 eggs, water, and sugar. Pour in the unsalted butter and whisk until fully combined.
- Add the wet ingredients into the dry ones and stir with a wooden spoon until no dry flour remains and a uniform mass forms. This should take about 1 minute.
- Cover the bowl with plastic wrap and let it rest for 10 minutes.
- Holding the edge of dough with your fingertips, fold it over onto itself halfway towards the middle. Turn the bowl 45 degrees and repeat the same process. Do this 6 more times. It should be 8 times in total. Cover with plastic wrap and let it sit for 30 minutes.
- Repeat folding and rising every 30 minutes three more times. After the fourth set of folds, cover it tightly with plastic wrap and place it in the fridge for 16-48 hours.
- Transfer the dough onto a lightly floured surface.
- Divide the dough into 6 equal pieces.
- Working with one piece at a time, pat dough into a 4-inch disk. Holding the edge of the dough, fold edges of the dough onto itself halfway towards the center. Repeat folding until it forms a ball. Flip it over and move your hands in small circular motions to form it into a smooth round ball. Feel free to sprinkle it with a bit of flour if it sticks to your hands. Repeat the same process with the rest of the balls.
- Cover with plastic wrap and let it rest for 5-10 minutes.
- Grease two loaf pans with melted butter.
- Place three brioche balls in each loaf pan. Cover loosely with plastic wrap and let it rise for 2 hours.
- Thirty minutes before baking, adjust the oven rack to the middle position. Turn a baking sheet upside down and place it on the oven rack in the middle position. Preheat it to 350 degrees.
- Remove plastic wrap and brush the now-risen dough with an egg. Set them on the baking sheet and bake until golden brown, rotating pans halfway through baking, 30-35 minutes or until the internal temperature reaches 190 degrees F.
- Take them out of the oven and let them rest for 10 minutes on a wire rack. Being careful not to burn your hands, carefully loosen the edges with a knife. Remove them from the pan, and let them cool to room temperature on a wire rack before slicing.
Video
Notes
- I used Diamond Kosher Salt. If you use Morton Kosher Salt please use half the amount of salt listed.
- If you watch the video, you will see that I used two packets of instant yeast. A reader, who made the recipe, pointed out that it works well with only one. I tried it with one packet and she was right so I changed the recipe. Please be advised that this recipe works both with one packet (1/4 oz. per packet) or two packets of instant yeast (aka rapid-rise yeast).
- Brioche Buns:
- Homemade Brioche Buns: You can use this brioche dough to make rolls that you can use as burger buns, sandwich bread, or dinner rolls. If that is what you prefer, be sure to check out my recipe for Brioche Buns.
- Storage: To store this homemade brioche, wait until the loaves are fully cool. Then, cut the bread into thick slices and seal the slices in airtight Ziploc bags. Once placed in the fridge, these slices will stay fresh for up to a week.
- Freezing: Similar to most other bread recipes, brioche freezes exceptionally well. Just let the bread cool, slice it, and place the slices into airtight Ziploc bags 1-2 layers thick. The bread can then stay in the freezer for up to 3 months.
- To Thaw: You don’t need to thaw brioche bread once you take it out of the freezer. Just pop each slice into the toaster until it reaches the desired level of warmth.
- Both 9’’ X 5’’ and 8½’’ X 4½’’ loaf pans will work for this recipe. Not only is there no difference in baking time, but they also result in similarly-sized brioche slices.
Nutrition
Nutrition information is automatically calculated, so should only be used as an approximation.





Well after telling you that may wife thought that something was “missing” from your Brioche Bread recipe, I shared a loaf with my neighbor, who made French toast with it. She just emailed me and asked for the recipe as her husband was raving over the French toast…all good, thank you!
YAY! I am so happy to hear that. Thanks for coming back and leaving a follow up review.
I just finished making this recipe and you’re right…our house DID smell like a French bakery! The loaves are absolutely beautiful and sliced perfectly. My wife loved the whole process and loved the look of the finished bread but…she said that while the bread tasted good, she said it lacked something. She couldn’t describe that “something” to me so tomorrow I’ll share some of my bounty with my neighbors to get their opinions. Thanks and keep these wonderful recipes coming!
Frank
I look forward to hearing what your neighbor says. Thanks for coming by and taking the time to leave a review. Cheers!
Sevgili Ayşegül, I made this recipe several times and the result is always perfect! I am so glad to have found this recipe as most of them were calling for stand mixer. I sometimes make burger brioche buns instead of baking them in loaf pans. Thank you so much!
YAY! This makes me so happy to hear Sule. I am too lazy to bring out my standing mixer to make bread so this works for me too 🙂
I just pulled two loaves of this bread out of the oven and I couldn’t be more pleased with the results. Plus, my house smells like a French bakery. The loaves rose beautifully with a nice brown crust. Can’t wait until they cool so I can cut into one. I’ll be making more of these in the future. Thanks for a great recipe!
This is music to my ears Reed. Thanks for coming by and taking the time to leave a review.
Your bread looks wonderful and I cannot wait to try your recipe.
My question is, why do you make “balls” or different shapes, when placing the dough into
The bread pans readying to go into the oven? I would like to use the traditional
Way to place the dough in the bread pans. Is there a reason that this way is not shown?
I will wait for your answer before going ahead. Thank you.
Hello Dana,
Good question.
I divide it into small balls for 2 reasons:
1. Because I believe it is the traditional way of baking brioche. That kind of glorious shape…
2. It helps with rising evenly.
However, this doesn’t mean that you cannot make it in one piece (meaning 2 separate 1-piece loaves).
Now, I’ll be honest, I have not tested this recipe in that format so I can’t guarantee that it will look like the one in the pictures. But I think it is worth a try.
I hope this helps. Please let me know how it turns out and/or if I can answer any other questions.
Best of luck.
Aysegul
I love French Brioche so much but haven’t been able to find a good recipe until I found this one. WOW! It was not only so easy to make, but your instructions and photos were so helpful.
I didn’t make any changes to the recipe, so I have nothing else to add but just to say it is delicious. It is a keeper.
Hi Rachel,
This is music to my ears. So happy to hear that you liked this recipe.
Thanks for coming by and leaving a review.
Cheers!
Aysegul
Hey, I’ve been looking for a Brioche recipe that can be made in the food processor as I don’t have a stand mixer. Thank God I found your recipe!
I just have one question, should I use the regular steel blade for mixing the dough or the plastic one? I’ve read in many places that the plastic blade is usually used for making doughs in a food processor.
Thanks!
Hello,
That’s a good question. You are right. Most dough recipes are made with the plastic blade, but in this recipe the steel blade is ideal.
I published this recipe many years ago but make it often in my own kitchen. I hope you like it as much as we do.
Best,
Ice