In November 2006, the food writer Mark Bittman published a bread recipe in the New York Times that shook the world of bread bakers. The recipe, originally created by Jim Lahey of the Sullivan Street Bakery in Manhattan, was a no-knead bread that promised what many thought to be impossible: A crusty bread that is made with only 4 ingredients (flour, yeast, salt, and water) baked in a dutch oven (heavy bottom cast iron skillet with a lid) without the need for kneading.
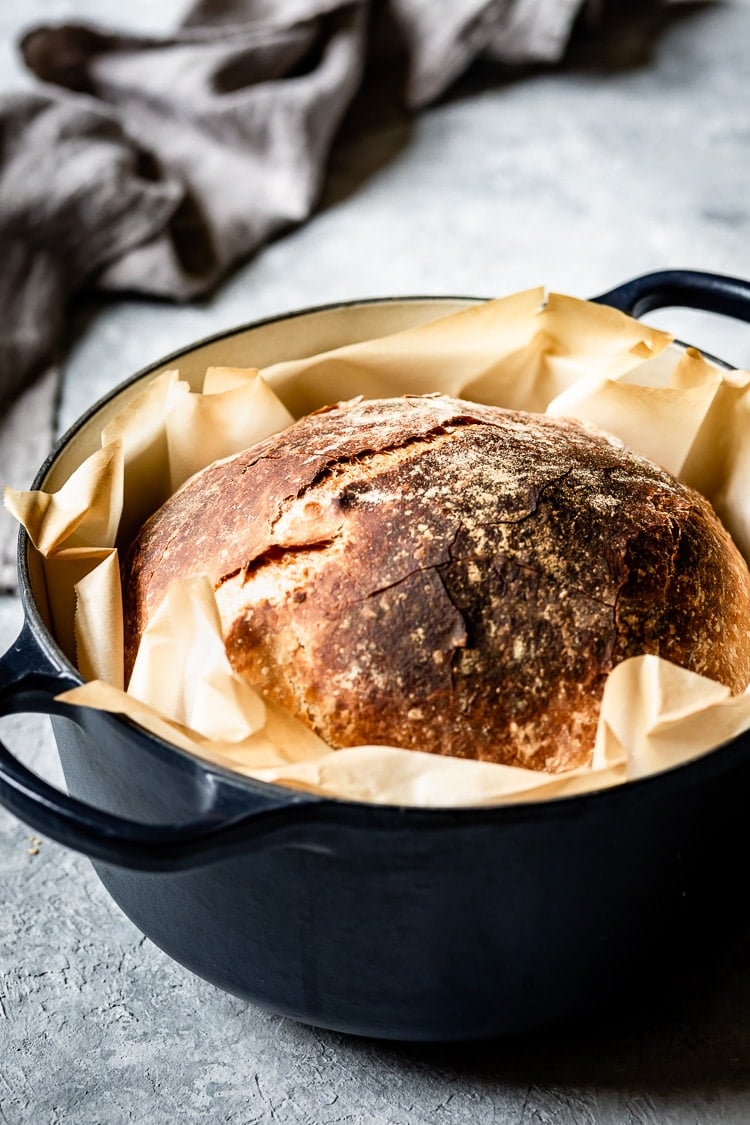
Table of Contents
- How To Make Artisan Bread
- Step By Step Instructions
- The Best Size of Dutch Oven for this No Knead Crusty Bread
- Can I bake this in a smaller countertop oven instead of a large wall oven?
- Best Temperature to Bake Bread
- How Long To Bake Bread
- A Few Last Minute Notes on The Best Artisan Bread
- If you liked this homemade rustic bread recipe, you might also like
- Great recipes to serve with this bread
- No Knead Artisan Bread
It wasn’t long after it was published that this homemade artisan bread recipe gained a cult following and raving fans. According to the New York Times, even to this day, Jim Lahey’s No Knead Bread remains as one of the most popular recipes of their website.
As the foodie that I am, I had heard about this no knead artisan bread recipe and the magic of baking bread in dutch oven, but never attempted baking it, mainly because I live in Vermont and I am spoiled with an amazing bakery right around the corner from where I live. Also, I am a little bit of intimidated when it comes to making bread.
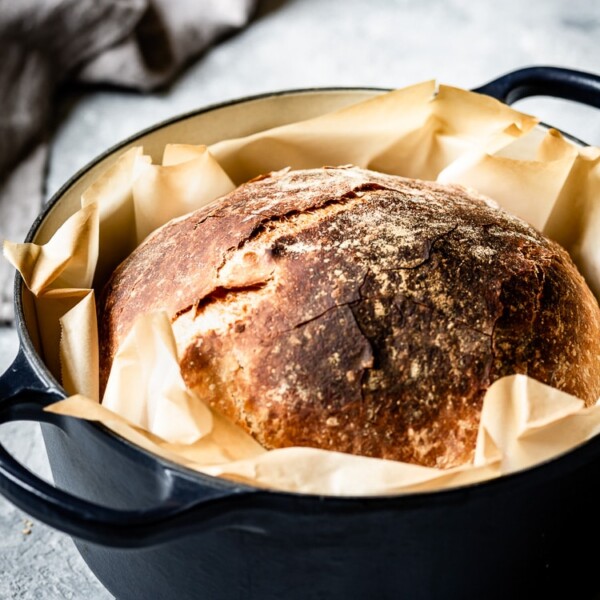
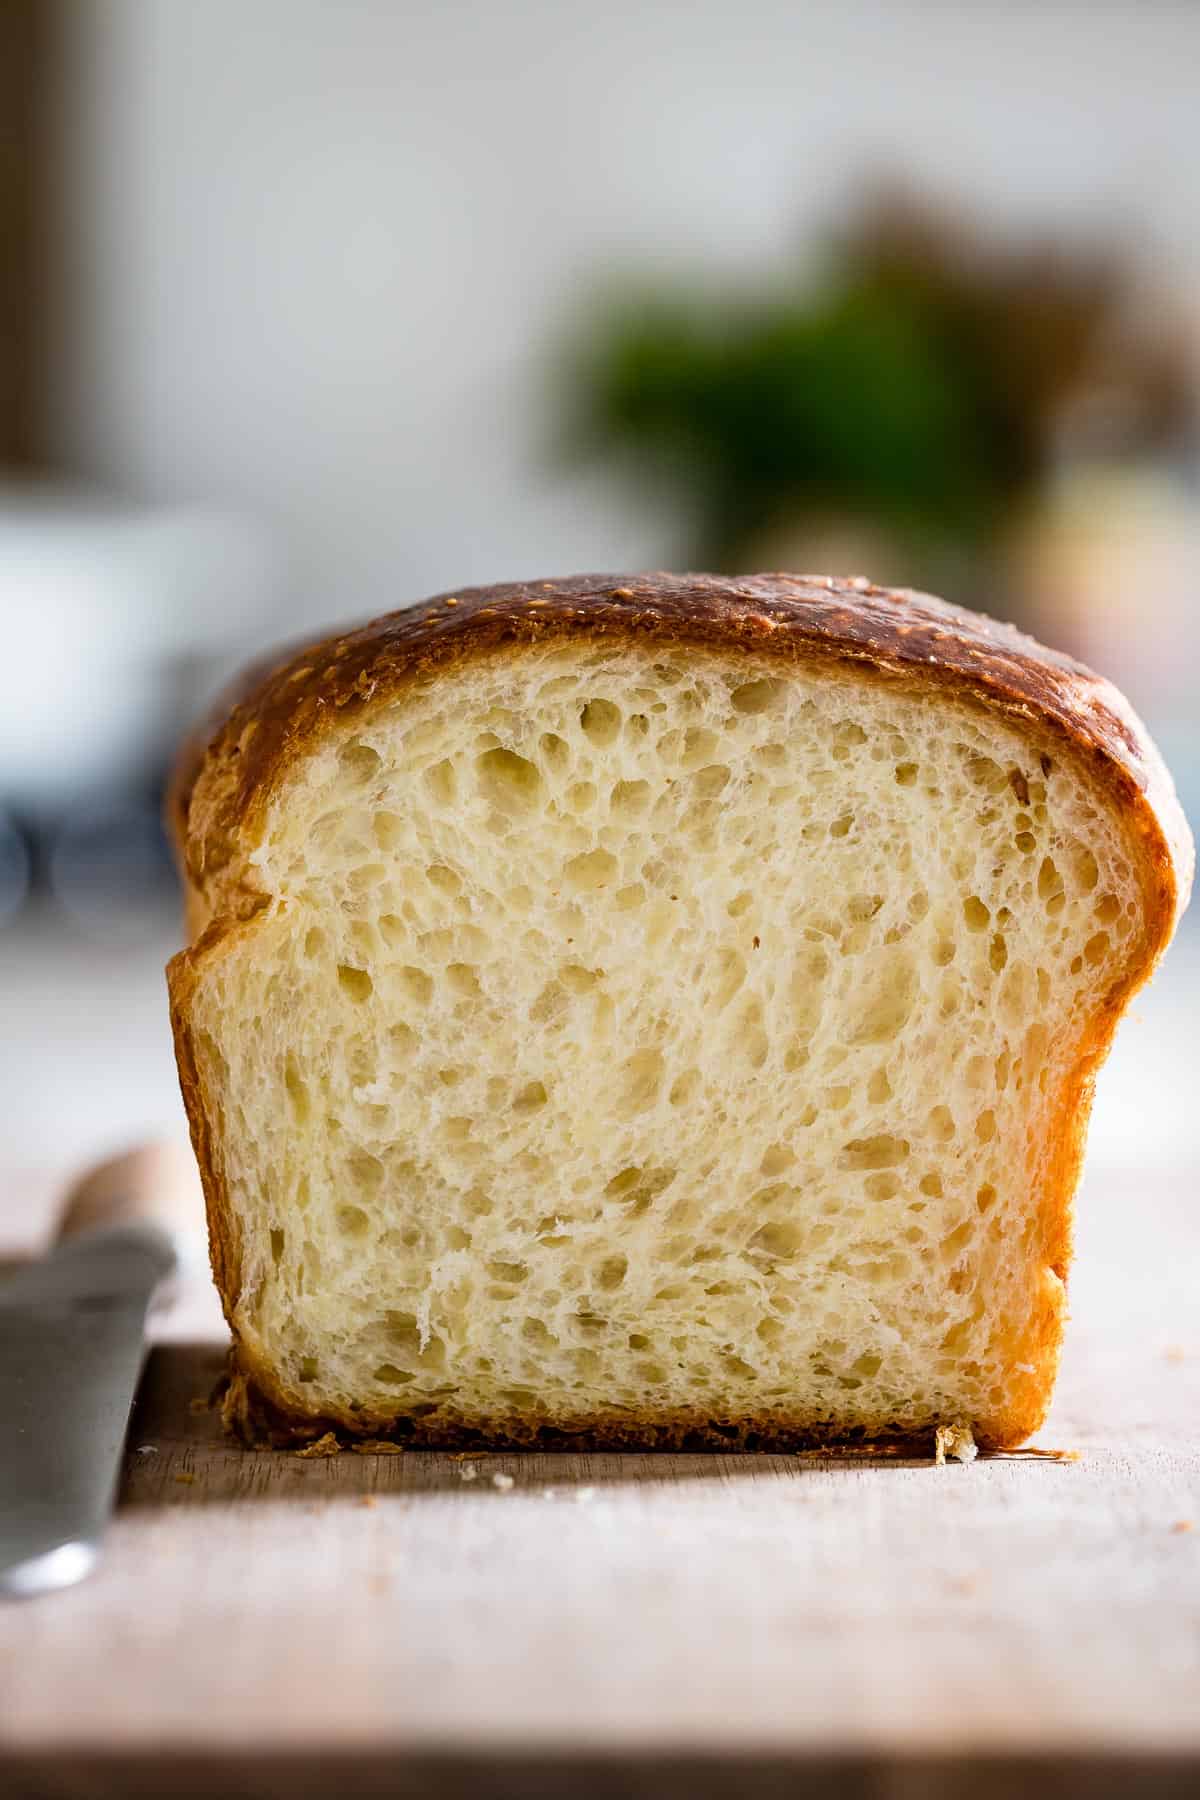
However, when I saw an adapted version of it in Staub’s newly published cookbook, The Staub Cookbook (affiliate link), with an out-of-this-world photograph (similar to the very first photo on this post), I had to give it a try and see whether or not what everyone has been raving about was true.
It did not disappoint.
On my very first try, following the Staub’s recipe word by word, I was able to get the a bread that looks exactly like what you see in these photos. And here I would like to mention; I don’t consider myself as a bread baker or a person who enjoys the long process of creating crusty artisan bread that you see in foodie magazines.
But this recipe was different. For one thing, as the name suggests, there was almost no kneading needed. Second, the hands on time was no more than 15-20 minutes from start to finish. And lastly, all I needed was 4 ingredients (which is why some people refer to this bread as 4-Ingredient Bread in most websites and bread-baker circles).
However, like it is in anything in life, something had to give, and in this case, it was time (18-24 hours) and a dutch oven with a lid. If you have both, I guess it is not a bad compromise.
Intrigued? Read on…
How To Make Artisan Bread
I thought that it would be helpful to explain each step with helpful photographs. Therefore, below you will find step by step instructions as to how to make this crusty bread in your own kitchen with helpful tips.
Artisan Bread Ingredients – What is in this 4-Ingredient Bread Recipe?

Like I mentioned earlier, there are only 4 ingredients in this recipe and they are:
- 3 cups of bread flour – I used King Arthur Flour
- ¼ teaspoon active dry yeast – Fleischmanns’ active dry yeast
- 2 teaspoons kosher salt – Diamond kosher salt
- 1 ⅓ cups lukewarm water – More on this below
If you a regular baker, you know that when it comes to baking you have to be very precise so I made it a point to share the brands that I used for my version of this no knead artisan bread recipe.
With that being said, as I was preparing for this recipe (reading through other people’s trials of this recipe) I learned that it is pretty “foolproof” and works with pretty much with every brand.
Please know that I am not being paid to refer these brands to you. Rather, my goal here is to be honest and helpful as you make it in your own kitchen.
What Does Lukewarm Water Mean?
While I was not able to find an exact definition to the meaning of “lukewarm” water, according to this article, if the water is warmer than your body temperature, meaning you touch it and feel like it is warm but not hot, then it is considered lukewarm.
In the context of this recipe, the ideal “lukewarm” temperature that worked in my testings was between 80 – 90 F degrees. If you have a digital thermometer handy, you can measure it, or if you don’t, you can do the feel test that I mentioned above.
Step By Step Instructions
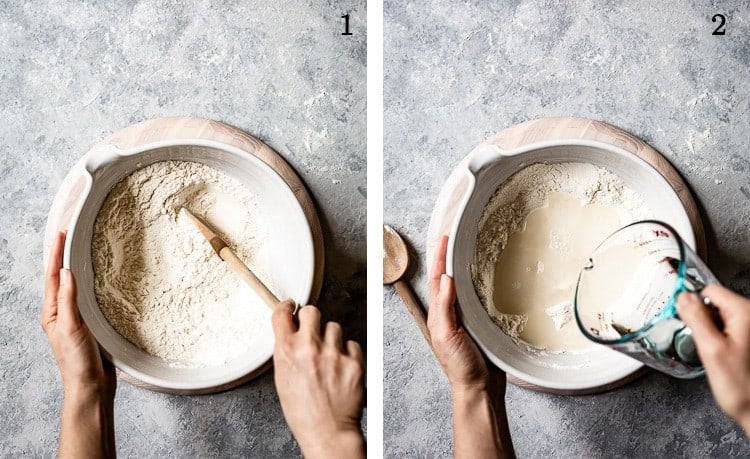
- Mix in the dry ingredients in a large mixing bowl.
- Pour in 1 ⅓ cups (316 ml.) lukewarm water.

- Give it a mix using a wooden spoon. At this point, the dough needs to be quite sticky. If it is not, after you fully mixed it, add in more water in 1-tablespoon increments. Alternatively, you can use your clean hands to mix and feel the stickiness.
Here, I’d like to mention that before publishing it in here, I made this recipe for 4 times and I had never needed to add more than 1 additional tablespoon into the mix. - Cover the bowl with a clean kitchen towel and let it sit in a warmer part of your house for 18-24 hours (quick trivia: due to this lengthy time of rising some people also refer to this bread as overnight bread) .
In my tests, I found that the bread baked after 18 hours of rising time was perfect, but the 24-hour one was also good.
One important thing to mention here is that at the end of the rising time you might see a thin (kind of hard – for the lack of a better word) layer at the top of the dough (as you can see in the picture (4) above). Don’t be alarmed by that. In the next step, we will fold that into the dough and since it is a sticky one, the additional rising time will help soften it.
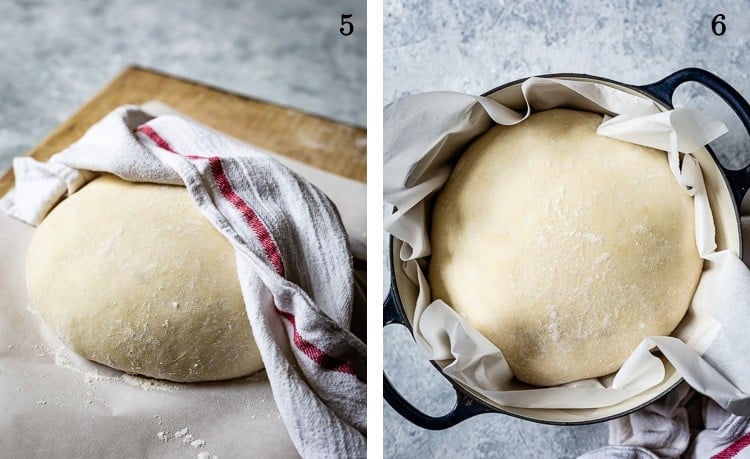
- Lightly flour your kitchen counter, gently remove the dough from the bowl, and place it onto your work surface. While removing, you will realize that it is quite sticky. However, if you take your time and gently pull it by folding it onto itself, you will see that it will come out easily without any dough remaining in the bowl.
Form the dough into a ball tucking the sides of the dough under. Transfer the dough onto a large parchment paper, lightly dust with a little bit of flour, cover it with a clean kitchen towel, and let it rise for 1-2 hours or until it doubles in size. Again, I recommend letting it sit in a warmer part of your house. - Towards the end of the rising time, place your dutch oven in the oven and pre-heat it to 450 F degrees. I will talk about the type of ovens and dutch ovens that are ideal for this recipe in more detail below.
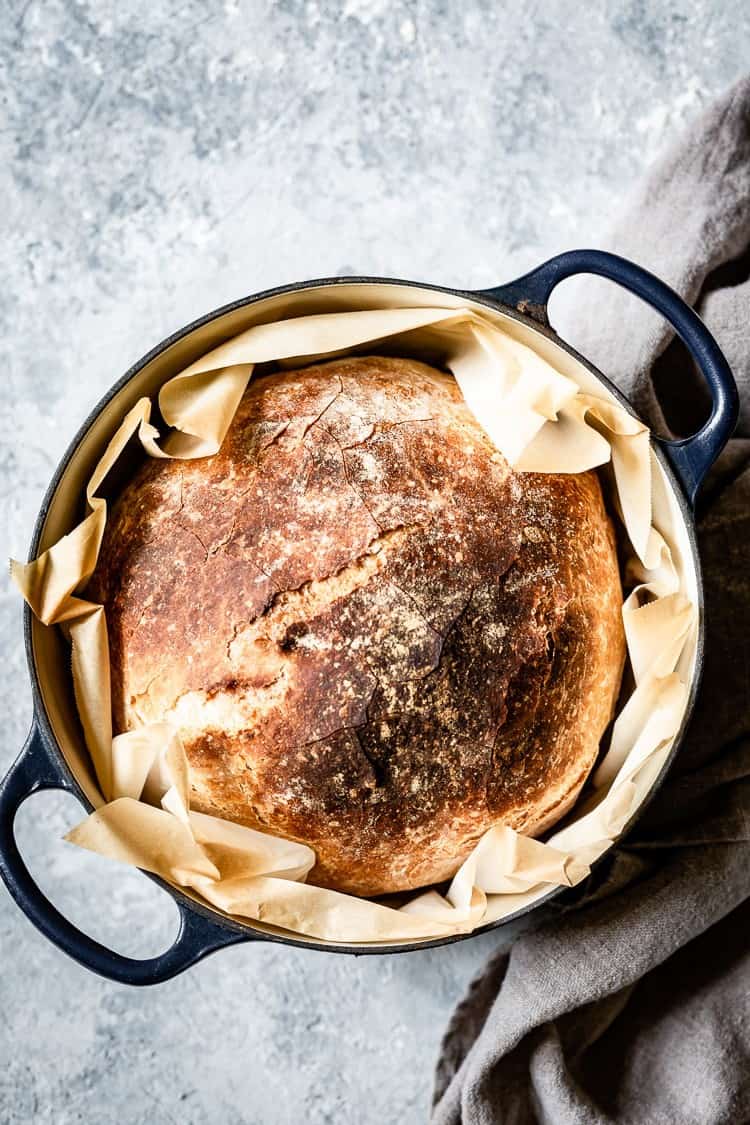
When ready to bake, take the now-very hot dutch oven out of the oven. Using the edges of the parchment paper carefully place the dough into the dutch oven. Put the lid on and let it bake for 30 minutes. Then remove the lid and continue to bake another 20-30 minutes or until the top is nicely golden brown as you see in the photos.
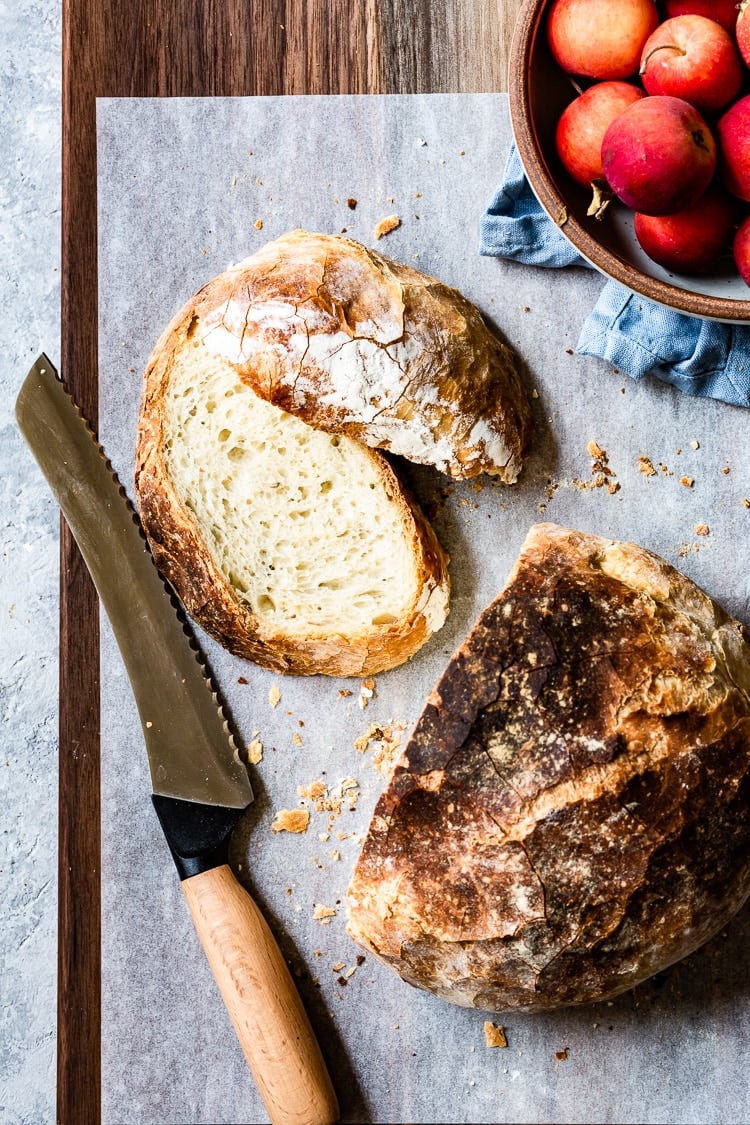
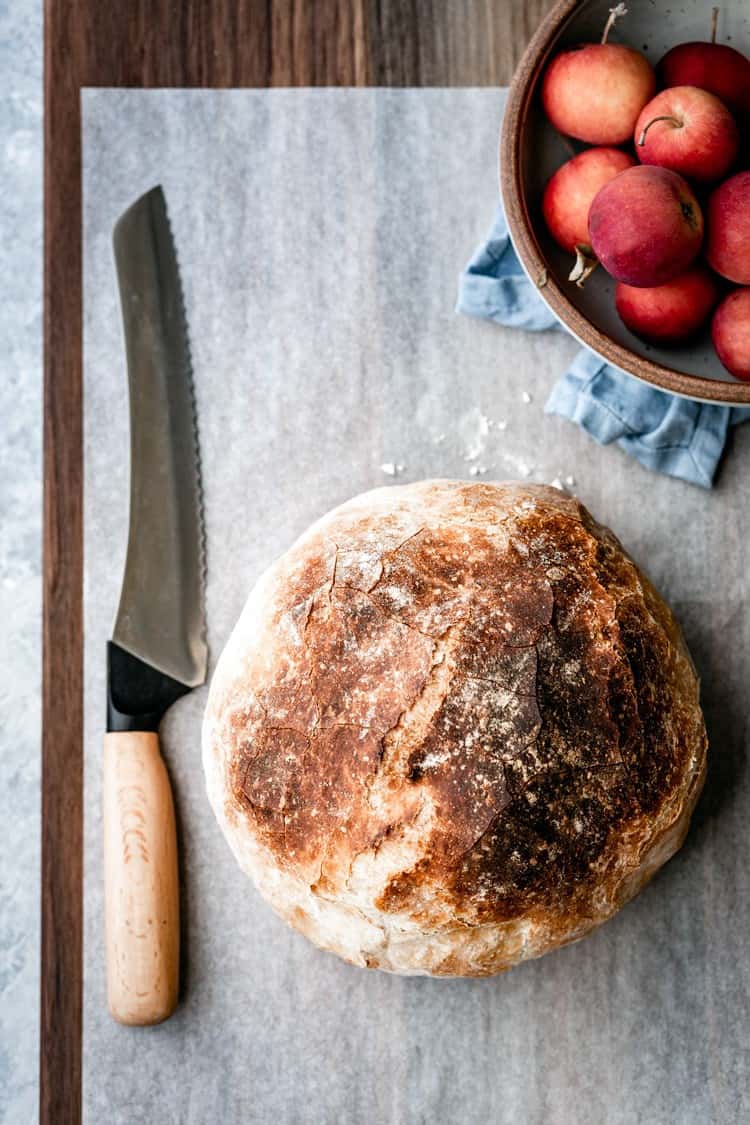
At the end of the baking, remove it from the dutch oven, place it onto a cooling rack and let it cool for 30-45 minutes before slicing.
If you are still with me and are encouraged to give it a try, I want to answer a few more questions that I had when I first read this recipe: (1) What is the best size of the Dutch oven for this no knead bread? (2) Can I bake this in a smaller countertop oven? (3)The best temperature to bake this bread.
The Best Size of Dutch Oven for this No Knead Crusty Bread
When I shared one of the photos of this bread on my Instagram feed, someone asked about the size of my dutch oven, which was a question that I had as well.
The original recipe on The Staub Cookbook doesn’t specify a particular size other than saying “a medium cast iron cocoette”. But what does that mean, especially if you don’t own that same exact brand?
To find the answer, I made this bread in 2 different size dutch ovens.
The first one, the navy blue dutch oven you see in the photos, was a 3 ½ quarts Le Creuset dutch oven (affiliate link). In my opinion, this was the ideal size for this dutch oven bread as it fit perfectly into the cast iron skillet and maintained its shape throughout the baking process.
The second dutch oven I baked this easy artisan bread was this 6-quart Lodge dutch oven (affiliate link). The result with this one was just as good. Before I tried baking in this larger cast iron skillet, I thought that the bread would spread quite a bit during the process, but surprisingly it maintained its shape quite well. Yes, it did spread a little bit, but it wasn’t too noticeable.
I wanted share this as I wanted to let you know that you can still make this homemade artisan bread even if you don’t own “the right size” dutch oven.
Can I bake this in a smaller countertop oven instead of a large wall oven?
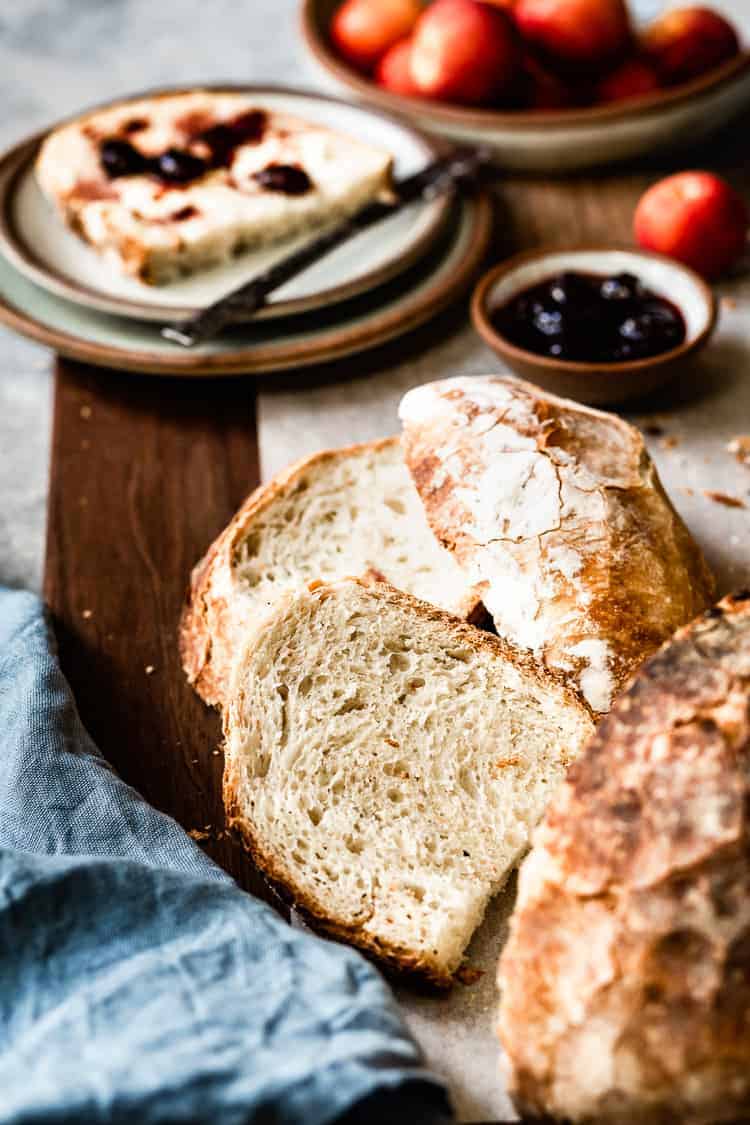
Let’s make one thing clear here. I believe that spreading a thick layer of butter onto a slice of this homemade rustic bread is quite a satisfactory feeling after waiting for 24 hours for it to rise. Not to mention seeing my husband’s face when he saw the freshly baked dough while it was cooling on the counter.
However, it was important to me to not to break the bank with a high power bill at the end of the month just to experience the aforementioned feeling of accomplishment. So, to see if this bread would also work in a smaller countertop style oven (this Wolf Gourmet countertop oven is the one I own – affiliate link), I baked it in it as well.
It worked perfectly, just as it did in the large wall oven. The only issue was that the larger 6-quart Lodge dutch oven didn’t fit into my countertop oven when the lid was on.
That is why, please know that (depending on your countertop oven) this is a good option if you have a smaller (3 ½ quart dutch oven).
Best Temperature to Bake Bread
The original recipe in The Staub Cookbook suggested baking this no-knead artisan bread in a pre-heated 475 F degree oven.
In my case, the issue was that the highest temperature that my countertop oven provided me with was 450 F degrees so I didn’t have an option but to bake it in 450 F degrees.
To my surprise, it worked perfectly.
Then on my third try, this time baking it in the large wall oven, I tried baking it in the same temperature (450 F degree), and again, it yielded a gorgeous loaf of crusty bread similar to what you see in the photos.
I wanted to mention this because this is the only change I made to the original recipe in the book. If you are not sure of your oven temperature, you can get an inexpensive digital oven thermometer (affiliate link) to make sure that it is providing you with the temperature you need.
How Long To Bake Bread
In all 4 of my testings, in both ovens, the bread baked under 1 hour. Like I mentioned earlier, I had the lid on in the first 30 minutes and then I removed it for the latter part of the baking process.
The second part of the baking process, without the lid on, took between 23-27 minutes. However, a good indication is by simply looking at the crust. If its golden brown, you are good to go.
A Few Last Minute Notes on The Best Artisan Bread
- Can I freeze this bread? Yes, you can. Simply let it fully cool to room temperature, wrap it in a plastic bag, and store in your freezer up to a month. When ready, thaw it on the kitchen counter (in its packaging) until it reaches room temperature, and then reheat in a 350 F degree oven for 8-10 minutes.
- Should I slice it before I freeze it? It is up to you whether you slice it or not. It is much easier to consume when sliced, but if you don’t seal the packaging properly, later you might run into freezer burn issues. So be sure to seal it well after you take the slices you need.
- Can I make this bread with gluten-free or whole wheat flour?: I have not tried baking this no knead crusty bread using any other flour than bread flour, but from what I understand from a few articles I read on the internet, this recipe is not ideal if you are using gluten-free or whole wheat flour.
- Do I need to grease the Dutch Oven before placing the dough into it?: No, you do not. The beauty of cast iron is that since it is so hot that it doesn’t let the dough stick to the pot. Plus, the parchment paper also helps.
- Any decorations or scoring on top?: I haven’t tried scoring it in fun ways, but I saw a few people score the top with a sharp knife. So play around with it as you like.
Whether you are an avid bread baker or an amateur one like I am, I hope you found this post helpful and feel encouraged to give this easy no-knead bread recipe a try. As you make this recipe in your own kitchen, if you have any questions feel free to drop me a line via email or comment below. I’ll try to help as much as I can.
If you liked this homemade rustic bread recipe, you might also like
Great recipes to serve with this bread
- Bread Dipping Oil
- Vegetarian Butternut Squash Soup Recipe
- Ribollita Soup
- Lentil Soup
- Turkish Lentil Soup
- Vegetable Beef Soup
- Sunchoke Soup Recipe

No Knead Artisan Bread
Ingredients
- 3 cups (360 grams) of bread flour
- ¼ teaspoon active dry yeast
- 2 teaspoons kosher salt
- 1 ⅓ cups (316 ml) lukewarm water*
Instructions
- Mix in the dry ingredients in a large mixing bowl.
- Pour in 1 ⅓ cups (316 ml.) lukewarm water.
- Give it a mix using a wooden spoon. At this point, the dough needs to be quite sticky. If it is not, after you fully mixed it, add in more water in 1-tablespoon increments. Alternatively, you can use your clean hands to mix and feel the stickiness.
- Cover the bowl with a clean kitchen towel and let it sit in a warmer part of your house for 18-24 hours.
- Lightly flour your kitchen counter, gently remove the dough from the bowl, and place it onto your work surface. While removing, you will realize that it is quite sticky. However, if you take your time and gently pull it by folding it onto itself, you will see that it will come out easily without any dough remaining in the bowl.
- Form the dough into a ball tucking the sides of the dough under. Transfer the dough onto a large parchment paper, lightly dust with a little bit of flour, cover it with a clean kitchen towel, and let it rise for 1-2 hours or until it doubles in size. Again, I recommend letting it sit in a warmer part of your house.
- Towards the end of the rising time, place your dutch oven in the oven and pre-heat it to 450 F degrees (230 C Degrees).
- When ready to bake, take the now-very hot dutch oven out of the oven. Using the edges of the parchment paper carefully place the dough into the dutch oven. Put the lid on and let it bake for 30 minutes. Then remove the lid and continue to bake another 20-30 minutes or until the top is nicely golden brown as you see in the photos.
- At the end of the baking, remove it from the dutch oven, place it onto a cooling rack and let it cool for 30-45 minutes before slicing.
Notes
- the brands I used for this recipe
- the type of dutch oven I used
- the oven I baked it in.
Nutrition
Nutrition information is automatically calculated, so should only be used as an approximation.
This recipe is adapted from the No Knead Cast Iron Skillet recipe on The Staub Cookbook.


Can you use gluten free flour for this recipe
Hi Millie,
Sadly, I do not think that this recipe would work with gluten-free flour. However, I have a few really good gluten-free bread recipes you can try instead:
https://foolproofliving.com/almond-flour-bread/
https://foolproofliving.com/millet-and-buckwheat-bread/
https://foolproofliving.com/pumpkin-cranberry-nut-loaf/
Please let me know if I can help you in any other way.
I have used every kind of flour with this bread, including gluten free flour (from Bob’s Red Mill) and it always works! My favorite is a mixture of white and rye – the rye gives it a lot of flavor. The gluten-free dough is very sticky so I just keep it in the bowl and pour it into the hot pot. Another note is that I don’t use a dutch oven – I just use an old tin pot with a lid that I can put in the oven. The pot doesn’t look so great anymore (lots of dark spots) but it still works wonderfully! And f inally, I also love adding rosemary and kalamata olives (need to reduce the salt if doing this combo). Thank you for the great introduction to this fabulous, easy bread!
WOW! So good to know. I plan on trying it with whole wheat flour next time I make. Have you ever tried that?
I have some fresh rosemary and would like to add it to this wonderful recipe. Could you please recommend how much fresh rosemary I should add? Thank you!
Hi Cindy,
I would add no more than 1-2 tablespoons of rosemary. I recommend chopping it finely so that it will distribute evenly throughout the dough.
If you want, you can also put a cup of chopped walnuts as well.
I hope this helps. I am here if I can help you with other questions.
Cheers!
Ice
Thanks, Ice. While preheating the Dutch oven, do you keep the lid on it?
Thank you,
Cindy
Hi Cindy,
No need to keep the lid on while preheating the dutch oven, but you want it on after you place the bread in it.
Sittin’ here drinking my coffee and got a text from my friend to your blog. Oh my gosh!! Seriously, I got butterflies in my stomach! Seriously, I did. Your blog is beautiful and your pictures are luscious, beautiful, bountiful, mouth-watering. You’re so talented and nice as well.
We were at our friend’s home for dinner and she made the no knead bread. I ate 2 whole pieces with dinner. It might be the best bread I’ve ever had in my life. My favorite foods are homemade bread and potato chips. My great gramma lived on a farm. She had one of those wood burning stoves. She made the best homemade regular bread I’ve ever tasted. I think baking bread in the wood burning stove made the difference. She always used solid yeast. Have you ever used it? I love blogs and live cookbooks too. Have you done cookbooks? I looked on Amazon and didn’t see any. I like sitting in my chair with coffee or tea at my side with a cookbook on my lap and turning the pages.
I am going to try a lot of your recipes. I live in the Portland, Oregon metropolitan area and we have great produce stands too.
I did make the No Knead Bread 2 days ago. It turned out good but it didn’t have the holes in it and was kinda dense and a little heavier. I think I handled it a little too much after taking it out of the bowl after the first rise. Do you think that’s the reason why no holes.
Hi Bobbie,
Thanks so much for your lovely words. I am thrilled to hear that you found me. I’ve gotten some similar comments in the past but no one ever said that they got butterflies in their stomach when they looked at my recipes. You are just so sweet. Thank you!
Sadly, I do not have access to a wood-burning stove but I know how delicious it tastes when the bread is baked in one. I have never used solid yeast as well. Where do you get that?
I, too, love cookbooks and going through them with a cup of coffee in my reading corner. I do not have a cookbook yet but perhaps one day I will write one. Who knows?
About the no-knead bread?.. Did you follow my recipe? What was the temperature of your water? I am asking because I recently made a batch and I think my water was hotter than it should be the yeast was not activated and I ended up with a dense bread. It is important that the water is lukewarm. Also how long did you let it rise?
Thanks again for your lovely words. They made my day.
Sending Portland, Oregon warm wishes from the snowy mountains of Vermont.
Cheers!
You may have handled/overworked the dough. This type of dough does not require any vigorous kneading. I put some flour on my countertop and gently drop the risen dough on it (it should release in one piece out of your bowl, be gentle and patient) Then just lightly shape it into a round-ish shape, handle it minimally! Make sure you have some flour on your hands and sprinkle some on top of the dough. Then quickly transfer it to a bowl lined with parchment paper for the 2nd rise. Key is to handle it as little as possible.
Hi, I’ve made it in the cake tin and I covered it with aluminium foil, came out perfect. Spongy inside and crusty in the outside.
Thank you
Oh what a good idea. Thanks for sharing your experience Ewa. So glad to hear that it came out good.
Are the metric measurements correct? It’s 92% hydration :O
Hi Cyrus,
Yes, the measurements are correct. Though I am not sure what you mean by “92% hydration”. Kindly elaborate.
I came here from the brownie recipe. I made this bread 2-3 times a week for about a year, making a slightly smaller loaf so it was always fresh. The same day I would bake I would start another loaf going.
I tweaked the recipe a little, adding about a 10 g of bulgar for texture, some soaked flax seeds just because, and about 15% whole grain (mix of wheat and rye) in place of some of the white flour.
I’m writing to say that I discovered a much easier way cook this than to use a heavy dutch oven, which is kind of a menacingly hot thing to handle. Also, I wanted to make a non-round loaf, and the round dutch oven limited me to boules.
I decided to try a granite ware roasting pan https://www.amazon.com/gp/product/B000QRAMMS/ref=oh_aui_search_asin_title?ie=UTF8&psc=1
It’s about $7 right now on amazon. You don’t need to preheat it; just line it with parchment paper, flip the brotform/basket/dough-fermentation holder onto the parchment which is lying in the roaster pan, cover it, and bake for about 28 minutes, then remove the loaf from the pan and bake directly on the stone. This keeps the bottom from burning. You can move the roaster into and out of the oven, with the bread inside, with one hand.
The key is not the preheating of the dutch oven, it is the trapping of steam in a covered container. You can also use a stainless steel bowl with some kind of lid; any container that will hold the steam from the bread will work. The weight and thermal mass of the dutch oven is not essential.
Again, I probably made close to a hundred loaves this way, and need to get back to it again because store bought bread is so inferior.
Thanks for your great blog.
WOW! This is very helpful John. Certainly, a more affordable (an easy to manage) alternative to Dutch oven.
I have been experimenting with versions of bread made with beer and various nuts, seeds and other ingredients like rosemary, olives, etc. It blows my mind that it always turn out great. I am no scientist but I would agree with what you are saying in that steam is where the magic happens.
So glad to hear that you like this recipe and make it often. Thanks so much for sharing your wisdom with me.
What would cause the crust to go from really firm on exiting the oven, golden brown 9 (actually after just 40 minutes total in a 450 oven) but turn soft on both the top and bottom of the bread after cooling down on a metal rack on the counter for about an hour or so.
Can you tell me what it is in the baking process that is supposed to insure that the crust is really crunchy and firm after adequate time on the cooling rack after baking?
Someone told me that adding 1 teaspoon of apple cider vinegar will help firm up the crust but that has not worked here once the loaf has cooled down.
Help!
Huh?? To be honest with you, I make this bread once a week and that never happened to me. Though one time, I let it cool in the pan (with the lid on) and that is when it lost its crunchiness. I don’t know why it would turn soft if it is uncovered and on a cooling rack.
I think the secret to this recipe is the Dutch oven that cooks the bread at a very high temperature and relatively fast.
I have never tried the apple cider vinegar trick. However, I know America’s Test Kitchen uses beer in some versions of this bread. Obviously, they are not the same things, but apple cider vinegar could be something to look into for the future.
I recieved a lodge cast iron Dutch oven for Christmas and have been playing around with this recipe for a couple weeks now. I think I have gotten where I want it but being a new Baker I’m not quite there. First off I doubled the recipe ( the smaller loaves barely lasted an hour in the house) cook for 35minutes with the lid on/ 35 with it off . Crust comes out beautiful the inside is just a bit too moist/dense. What can I do to get an airier interior?
So happy to hear that you got a new Dutch oven. It is surely a great investment that will last a life time.
To be quite honest, it is hard to tell you what to do without testing it. However, if you need a large loaf I recommend making 2 batches and baking them separately rather than doubling the recipe.
Again, it is hard to tell without trying, but I am thinking that it might be too large/heavy of a dough for the heat to cook the inside of the bread properly.
I hope this helps.
Hi Aysegul,
I followed the recipe very carefully, but my dough didn’t rise.. Not after 24 hrs, and not after the second rising time either. I tried baking it anyway and of course it turned out to be just a piece of wet dough on the inside and nothing interesting on the outside either.
What could have gone wrong?
Ana,
First, I am so sorry that your dough didn’t rise. A note of this kind is the worst thing that can happen to a food blogger.
Second, it is really hard for me to know without asking more questions. I literally make this bread every other day and have never had the issue you had so I am really baffled. The only thing I can think is the temperature of the room that it was rising. Was it in a cold room? I usually let the dough sit in a warmer room in the house.
Can you give me a little bit more information? Did you use the exact ingredients: bread flour and active dry yeast?
Another thing that I can think of is the temperature of the water. Was the water luke warm? If it wasn’t the yeast might not have gotten activated.
I am truly sorry, but I can’t think of anything else. I literally have one batch in my kitchen rising right now and I have never had this issue.
If you let me know the answers, I’d be more than happy to troubleshoot with you.
Thanks.
Hi again Aysegul. Thanks for walking me through the ingredients again!
I’m sorry, I just realized that I used plain flour instead of bread flour, so no wonder that the dough didn’t rise – the yeast had nothing to feed on!
I will try it tonight with bread flour.
Thanks again 🙂
Hey Ana,
Thanks for letting me know.
I am always here if I can answer any questions.
Best,
Ice
This bread exceeded all expectations, it turned out heavenly! Thank you for sharing this recipe and for helping me find my mistake. I used the right flour on my second try and everything worked perfectly!
All the best,
Ana
Ahhhh Ana!!! This is music to my ears. SO happy to hear that it worked for you. Thanks so much for coming back and leaving a comment.
Cheers!
You might check your yeast expiration date. Old yeast, occaision-ly fails to “rise” to the occasion!
This is the best homemade bread ever.
It sure is. So easy to make too. Thanks for stopping by Stephanie.