I am going to be honest, I am not a baker. And I am certainly not a bread baker. But when I originally found the no-knead bread recipe published by Mark Bittman in the New York Times, originally created by Jim Lahey of Sullivan Street Bakery in Manhattan, the world of bread baking was completely transformed.
Who knew you could bake a crusty loaf of bread in your home kitchen without the technique of kneading? I was instantly amazed.
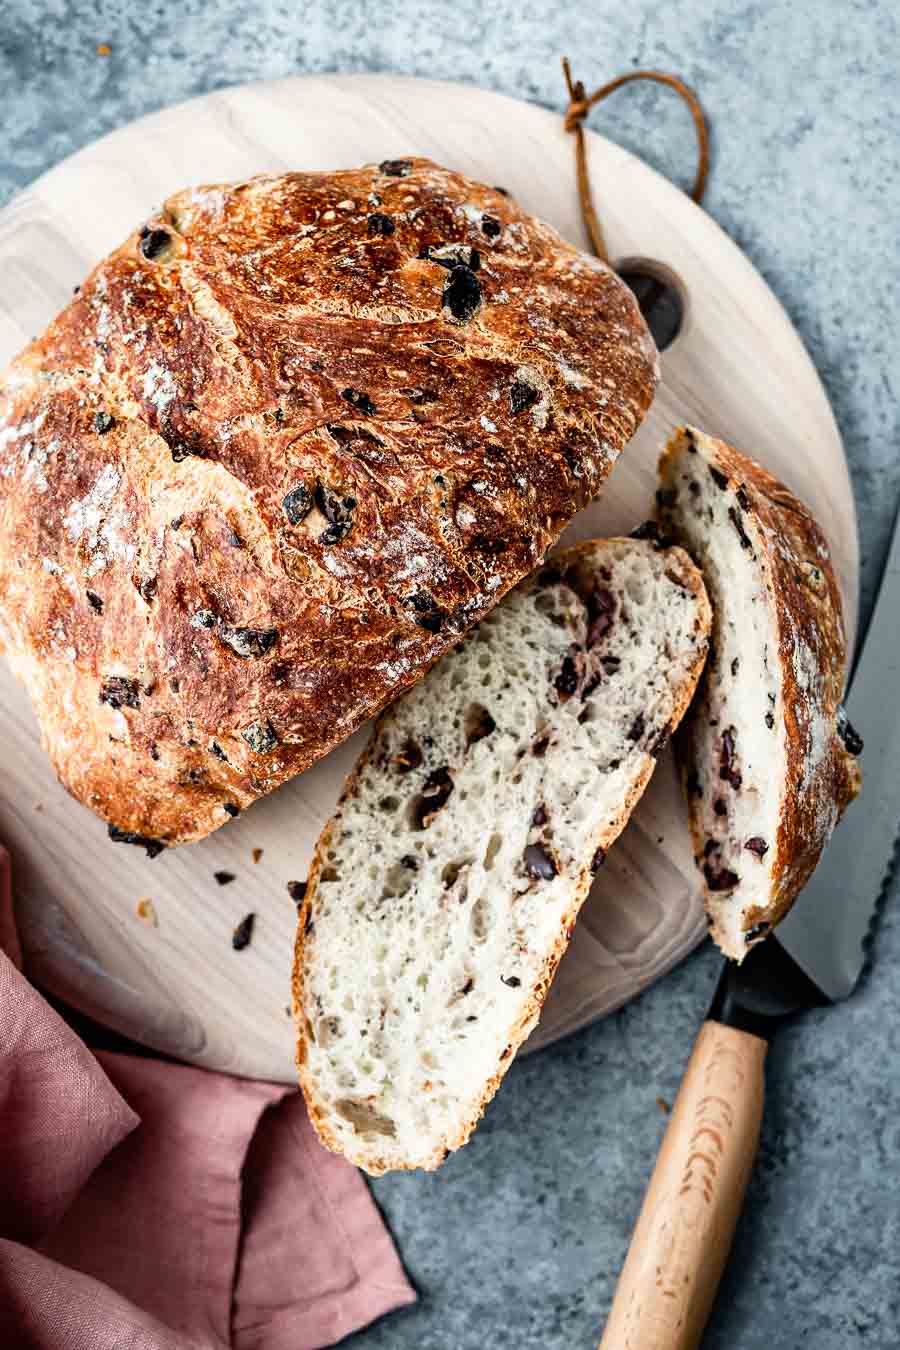
Table of Contents
- What is Olive Bread?
- Where did olive loaf originate?
- What is an olive loaf made of?
- How to make olive bread?
- An important tip for using olives
- Is olive bread healthy?
- What to serve with olive bread?
- Olive Loaf Variations
- A few tips for making the best recipe
- Other bread recipes you might also like
- Homemade No-Knead Olive Bread Recipe
But then I realized, the 4-ingredient no-knead bread recipe is such a fantastic base, why not make it more interesting? And since olives are one of my pantry staples, as they are so prominent in Mediterranean cuisine, I knew I was on to something. So I got to work.
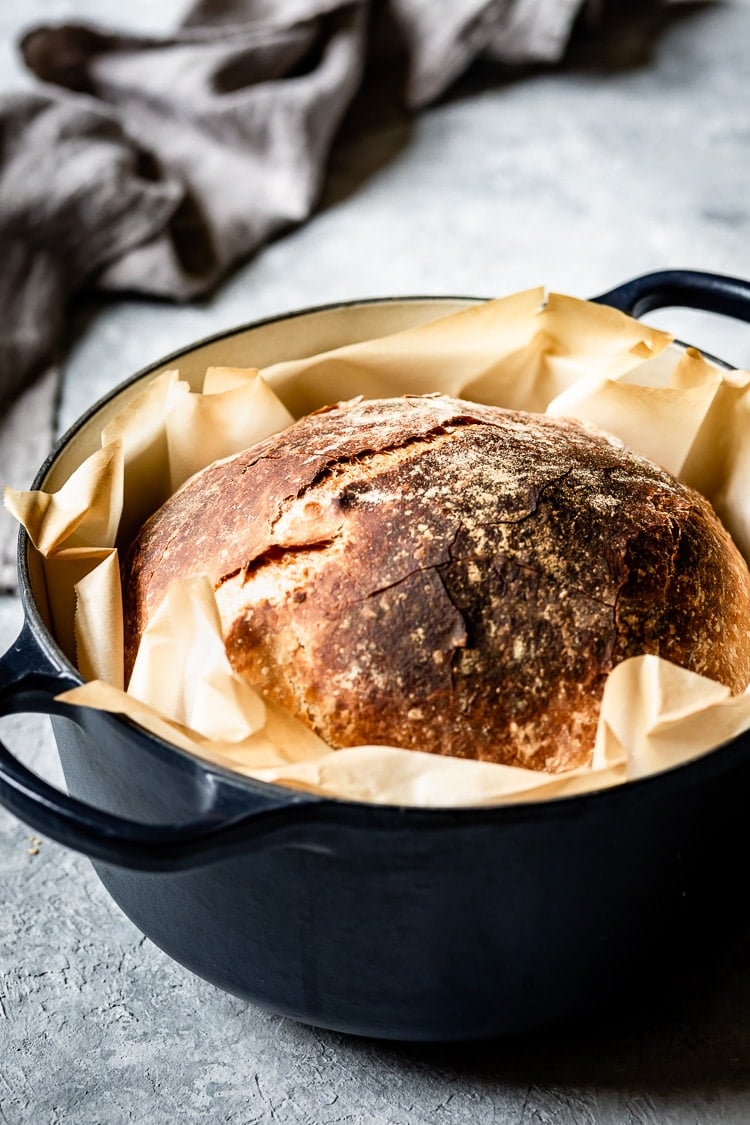
After a few trials and errors, this olive loaf bread became my new favorite. Warm from the oven, my husband and I simply couldn’t get enough. Once we tried it with Olive Oil Bread Dip, it was simply perfection. It makes a great go-to bread to bring to all of our upcoming holiday parties, too! Just think of this rustic bread as a delicious way to impress all your friends!
What is Olive Bread?
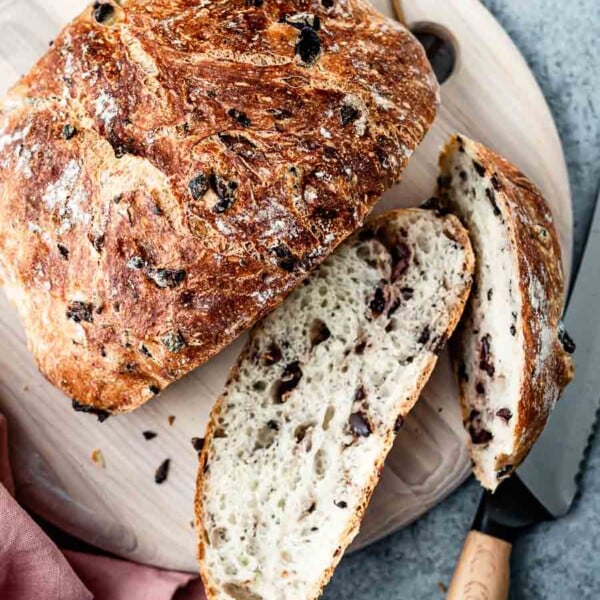
Olive bread, sometimes referred to as olive loaf (not to be confused with the cold cut version studded with olives), is a bread where the loaf of bread is laced with whole or chopped olives. This ensures a quintessential olive artisan bread flavor.
Where did olive loaf originate?
From my research, the olive loaf recipe seems to have originated in the Mediterranean, mostly in Italian and Greek cultures. And it makes sense since olives are such a staple ingredient in this region. Many times, you will find artisan bread makers with a version of olive bread in their shops. But today, it can easily be made in your home kitchen!
What is an olive loaf made of?
Homemade olive bread requires 5 simple ingredients:
- Bread Flour
- Active Dry Yeast
- Kosher Salt
- Lukewarm Water (more on that later below)
- Chopped Kalamata Olives (but you can use any of your favorite olives – more on that below)

How to make olive bread?
This no-knead olive bread comes together in 3 folds.
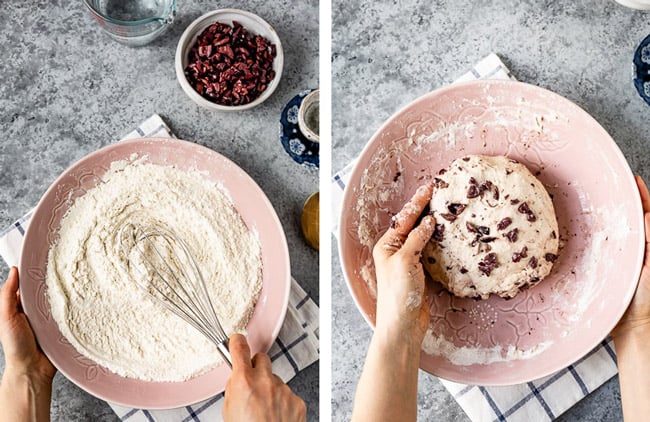
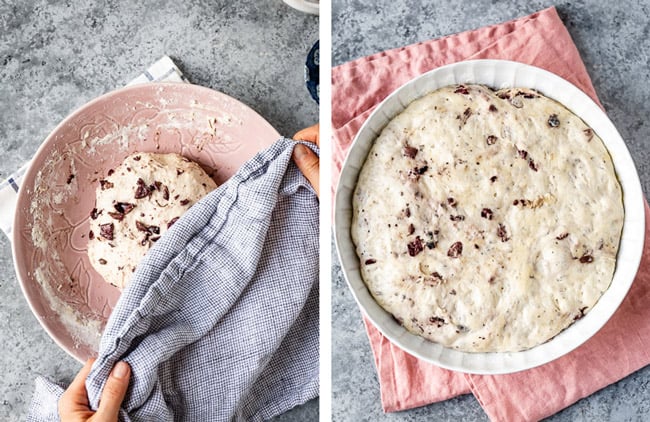
- First, mix the dry ingredients in a large mixing bowl. Pour in the lukewarm water. Mix with a wooden spoon. At this point, the dough will be sticky.
Stir in chopped kalamata olives and ensure they are evenly distributed throughout the dough. (Feel free to also use your hands!) Cover the bowl with a clean kitchen towel and allow it to rest 18-24 hours in a warmer part of your kitchen.
PRO TIP: Warm water is very important to activate the yeast. Though you might ask, what is the exact temperature you are referring to when you say, “lukewarm water”?
Typically, this is a temperature between 100-110 degrees. You can use an instant-thermometer to know for sure. If you don’t have one, you can simply stick your finger in the center, if it feels slightly warm to the touch, you are good to go!
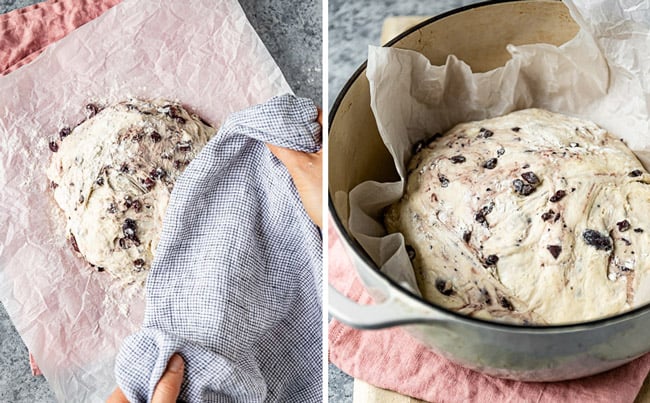
- Second, transfer the dough from the bowl onto a lightly floured surface. It will be sticky. But if you gently remove the olive bread dough from the bowl, you will notice it will all come out easy and fold onto itself. If you need a visual, be sure to check out the quick how-to video in the recipe card below.
Form the dough into a ball by tucking the sides of the dough under. Transfer to a large piece of parchment paper, lightly dust with flour, cover with a kitchen towel and allow to rise once more in a warmer part of your kitchen until doubled in size, 1-2 hours.
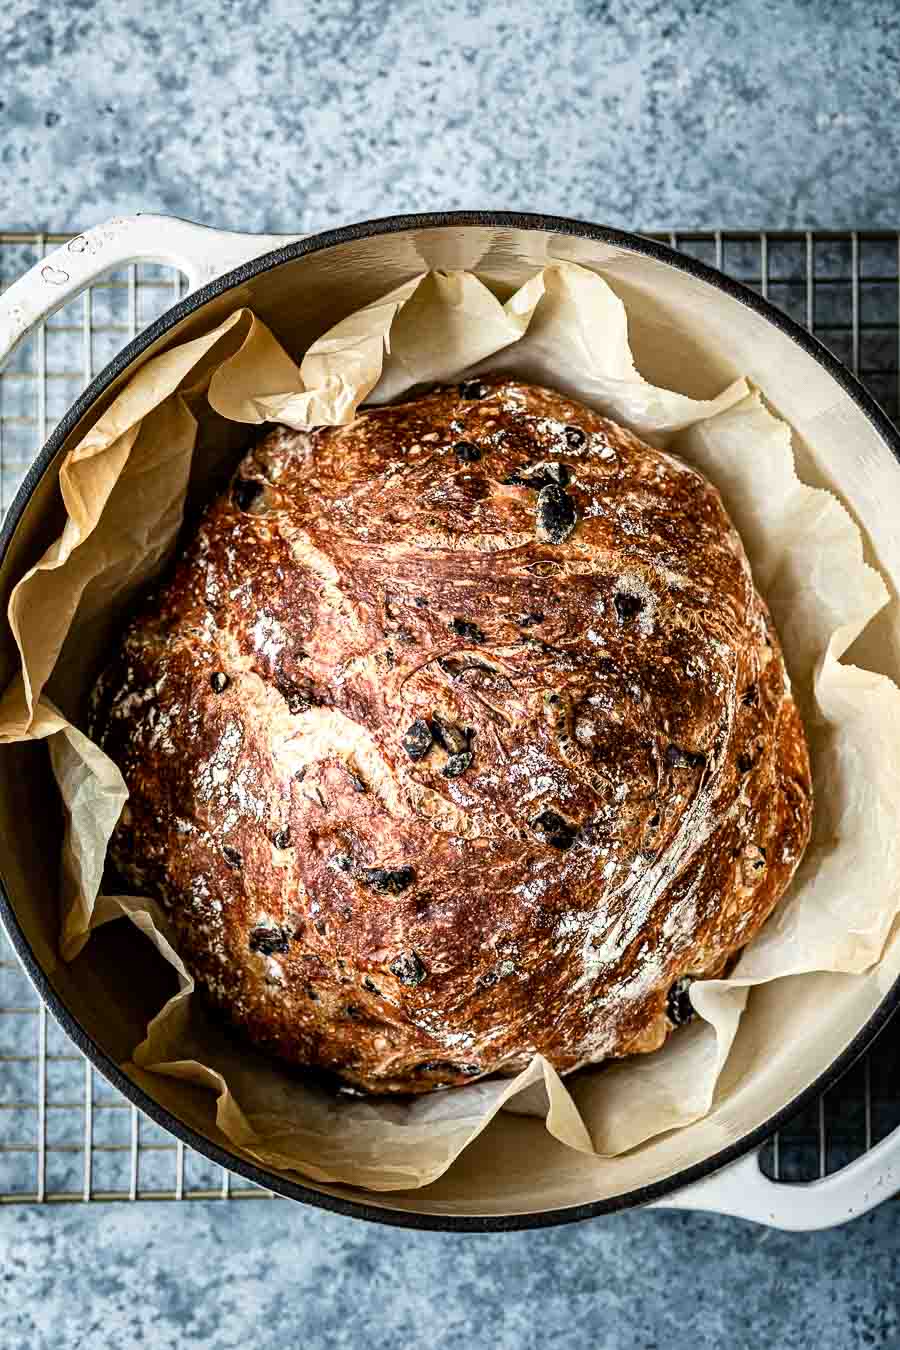
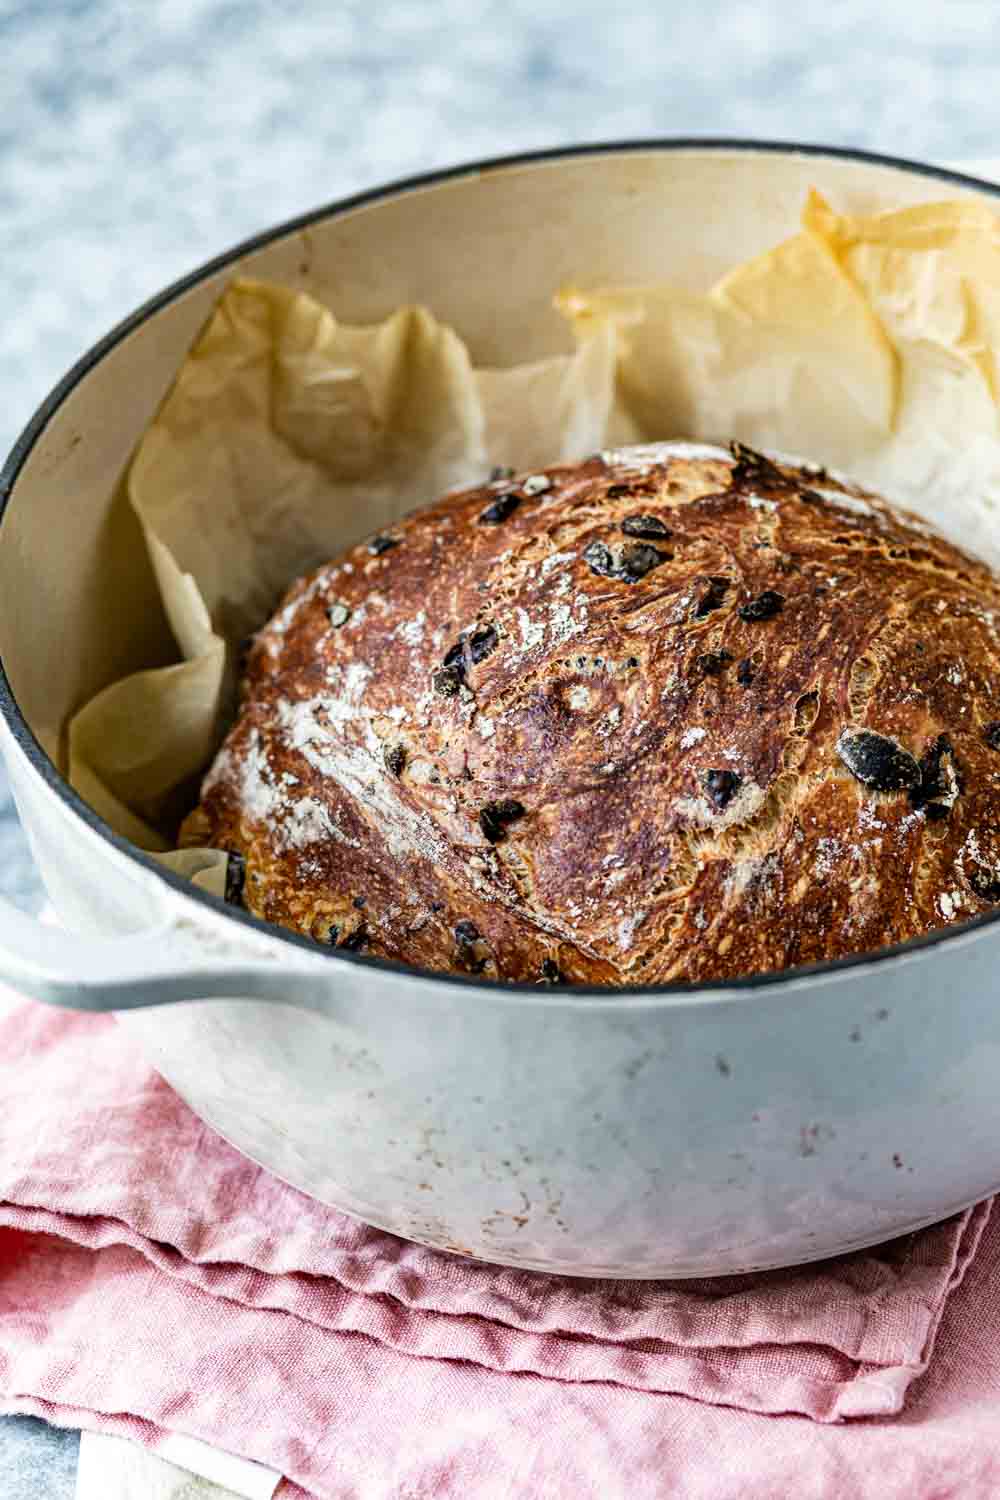
- Lastly, towards the end of rising time, place your dutch oven in the oven and preheat the oven to 450 degrees F. When ready to bake, remove the very hot dutch oven from the oven with potholders.
Using the edges of the parchment paper, carefully place the dough in the dutch oven, cover and bake for 30 minutes. Then, remove the lid and bake another 20-25 minutes, or until golden brown. Remove the olive loaf from the dutch oven and place it on a cooling rack to cool for 30-45 minutes before slicing.
PRO TIP: To know for sure that your bread is fully cooked through, once you remove it from the dutch oven, gently lift it over and tap the bottom of the bread loaf. If it sounds hollow, it’s done!
An important tip for using olives
Make sure the kalamata olives are completely drained as this rustic loaf recipe is already very moist and sticky. To ensure your olives are completely dry, chop first and pat them with paper towels to get rid of excess liquid.
Is olive bread healthy?
Yes, especially a dutch oven olive bread. Since olives have heart-healthy fats and we are making the bread from scratch with top-quality bread flour, it is good and good for you! So go ahead, have two, ahem, three slices!
What to serve with olive bread?
The rustic olive bread recipe is absolutely divine with Olive Oil Bread Dip (and a glass of wine!). But with the colder months coming, it also pairs perfectly with hearty fall and winter soups. Try it with Vegan Butternut Squash Soup, Ribollita Soup, Lentil Soup, Turkish Red Lentil Soup, or Homemade Vegetable Beef Soup.
Olive Loaf Variations
The beauty of this rustic olive bread recipe is the number of variations you can make. I would recommend replacing the olives altogether or adding one additional ingredient to keep it simple. Here are a few of my favorites:
- Olive Cheese Bread: Add 1 cup shredded white cheddar
- Green Olive Bread Recipe: Replace the purple kalamata olives with chopped green olives
- Olive and Herb Bread: Add 1 teaspoon each dried thyme and oregano to the dry ingredients
- Olive Garlic Bread: Add 1 tsp garlic powder to the dry ingredients
- Black Olive Bread: Replace the kalamata olives with black olives. I especially like the extra special briny bite of pitted, black oil-cured olives.
- Sun-Dried Tomato and Olive Bread Recipe: Add 1 cup sliced sun-dried tomatoes
- Olive Tapenade Bread: Replace the chopped olives with ½ cup strained olive tapenade
- Rosemary Olive Bread Recipe: Add 2 teaspoons dried rosemary
- Walnut Olive Bread: Add 1 cup chopped, toasted walnuts
A few tips for making the best recipe
- Can I freeze this olive bread? You sure can. As a matter of fact, I usually make a few loaves on the same day. Let them cool completely, slice, place in freezer bags, and freeze until I am ready to use. When ready to serve, I toast a slice (or more) and serve.
- Do I have to slice it before I freeze? Can I freeze the whole loaf? You can. However, (1) be sure to place it in an airtight container (I usually wrap it in a clean kitchen towel, place it in a freezer bag, and get as much air out as possible), and (2) be sure to thaw it in the fridge overnight before serving.
- What is the best size of the Dutch oven to bake this olive loaf? I have made this baked bread in 3 different sizes of Dutch ovens and brands and they all worked well. The brands and sizes are as follows (the links below are affiliate links)
Le Creuset Signature Cast-Iron Round Dutch Oven, 3 1/2-Qt
Lodge 6 Quart Enameled Cast Iron Dutch Oven
Staub Cast Iron 5.5-Qt. Round Cocotte - A few requests for whole wheat olive bread have been mentioned. I have not tested this recipe with whole wheat flour as the structure and protein content is different than bread flour. If you are adventurous and want to try a whole wheat version of this bread on your own, I would start with replacing 25% of the bread flour with whole wheat and work your way up from there. I would love to know the results if you try it out!
Other bread recipes you might also like
- Brioche
- Foolproof Challah recipe
- Turkish Simit
- Easy No-Knead Skillet Bread – From Baker Bettie
- Bread Maker Olive Bread Recipe – From Family Spice
Homemade No-Knead Olive Bread Recipe
Ingredients
- 3 cups bread flour, (360 gr. )
- ¼ teaspoon active dry yeast
- 2 teaspoons kosher salt*
- 1 ⅓ cup lukewarm water (between 100-110 F degrees), (316 ml)
- 1 cup chopped kalamata olives, drained well
Instructions
- Mix the dry ingredients; bread flour, active dry yeast, and kosher salt, in a large mixing bowl.
- Pour in 1 ⅓ cups (316 ml.) lukewarm water.
- Give it a mix using a wooden spoon. At this point, the dough needs to be quite sticky. Stir in the chopped olives and ensure that they are equally distributed throughout the batter. (Alternatively, you can use your clean hands to mix and feel the stickiness.)
- Cover the bowl with a clean kitchen towel and let it sit in a warmer part of your house for 18-24 hours.In my tests, I found that the bread baked after 18 hours of rising time was perfect, but the 24-hour one was also good. One important thing to mention here is that at the end of the rising time you might see a thin (kind of hard – for the lack of a better word) layer at the top of the dough. Don’t be alarmed by that. In the next step, we will fold that into the dough and since it is a sticky one, the additional rising time will help soften it.
- Lightly flour a piece of parchment paper, gently remove the dough from the bowl, and place it onto the parchment. While removing, you will realize that it is quite sticky. However, if you take your time and gently pull it by folding it onto itself, you will see that it will come out easily without any dough remaining in the bowl. For a visual, be sure to watch the video below.
- Form the dough into a ball tucking the sides of the dough under. Lightly dust it with a little bit of flour, cover it with a clean kitchen towel, and let it rise for 1-2 hours or until it doubles in size. Again, I recommend letting it sit in a warmer part of your house.
- Towards the end of the rising time, place your dutch oven in the oven and pre-heat it to 450 F degrees.
- When ready to bake, carefully take the now-very hot dutch oven out of the oven. Using the edges of the parchment paper place the dough into the dutch oven. Put the lid on and bake for 30 minutes. Then remove the lid and continue to bake another 20-30 minutes or until the top is nicely golden brown as you see in the photos.
- At the end of the baking, remove it from the dutch oven, place it onto a cooling rack and let it cool for 30-45 minutes before slicing.
Video
Notes
- I use Diamond Kosher Salt. If you are using Morton Kosher Salt or table salt, please use half the amount of salt.
- It is imperative that you drain the olives well.
- When using olives in any recipe, it is best to give them a taste. If they are too salty, I would recommend letting them soak in water for an hour or so. Obviously, the longer they sit in the water the less salty they will become. Alternatively, you can use less salt, but I personally prefer to adjust the saltiness of the olives instead of using less salt. Because I like my bread dough to be properly seasoned.
- Storage: After it comes to room temperature, cover it with a kitchen towel and keep it on the kitchen counter. It should still be good the next day.
- Freezing: You can freeze the whole loaf or slice it before freezing. Just make sure that it is fully cooled before doing so. Additionally, be sure to place it in an airtight freezer bag and get the air out as much as you can to prevent freezer burn.
- Thawing: If you froze it sliced, you can warm the slices in your toaster without having to wait for it to thaw. If you froze it as a whole, it is best to let it thaw in the fridge overnight.
Nutrition
Nutrition information is automatically calculated, so should only be used as an approximation.


This is one of the best if not the best bread recipe I have tried and trust me I tried many of them for the last couple of months:) Thanks!!
I will be trying your other recipes. Very good to find you!
YAY! It is funny because we have the same name 🙂
Thanks Aysegul I am so glad that you enjoyed the recipe and it turned out great,
Sevgiler.
Cheers!
Is there a reason why you need to let the dough sit for 18-24 hours. I have read other no knead recipes where you let the dough stand for 3-4 hours before mixing again.
Hi Christina,
That could be true. However, the temperature of your kitchen (or the time of the year) plays an important role in how much time it takes for the dough to rise. During the warmer months, you could let it sit for 5-6 hours and bake the bread. But during the colder months, it is best to wait longer.
With all this being said, if you have a warm kitchen feel free to try baking it earlier.
In the past when I made this bread during the summer months, I found success in letting it sit for 5 to 6 hours and have gotten good results.
I hope this helps.
Please let me know if I can answer any other questions.
Precisely followed the recipe with one exception. I used a large corning ware pot with a lid instead of a traditional dutch oven. The bread turned out AMAZINGLY delish. Love it! Thank you!
Hello Li,
I am so glad to hear that it worked for you. It is good to know that this recipe would bake in a large corning ware pot.
Thanks for sharing.
Cheers!
Great recipe! Question do rising times need to be adjusted if using Instant Yeast(dry)?
Hi Ambar,
I have not tried this recipe with instant yeast before so I am not sure.
Have you ever made no-knead bread with instant yeast before?
Good overall, but a bit salty, given the amount of kalamatas. Also, the parchment stuck to the bottom of the loaf. I made another no-knead recipe a few weeks ago that baked directly in the Dutch oven, so I’ll try that next time. Thanks much!
Hi Lisa,
Thanks for taking the time to leave a review.
Interesting on the parchment paper. I will try it without it next time.
Thanks.
This recipe is amazing. Super easy. Crusty outside and inside chewy. If you cover bowl with a moistened towel you don’t get the funky crust on it as it rises.
Oh that is such a good tip Dianne. I will be sure to try it next time.
Thanks so much for sharing your experience with us. Cheers!
I made this recipe with 2 1/2 cups whole wheat and 1/2 cup of AP flour and it turned out great and super yummy!
Thanks so much for sharing this information Vivienne. So good to know that a combination of two different flours worked together to make this no knead bread recipe.
I plan on trying myself next time I make it.
Cheers!
Directions are confusing. Step 1 is mix in ingredients. It doesn’t say which ones. As a baker I assumed you didn’t mean to include the olives- or other extra ingredients one might want to add. I think for clarity, and with an inexperienced cook you might want to say “mix dry ingredients.” Just a thought. Recipe is easy and delicious. Best.
Hi Stephanie,
Thanks for your feedback. This makes sense. I made the changes to the recipe to make it more clear.
I am glad to hear that you enjoyed it.
Best,
Ice
Would it be ok to not use any parchment paper and just place the dough in the dutch oven?
Quite honestly, I have never tried baking this without parchment paper, but if you make sure that the bottom of the dough is covered with a little bit of flour (or cornmeal if you have – like we use when we make pizza) it might work.
I hope this helps.
Hi, my first loaf came out great! Love the recipe. I was wondering if it would be possible to split this recipe into 2 smaller loaves. Also would the baking time be different if I did so?
Hi Ally,
So glad to hear that your bread came out great.
In terms of your question: How are you planning to bake them? At the same time? In the same dutch oven?
I don’t see splitting the dough into two a problem but I need more information to answer your question. Will you please elaborate?
I look forward to hearing from you.
Thanks for the reply…I was planning on splitting the dough before the last rising stage and then baking them separately, one after the other.
Himm.. I don’t see it being an issue. I think it would be fine.