When people find out that I am a food photographer, the first question I get asked is my equipment. The same thing happens every time I share a behind the scenes on my Instagram Stories. So I thought it would be helpful to create a detailed post of the equipment I use for all the photography on Foolproof Living since I started it back in 2013. I plan on updating this post as I purchase and use new equipment.
If you are interested in seeing my videography equipment, feel free to visit my videography equipment page.
Disclaimer: Please note that some of the links below are affiliate links and I will earn a commission if you purchase through those links. I use all of the products listed below and recommend them because I own and use them on a regular basis.
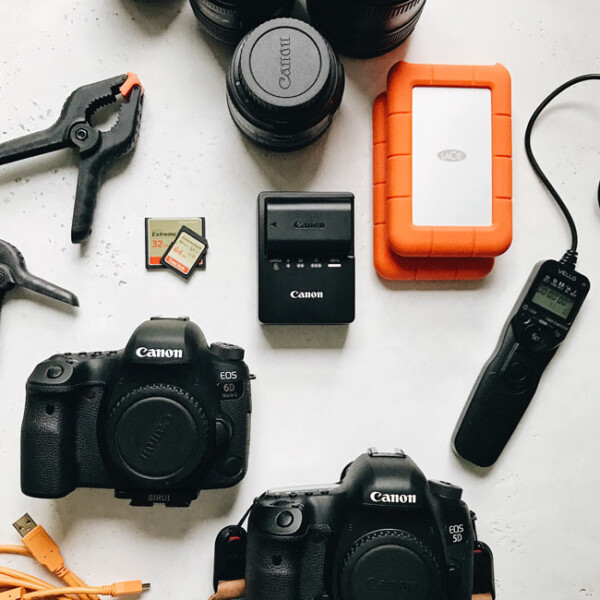
Camera Bodies:
- Canon EOS 5D Mark III
 (Full Frame): I have been using this camera since December of 2014 and I cannot recommend it enough. I bought it when I decided to take on photography as more than a hobby. It takes incredible clean and sharp pictures as well as HD videos.
 - Canon EOS Rebel T4i DSLR (APS-C sensor): This was my first DSLR camera. Every photo you see on this website until December of 2014 was taken with this camera. While they no longer produce this particular model, Canon regularly updates its Rebel series. If you are new to photography I think Rebel cameras are a great place to start. They are affordable and take great photos.
I no longer use this camera for photography. Instead, I mainly use this as my second camera (mostly for overheard clips) for all my videos. Its tracking focus feature help me keep the scene sharp and in focus. - Canon EOS 6D Mark II : I use this camera mostly for shooting videos. It has an automatic focus that makes it so easy when you are shooting by yourself.
Lenses:
- Canon EF 50mm f/1.4: This is my most used lens, especially if I am shooting on my full frame camera. It gives me a beautiful soft bokeh while it allows me to keep the subject in focus and sharp. If you are just starting out, have a full frame camera and can only get one lens, I would recommend this one.
- Canon EF 100mm f/2.8L: This also is a favorite lens and one that I use almost every day. It is a great lens when you want to take close up shots and show the detail of your food. It is fairly heavy, but since I almost always use a tripod that is not a big problem.
- Canon EF 35mm f/2: This was my go-to lens when I was primarily shooting with my Rebel as it was similar to the 50 mm on my full frame camera. I still use it when I am doing overhead shots and photographing indoors and outdoors while I am shooting in restaurants.
- Canon EF 24-70mm f/4.0L: This is the only zoom lens I own. It is my go-to travel lens, but I occasionally use it in my food photography as well. With that being said, I wish I had purchased the Canon EF 24-70mm f/2.8L. Yes, it is almost $1000 more, but I think it is worth it. While f/4 does the job, when I am in low light situations I do not like the fact that I have to be tied to my tripod. If you are in the market for a zoom lens, I think f/2.8 is a better investment.
- Canon EF 85mm f/1.8 : I recently purchased this lens (Feb 2018) and I am still in the process of getting used to it. The compression it offers along with the detail and bokeh quality is amazing. While 85mm is mostly used as a portrait lens, I have been enjoying the details that I can highlight within my food photography using this lens. I wouldn’t call this a beginners lens, but as you grow your photography portfolio/business I recommend adding this luxurious lens to your camera kit.
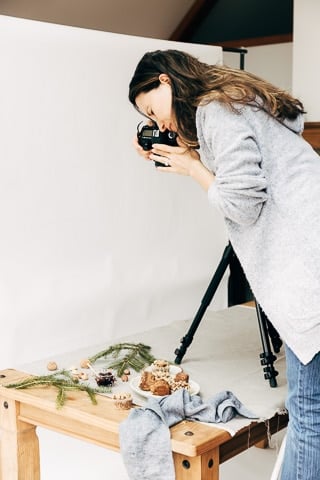
Tripod:
- Manfrotto MT190XPRO3: This has been my tripod since I started back in 2013. It is durable, light weight, and gives me the perfect height. It folds into a smaller size making it easy to transport if you want to shoot on a different location. It does have an arm that extends, but I do not use that as it is not long enough. Instead, I use the attachment below.
- Manfrotto 131DB 23.6″ Reproduction Arm with Double Camera Attachment: This is an attachment arm I use for my tripod. It is basically an arm that attaches to the top of the tripod making it easy to shoot overhead shots and video in a more stable way and without breaking my back.
- Siriu K-20X Ball Head: This is the ball head I use to attach to the arm of the tripod to hold the camera safely. It has multiple controls that makes it very easy to move the camera safely.
I actually have 2 of these. I use the first one with my tripod and the second one with my C-Stand. If you use multiple tripods and cameras (especially while shooting videos), I recommend getting the same ball head as it will make it easy for you to not to worry about having to change the plate that attaches to the ball head.
C-Stand:
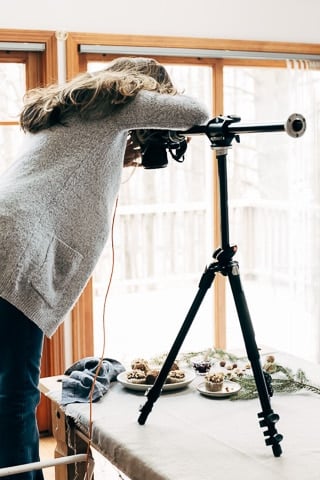
If you do not know what a C-Stand is, you are not alone. A friend of mine, who is a staff photographer for The New York Times, introduced me to C-Stands years ago. I bought one in 2016 and since then it has been a great tool that I use on a daily basis. A C-Stand is basically a stand that holds things. Think of it as a large tripod. It is mostly used to hold lights in studio photography. Similar to the tripod, you can attach arms and other devices to hold things in place.
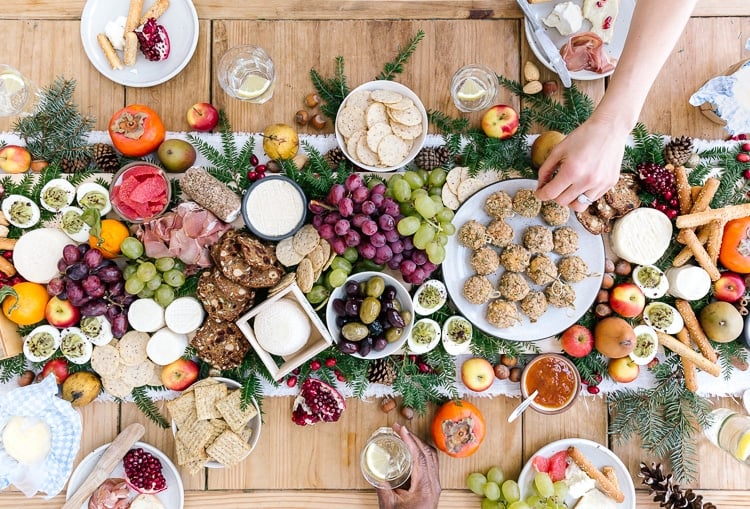
The main reason I invested in a C-Stand was that I wanted to be able to take photos from a higher level than I could with my tripod. Additionally, I have chronic back issues so it made it easier to photograph larger areas. (The photo below for Baked Goat Cheese Balls was taken with my C-Stand.)
Similar to my tripod, I purchased an arm to make it easier to do overhead shooting. The arm is called the boom arm. Below is the whole kit I own:
- Base: Avenger Turtle Base C-Stand (9.8′, Chrome-plated) – (No longer in stock)
- Arm: Avenger D600 Mini Boom (No longer in stock)
- Adapter: Manfrotto 014-38 Rapid Adapter – 5/8″ Stud to 3/8″ Thread – This is what you use to attach camera to the boom arm.
PS: While I love my C-Stand and use it everyday, there are some downsides to using it. I plan on doing a whole blog post about all the pros and cons of using a C-Stand in food photography/videography in the coming days.
Artificial Lights & Accessories:
I have always loved photographing with natural light. However, I think we can all agree that it slows you down. It changes all the time and makes it hard to have a workflow that is quick and efficient. I think figuring out a way to shoot faster is especially important and necessary if you are like me, doing step-by-step photos for all your recipes.
I made the switch to photographing with artificial lights on March 2019. Every post (unless it is an update of an old post) you see on my site that is published after that date is photographed with artificial lights.
It works for me because:
- I no longer have to make plans based on the weather and the light conditions.
- I can now set photography days and photograph multiple recipes in a day (with step by step photos) as opposed to being able to do one a day with natural light.
- Helps me with having an efficient workflow and a consistent look throughout my blog.
If you are convinced and need artificial lights, below is the list of my light and accesories:
Profoto B10: Now, I know this is not cheap. However, it is a superb light that helped me so much in creating good quality photos. Using this light, I can easily keep my ISO at 100 delivering the grain-free stunning images (which I sell later through my stock photography agency). While it is a strobe it also offers continuous lighting that I can use in my videos. Though I think it is important to mention that it has a loud motor noise that needs to be edited out in the post processing.
I only have one of these lights, and if you are only shooting food I do not think that you will need more than one light.
Profoto Air Remote TTL-C: You will need this air remote to connect to your camera so that it can communicate with the light. I highly recommend making sure to check their site for compatibility of this air remote with your camera before purchasing it.
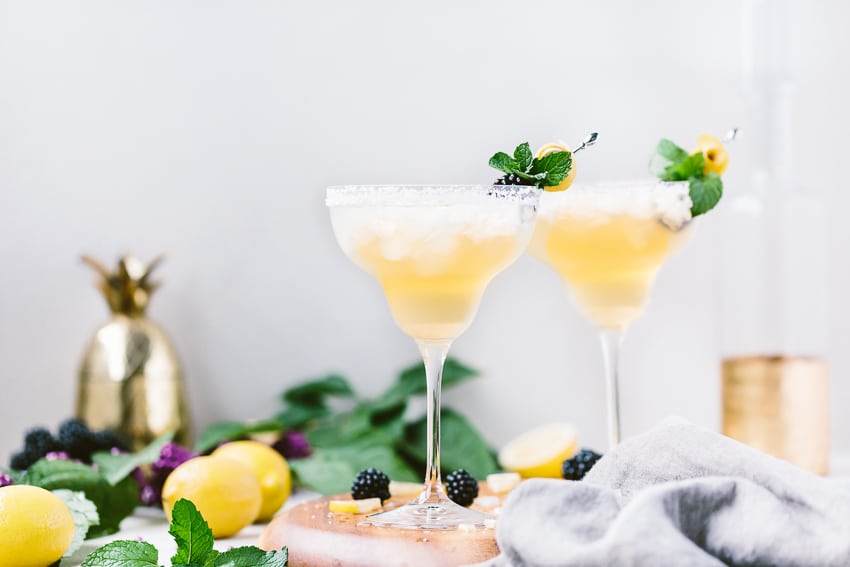
Profoto 101215 OCF Softbox 2×3′, Black/White: This is the softbox I use to manipulate and manage the light. Also, this is the softbox that I use when I want to achieve a light and airy look in my photos. Check out this Black Bean Quinoa Tacos recipe to see what I mean.
Profoto OCF Softbox 1×3′, 101217: Compared to the 2×3 version, this softbox is long and lean (1X3), which is helpful when I need to block some of the light. This is especially helpful when I am trying to create a moody look. Check out this Cauliflower Curry recipe for an example of how I used it.
Neewer 75″/6 Feet/190CM Photography Light Stands: Any light stand would work for this, but this is the one I own.
Reflectors:
I often use white & blackboards and reflectors to manipulate light. The boards I use are called poster boards and can easily be found in your local stationery store. I have a few of those in different sizes and I use them in almost every shoot.
Additionally, I own the two reflectors below when I am in need of directing or diffusing light. Both of these reflectors offer 5 different colored surfaces, but I mostly use the white and black sides. Also, they are both easy to store as they fold into a smaller size.
Fotodiox Pro 5-in-1 Reflector ![]() : This is a smaller round reflector that is great for everyday use. While it does a good job helping me direct light, if I were in the market for a new reflector I would buy this triangle
: This is a smaller round reflector that is great for everyday use. While it does a good job helping me direct light, if I were in the market for a new reflector I would buy this triangle![]() reflector as it is easier to lean it on the wall or the window instead of having to hold it in your hand.
reflector as it is easier to lean it on the wall or the window instead of having to hold it in your hand.
Neewer Portable 5 in 1 59″x79″![]() : This reflector is a really big one. I bought it after we moved to Vermont as the space I use as my studio has large and tall windows. It is very difficult to manipulate light with the smaller reflector so I use this one when I need to block sun or redirect natural light. If you are shooting in a smaller space with regular windows, it might be an overkill.
: This reflector is a really big one. I bought it after we moved to Vermont as the space I use as my studio has large and tall windows. It is very difficult to manipulate light with the smaller reflector so I use this one when I need to block sun or redirect natural light. If you are shooting in a smaller space with regular windows, it might be an overkill.

Memory Cards:
When you shoot as much as I do and use your cameras both for photography and videography, you need cards that can record data fast. Below are the two card that I own. I have two of each.
- SanDisk Extreme PLUS 64GB SDXC UHS-I/V30/U3/Class 10 Card with Adapter (SDSDXWF-064G-ANCIN)
- SanDisk Extreme 32GB Compact Flash Memory Card UDMA 7 Speed Up To 120MB/s- SDCFXS-032G-X46
External Hard Drive For Data Back Up:
It is no secret that backing up your data is so important. And when you work with such big files then you need a reliable hard drive to store them. Over the years, I have used several external hard drive brands to back up my data. Some were great while others were not. Below is the list:
- Toshiba Canvio Connect II 1TB Portable Hard Drive: This was my first external hard drive. I do not think it is still in production, but for a good reason because I would not recommend this hard drive. I learned a hard lesson when I dropped it. Obviously, there is no guarantee that your data will be safe after you drop any external hard drive, but later I learned that there are other more durable options out there.
- LaCie Rugged Thunderbolt and USB 3.0 2TB Portable Hard Drive LAC9000489:I was introduced to LaCie products by a wedding photographer friend. This is what I currently use. 99% of the time I shoot tethered and record everything to this hard drive. I have a few of these and never had a problem. At least so far.
- Dropbox: I have a monthly membership with Dropbox Cloud Service and I use it to back up my data on a daily basis. For every recipe/project, I keep a file and only store the information that I used. I keep everything in one folder and create a new one for each project. Then I save the RAW files that I used along with the edited JPEG versions. This way, they don’t take too much space. Additionally, I find Dropbox to be a great way to provide photos to clients for review.
One thing I highly recommend is to get recovery insurance for the external hard drive you purchase if they are offering. While the best solution is to back up your data in multiple hard drives along with a cloud service, we all know that sometimes that is not possible. When I had an issue with my Toshiba hard drive, having that insurance helped to recover my data with no charge. They were not able to get everything restored, but still, it was good to be able to get some help without having to pay additional money.

Remote Control
While I do not use a remote control for most of my photography, I occasionally do stop-motion videos (you can see an example here in this Double Layered Mashed Potato Casserole) and since I work by myself I need a remote control to take photos of my hands when I actually make the recipe. I found that Vello Shutter Boss II is a great product that you can use if you are shooting with a Canon camera. I love that I can attach it to my camera and set it to take photos in 1-second increments, which is perfect for stop motion videos.
With that being said, if I was in the market for a new remote control, I would rather buy its wireless version. Yes, it is more expensive, but I think it is a better investment, especially because not having the cord attached to the camera minimizes the possibility of camera shake, which could potentially be a huge issue when you are trying to shoot fast.
Camera Bags
It is imperative to keep your lenses and camera bodies in a safe place. When I am in my studio, I make sure to keep them in a locked cupboard. However, if I am on location I use camera bags to keep my equipment out of harm. Below are the camera bags I own:
- ONA – The Union Street – Camera Messenger Bag – Black Waxed Canvas (ONA5-003BL): While I love this Ona Bag and find it to be stylish, for a small person like me this design is not conducive. It is a great bag to protect your equipment with adjustable lens slots and a section for your camera body, when you put a few lenses with your camera body it gets so heavy to carry around on your shoulder for a long period of time.
- Lowepro Photo Hatchback 22L AW. Outdoor Day Camera Backpack for DSLR and Mirrorless Cameras: After my experience with my Ona Bag, I bought this basic Lowepro backpack and this is what I currently use. As in most camera bags, it has adjustable compartments to safely store lenses and camera body for one camera. It is lightweight and easy to use while shooting.
- Shootsac Lens Bag: When you shoot on location, use multiple lenses during the shoot, and need to reach them fast Shootsac is a great option. This is what I use when I shoot in restaurants. It has compartments to safely store lenses and you can easily carry it around with you.
Camera Maintenance & Cleaning
I clean my camera bodies and lenses once a week. Since I work with food, they get so dirty and require regular cleaning. The following is the kit I own along with the spray I use to clean my lenses. I find that they are a fairly inexpensive solution for keeping my equipment dust free and in top shape.
Altura Photo Professional Cleaning Kit![]()
Zeiss Lens Care Kit![]()