This post is sponsored by Kroger. All thoughts and opinions are my own.
This coming week is going to be my last week in Atlanta. It is bittersweet because I lived in this city (on and off) for over 10 years. Even though I am excited about living in Vermont, a part of me will always miss Atlanta.
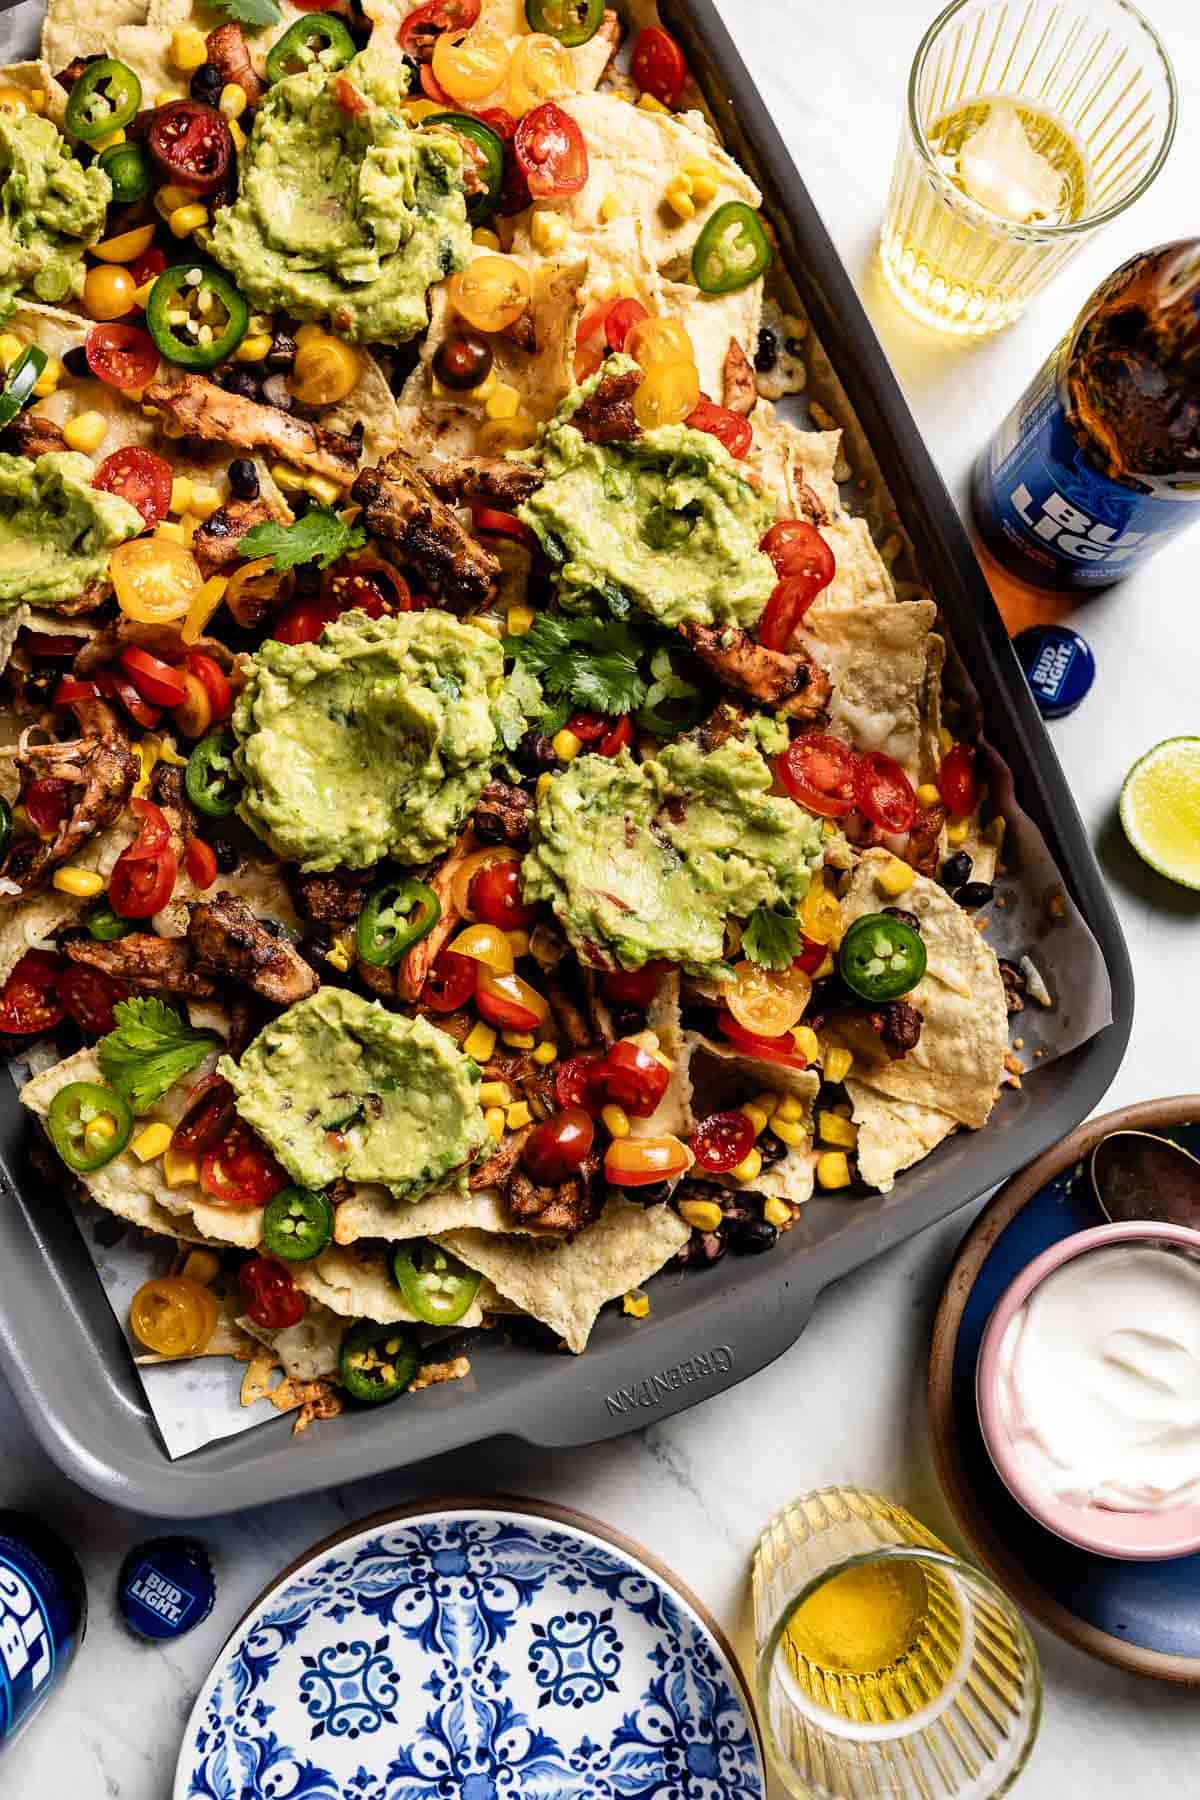
Speaking of being excited, next Sunday is going to be a big one around here as Atlanta’s Falcons are playing in the Big Game. Everyone I know is in a party mood and most friends are reaching out for game day recipe ideas. So I came up with an elaborate Mexican recipe that will wow your friends and family.
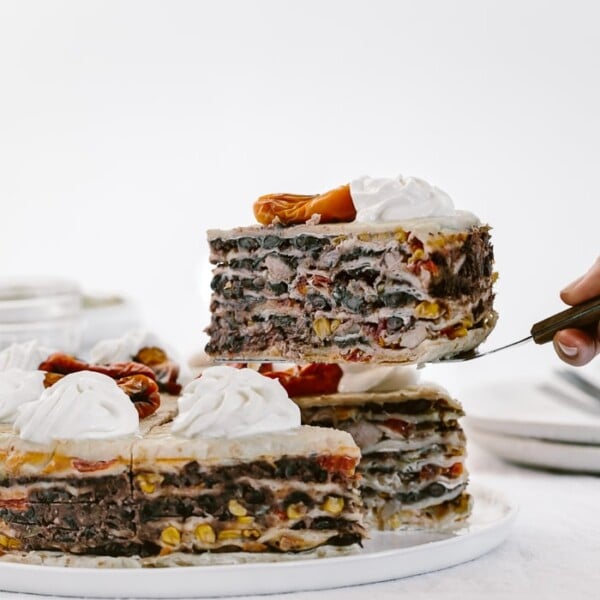
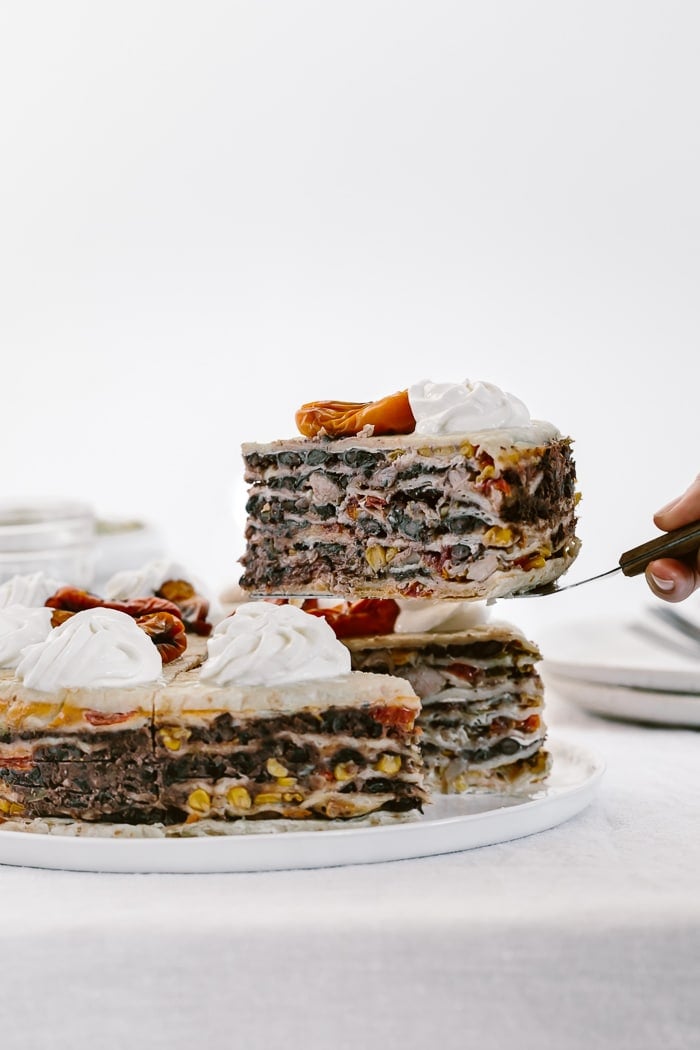
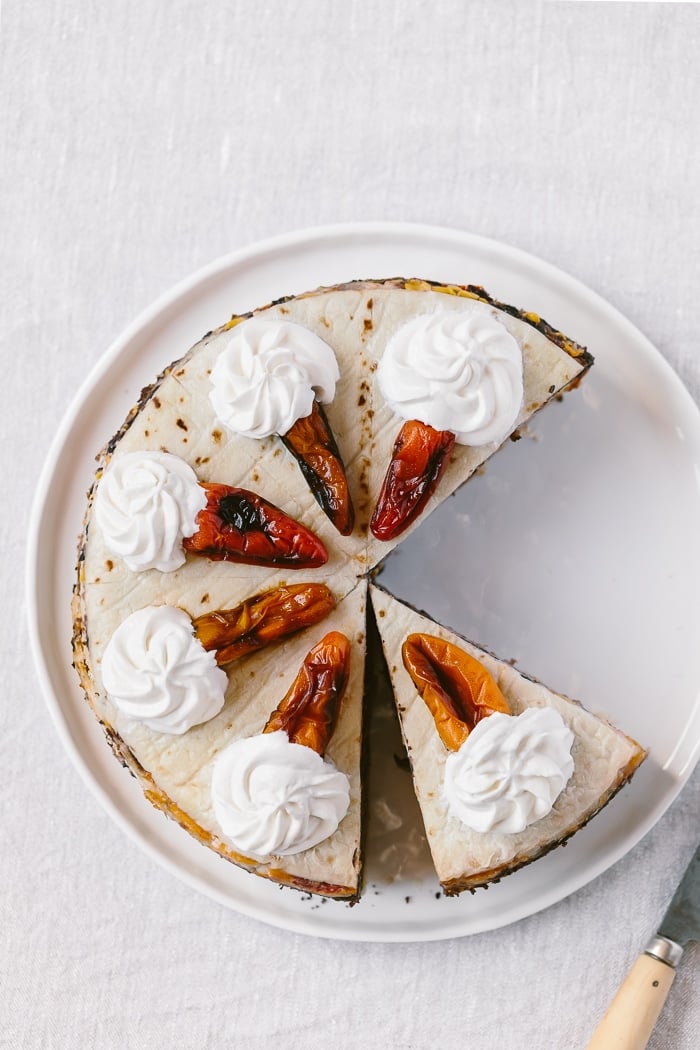
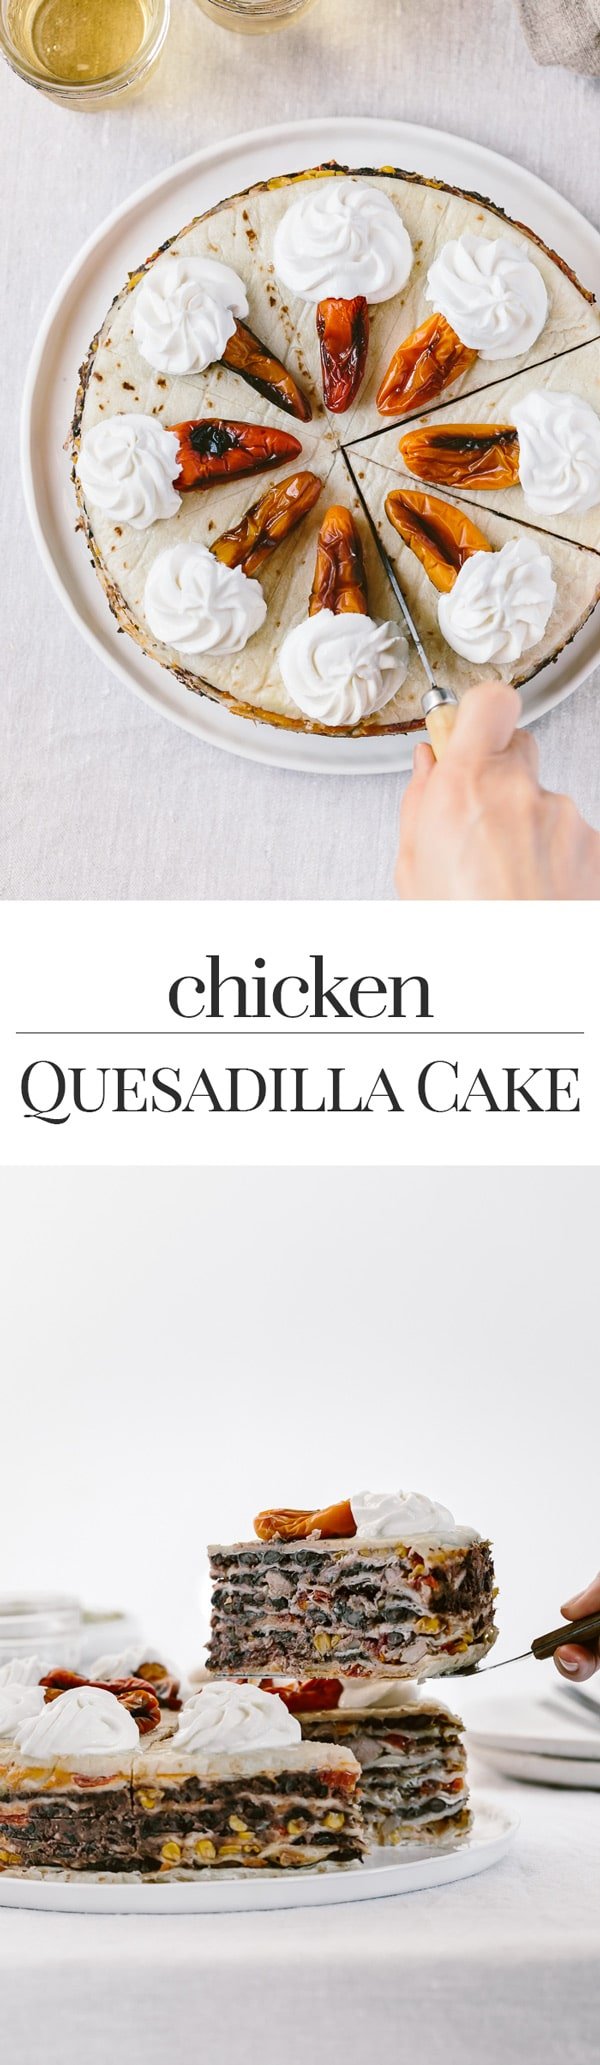
I know this for a fact because I made this chicken quesadilla cake several times during the holidays and it was a big hit every single time. Imagine, our favorite Mexican flavors like refried beans, corn, cilantro, jalapenos, shredded cheese etc., layered between flour tortillas in a large spring form pan, baked in the oven, and sliced and served as “cake”. Who would say no to that?!
About this Chicken Quesadilla Cake recipe:
Admittedly, I have been working on this recipe for over a month now and it took me a few tries to get it right. Below you will find a few tips and tricks, notes on ingredients, substitutions, and make ahead ideas to help you make your own:
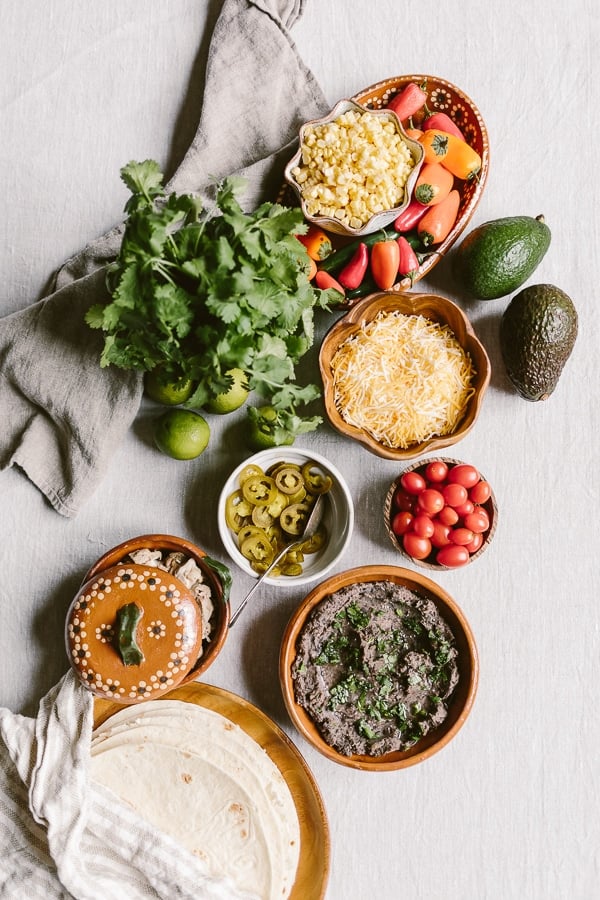
Ingredients:
Now, I will admit the list of ingredients is long, but most of them are readily available in well-stocked pantries. If you are missing a few, you will find everything you need with a quick visit to your local grocery. I purchased everything I needed from our local Kroger Simple Truth product line. I love this brand because the products are mostly organic, natural, and free from artificial flavors. I believe that if you start with the best ingredients you will get the best results at the end. I find that even in an elaborate recipe like this one, you can make it healthy and nutritious by using the cleanest ingredients you can get your hands on. For me, Simple Truth products is just that: clean ingredients I can use in all my cooking, all conveniently available in one place.

This recipe has two parts. The first one is to get the ingredients ready, including making the refried beans. If you are planning to serve this for a party, I recommend prepping everything (including the beans) a day ahead. When you have your ingredients ready, putting it all together is a breeze. The second part is the layering, but we will talk about that in a minute.
The Importance of the Cream Cheese:
In my first try at making this recipe, I did not use cream cheese as I didn’t want additional calories. However, the end product was dry, even with the use of shredded cheese. The layers needed something creamy. While looking for alternatives, I found a similar recipe that used cream cheese and decided to give it a try. The difference in moistness was like night and day. However, I want to mention here, a little cream cheese goes a long way. Only one tablespoon per layer is needed.
Substitutions:
I think the best part of this recipe is the endless possibilities. You can swap chicken with beef, shrimp or pork. Are you a vegetarian? Why not use mushrooms or even tofu instead of chicken? If you do not like jalapeños or cilantro, just omit them. Seriously, you can use whatever you have on hand.
My Tips on Layering:
There are two critical things to pay attention as you layer the quesadilla cake:
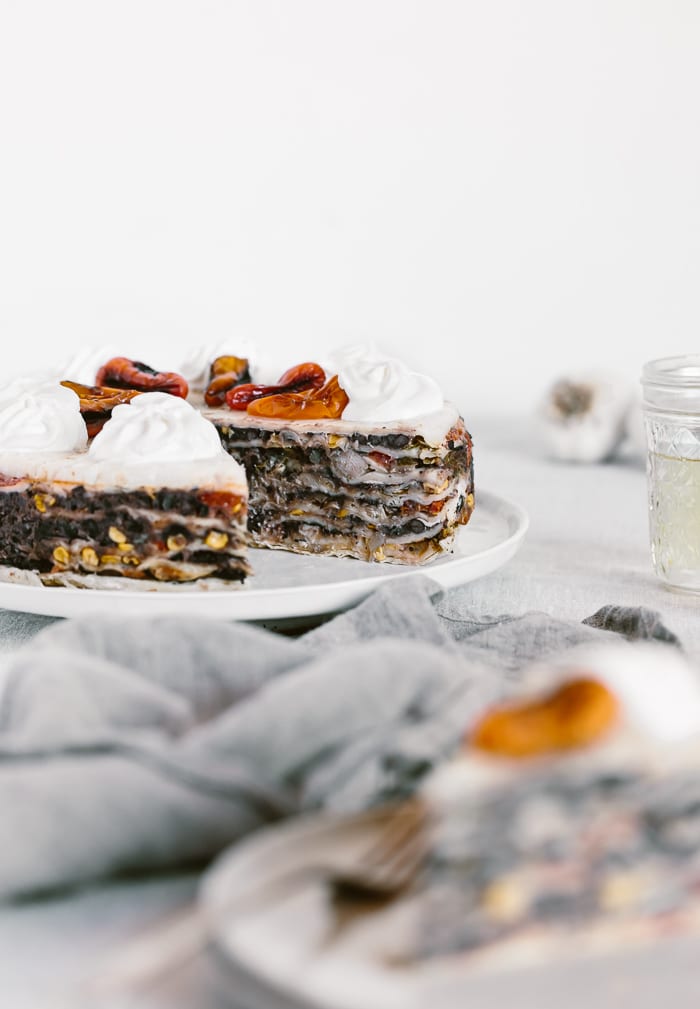
1. The size of the tortillas: As I mentioned earlier, having all your ingredients laid out before you start, including the flour tortillas, is crucial here. The cake in the photos is made of 8 large flour tortillas for a total of 7 layers. To make the whole thing look like a cake, I used a 9-inch spring form pan. However, my tortillas were larger than 9 inches (they were 9 ¾ inches in diameter), so I had to cut them to fit in the pan. With that being said, please know that they do shrink during the baking. This is not an issue for the layers in the body of the cake, but it is a problem for the top layer as it shrinks much more than the body layers.
To fix that issue, I did not cut the top tortilla. Instead, I tucked the excess sides gently into the corners using a spatula (or a butter knife would work as well). After it baked, the tortilla at the top was exactly 9-inches covering the whole cake beautifully.
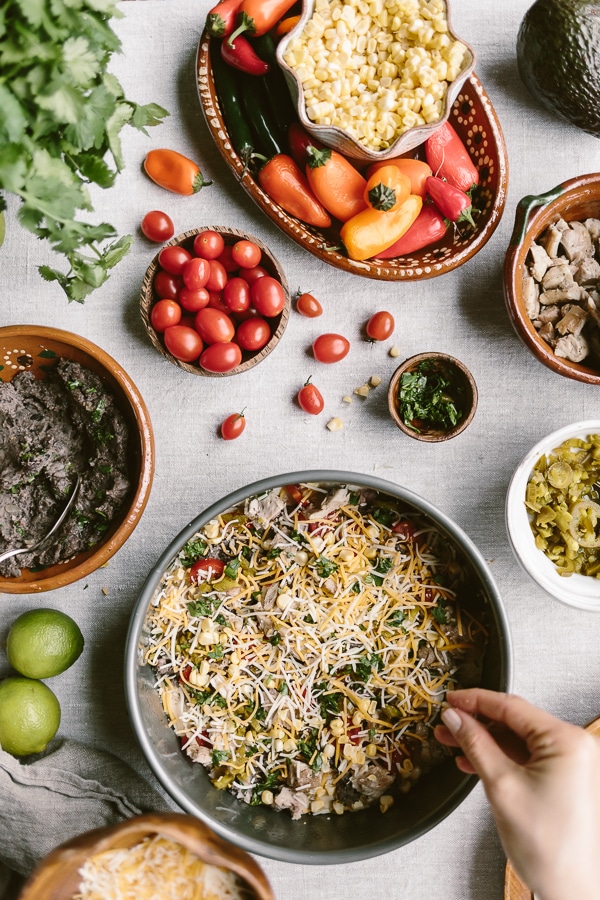
2. Layering evenly: As you build your layers, make sure the ingredients are distributed evenly in the cake pan. You do not need to use every ingredient in every layer. Feel free to mix and match.
Also, after you are finished with each layer and place the next tortilla on top, press with your hand to (1) even out the cake and (2) let air out. Compression is necessary, or you will not be able to fit all seven layers into the cake pan, and the cake will not have attractive height.
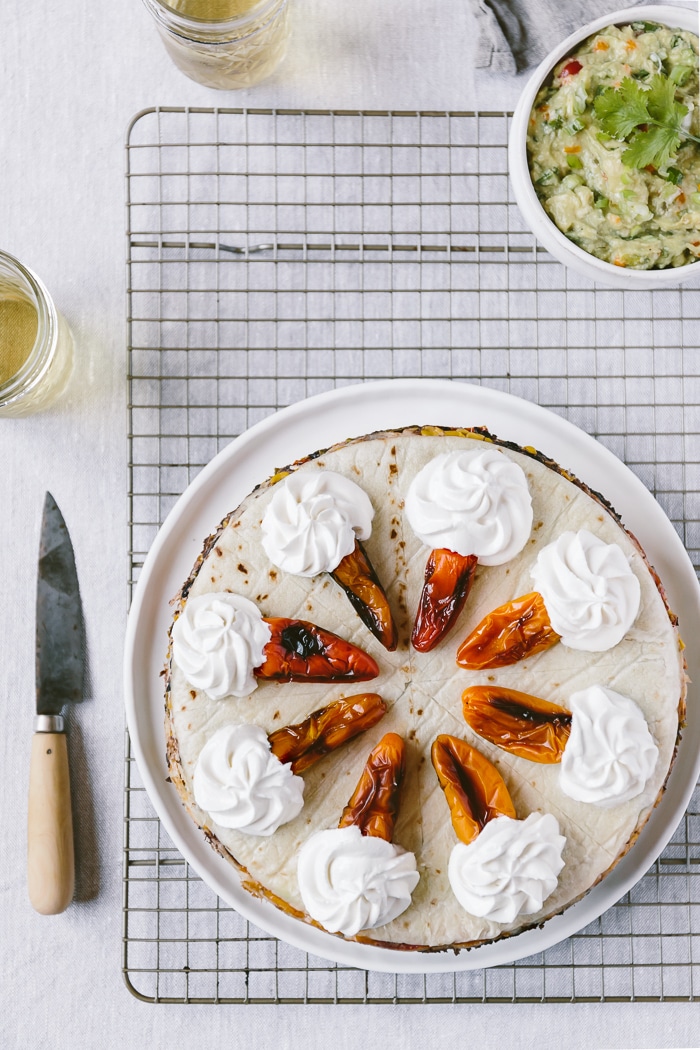
Decorations on Top:
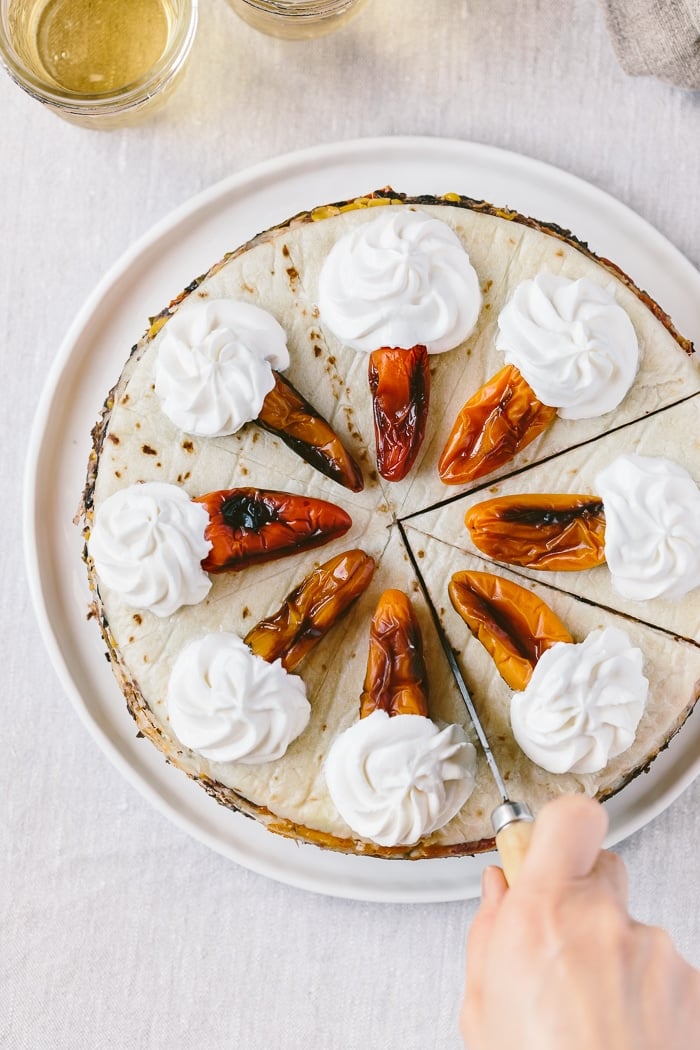
If you are short on time, you can certainly skip the sour cream and sweet pepper decorations on top and serve them on the side. However, if you decide to decorate it as I did, I recommend using a ruler and gently cutting guidelines for yourself to make sure that it will be eight even layers. If you look carefully in the photo above, you can see my lines. Creating the guides will be helpful as you decorate the top and make the wedges look uniform.
On making it ahead, storage and leftovers:
I can almost hear you ask: “Can I make this a day ahead and bake it on the day of?” Yes, you can. However, if you decide to do so, make sure all your ingredients are at room temperature, especially the refried beans. If the beans are hot, the baking process will start immediately leaving you with a semi-baked cake before it goes in the oven.
Simply layer your cake in the spring form pan, cover it tightly with plastic wrap and keep refrigerated until you are ready to bake it.
If a few slices are leftover, refrigerate them in an airtight container, and they will be good the next day. To reheat, remove the sour cream topping (because it would melt in the oven) and place in the oven for 5-10 minutes.
Finally, I know that this has been a longer than usual post. It took several times to get this cake right, so I wanted to arm you with all the knowledge I gained throughout my trials. After reading my notes, it will be a breeze to make, and I hope you will enjoy eating and serving this chicken quesadilla cake as much as I did.
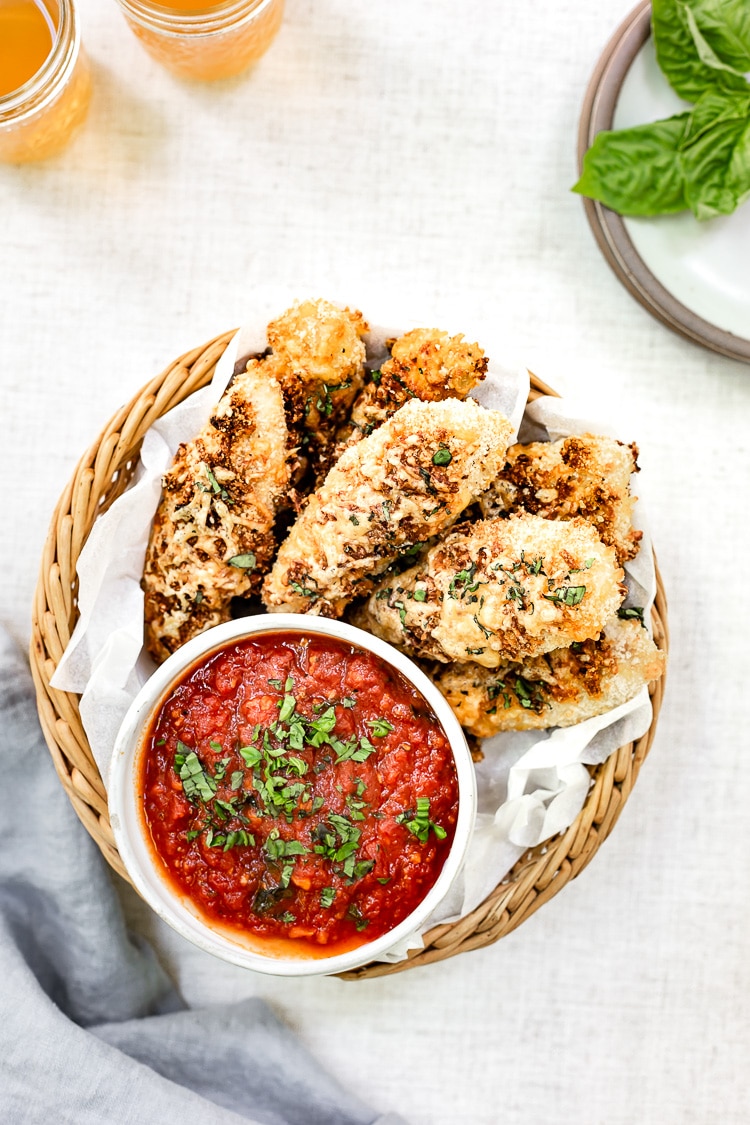
Other Recipes You Might Be Interested for Your Game Day Parties
- Oven-Baked Chicken Wings
- Slow Cooker Sticky Chicken Wings
- Guacamole Burger with Roasted Sweet Potatoes
- Loaded Twice-Baked Potato Skins
- Baby Potatoes with Sun-Dried Tomatoes and Caper Dressing
- Baked Brie with Blackberry Compote and Spicy Candied Pecans
- Need more inspiration? Check out all my Healthy Game Day recipes.

Chicken Quesadilla Cake
Ingredients
For the refried beans:
- 1 tablespoon olive oil
- 1 teaspoon ground cumin
- ½ teaspoon ground coriander
- ¼ teaspoon red pepper flakes, optional
- ½ teaspoon black pepper
- 1 medium size onion, chopped
- 3 cloves of garlic, peeled and minced
- 3 (15 ounce) cans of black beans, drained and rinsed
- ½ cup chicken stock
- ½ teaspoon salt
- 2 tablespoons fresh cilantro, chopped
For the quesadilla cake:
- 8 large flour tortillas
- vegetable spray
- 6 ounces whipped cream cheese, at room temperature
- 12 ounces of shredded Mexican blend, or cheddar cheese
- ½ cup sliced pickled jalapenos, chopped
- 1 15 oz. can of sweet corn, drained and rinsed
- 1 ½ cup cherry tomatoes, sliced thinly
- 1/3 cup chopped fresh cilantro
- 2 cups of cooked chicken, cubed
- 2 tablespoons olive oil
- 8 small sweet peppers, rinsed and pat-dried
- ½ – ¾ cup sour cream, cold
- To serve, optional
- Fresh avocados or homemade guacamole
Instructions
To make the refried beans:
- Heat the olive oil in a large skillet over medium heat.
- Add in the cumin, coriander, red pepper flakes and black pepper.
- Cook, stirring constantly, for 30 seconds.
- Add in the onion and cook until translucent, 4-5 minutes.
- Stir in the garlic and cook for 30 seconds.
- Stir in the black beans, chicken stock, and salt. Put the lid on and let it cook for 7-8 minutes in medium heat. Make sure to give it a stir every 2 minutes or so. It should thicken after the 8-minute mark. If it doesn’t let it cook until it does
- Using a potato masher or the back of a fork, mash black beans as much as you want. I prefer lightly mashed, but it is up to you. Taste for seasoning and add in if necessary. Stir in the cilantro and set aside to cool.
To make the tortilla cake:
- Pre-heat the oven to 350 F°. Lightly spray the inside of a 9-inch spring form cake pan with vegetable spray. Line the bottom of the pan with parchment paper.
- Using the bottom of the pan as your guide cut out 9-inch circles from the tortillas. Do this for 7 of the tortillas. Leave one of them as it is.
- Place the first tortilla at the bottom of the cake pan. Using a spatula, spread it with a tablespoon of cream cheese and 3 tablespoons of black beans. Sprinkle it with some corn, pickled jalapenos, sliced tomatoes, cilantro, shredded cheese and chicken. You do not need to use every single one of the ingredients for every layer. The important thing here is to make sure that every ingredient is spread out evenly before you continue with the next layer.
- Repeat the same thing for 6 more times. As you layer, feel free to push down and get the air out as much as you can. If you feel that some layers are uneven, make sure to go back and even them out.
- When you come to the last layer, it should be pretty packed. You should have used 7 tortillas. Top the last layer with whatever ingredient you have left. Place the largest tortilla on the top. Gently tuck the ends of the tortilla into the pan. You should be covering the top of the cake fully. Lightly spray it the top of the cake with the vegetable spray. Bake in the oven for 30-35 minutes or the top tortilla is lightly browned. Take it out of the oven and let it cool for 10-15 minutes. Run a knife through the edges and take the cake out of the spring form pan. Transfer to a large plate.
- Meanwhile, heat the olive oil in a skillet and fry the peppers until they are lightly charred.
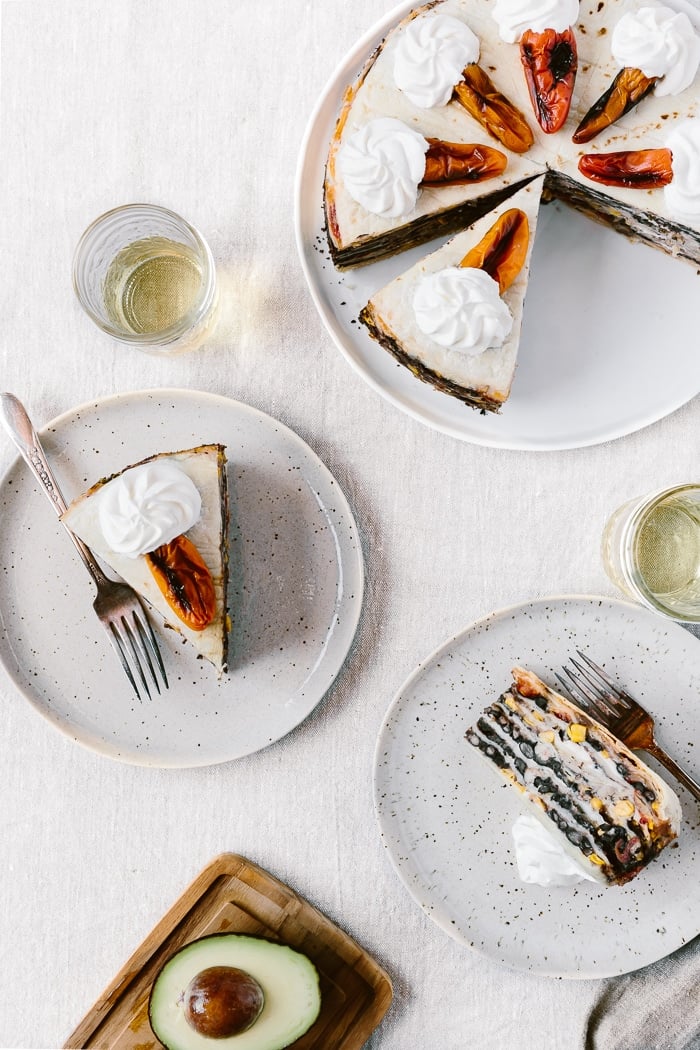
- When ready to serve, place the peppers on the cake as seen in the photos (1 pepper per slice).
- Fill a disposable decorating bag (or a large clean ziplock bag) with sour cream fitted with your favorite decorating tip. Squeeze a large dollop (1-2 tablespoons or so for each slice) of sour cream onto the end of each pepper.
- Slice and serve with fresh slice of avocado or homemade guacamole.
Notes
Nutrition
Nutrition information is automatically calculated, so should only be used as an approximation.
Editor’s note:
This is a sponsored conversation written by me on behalf of Kroger Atlanta. The opinions and text are all mine.


Such a fun way to serve up a savory meal!
Can’t agree more. Thanks Sommer.
This was really amazing! My new favorite!
YAY! So glad to hear that. Thanks Toni.
This is such a fun twist on Tex Mex, which is always a hit around here!
It is a favorite in our house as well. Thanks Lisa.
this is beautiful and such a neat idea!!
Can’t agree more! Thanks Ashley.
I love when food tastes as good as it looks! And this quesadilla cake certainly does!! It made a delicious dinner.
It sure does. This cake is the first one to disappear when I make for parties. So glad to hear that you liked it as well. Cheers!
Can I come to your football party just for the food? What a fabulous savory, Mexican “cake”, Aysegul! I looove spicy food, so I say, pile on the jalapeños! Yes to the mushrooms.. what a delicious way for vegetarians to enjoy this. I can see how the cream cheese would make this over the top, with a little bit of tang to tie all the flavors together. Total faceplant!! Thank you for testing this recipe to get it just right for us… it’s perfect!!
Wow! Just wow! I would face plant into this.
What a beautiful creation! it looks too elegant for a football game!!! the flavors sound delicious. Best of luck with your move to Vermont – it’s such a lovely State I’m sure you’ll soon be at home there:)
OMG! I have never heard of anything like this, I’m going to make this as soon as I can, sounds incredible! 🙂
WOW!!! This is such a great idea. I would have never thought to make a cake like that. Love it!I, too, like to shop from Kroger. I used to go to Publix but after they opened one close to our house, I much prefer the new Kroger now. I need to check out their new line of products. Looks really good. Thank you for sharing!