
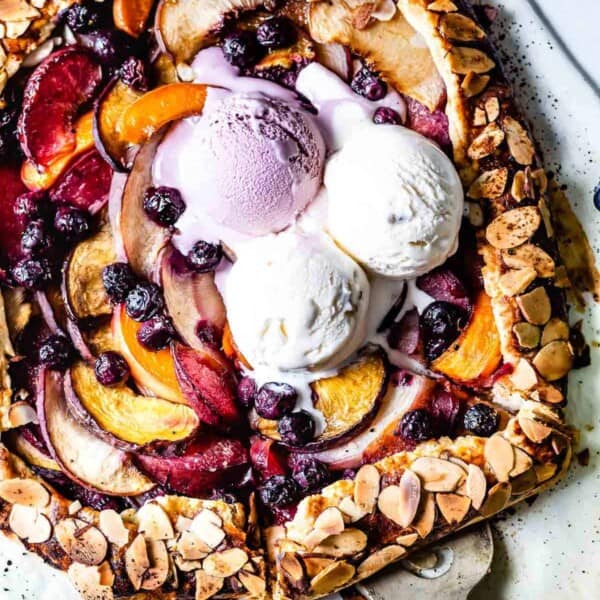

Why This Galette Is My Go-To Summer Dessert

I did not grow up eating fruit pie. It was not until I moved to the United States from Türkiye that I had my first slice, and while I loved it, I found most versions overwhelmingly sweet. As a beginner baker, I also found traditional pie dough daunting.
I set out to solve both problems in my own kitchen. After years of testing, this has become my favorite way to enjoy summer fruit, and I believe it will be yours, too:
- Endlessly Adaptable: The classic pairing is peaches and blueberries, but the real secret is variety. Mixing different stone fruits, like a tart plum or a nectarine, adds depth that no single fruit can. Use what looks best at the market. More on my favorite combinations below.
- A Truly Foolproof Crust: If pie crust intimidates you, a galette is the answer. It uses my foolproof Galette Dough, and instead of fitting a pan and crimping a perfect edge, you just fold the sides over the fruit. The rustic, imperfect look is exactly what you want.
- Barely Sweetened, on Purpose: Most galette recipes drown good fruit in sugar. I go the other way. When peaches and blueberries are at their peak, they are sweet enough on their own, so I use just a touch of sugar to pull out their juices rather than to sweeten them. The fruit stays the star, the way I think summer fruit should be.
Ingredients Notes And Substitutions
This easy peach blueberry galette has two components: the galette dough and the fruit. You probably already have most of what you need on hand. But over the years, I have picked up a few things worth sharing before you start.
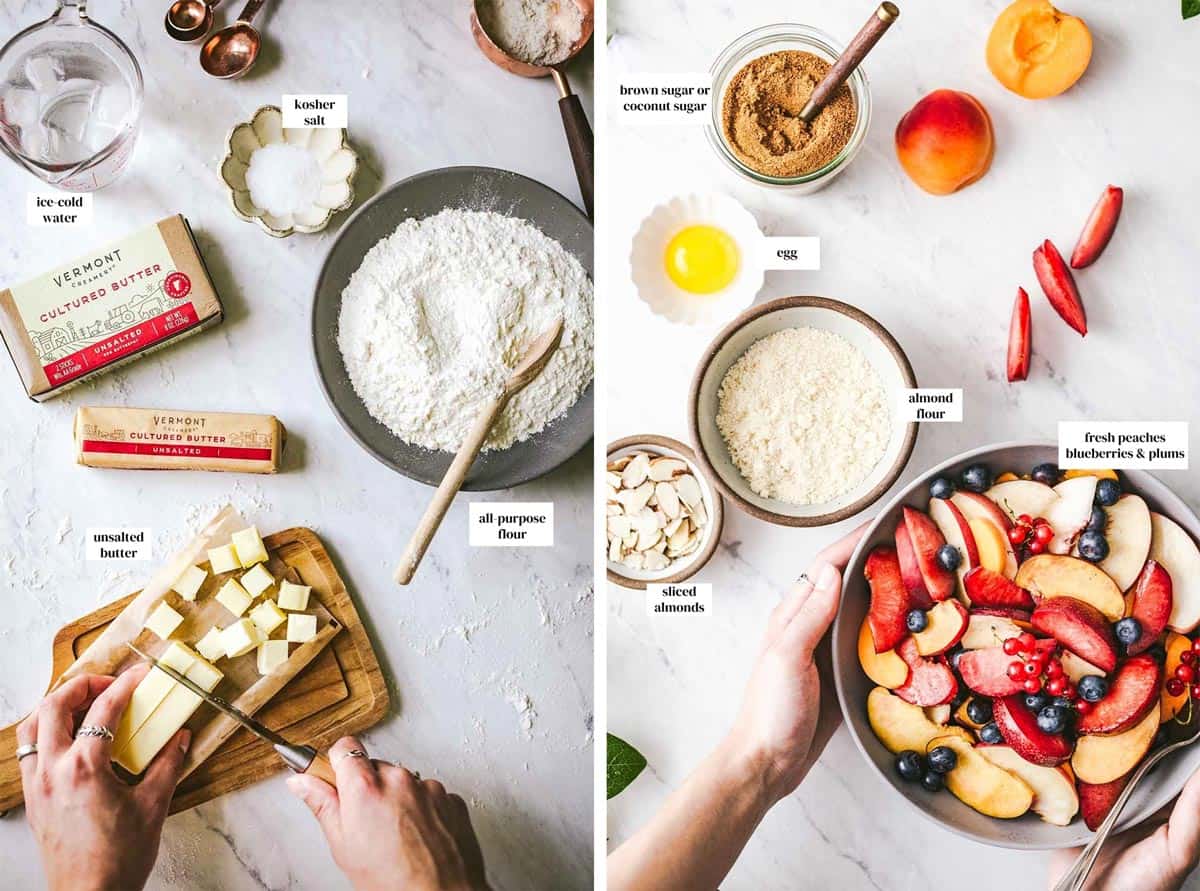
You can find the full ingredient list and exact measurements in the recipe card. Below are some helpful notes from my recipe testing:
Butter: Any butter works here. I prefer unsalted butter, but if all you have is salted butter, you can omit the salt and use it instead. If you can find it, European butter is worth it. My favorite is Vermont Creamery’s cultured butter. Its higher fat content (around 82%) makes the dough easier to handle and the crust flakier.
Whatever butter you use, the one rule is that it must be cold for a flaky crust. I cut it into small pieces and put it in the freezer for a few minutes before making the dough.
Peaches and blueberries: I use mildly ripe yellow peaches with the skin on, though white peaches or nectarines work well too.
For blueberries, the sweeter the better, and avoid any with bruises, so take a minute to pick through them.
Take advantage of the season’s abundance: While it is optional, a small amount of a third stone fruit balances the sweetness with a little tang. I use a plum, but apricots are lovely too.
Should I peel the peaches? Personal preference. I leave the skin on for texture, but peeled works just as well.
Can I use canned or frozen peaches? Yes, with a couple of cautions:
- Frozen: Thaw the peaches and pat them dry on paper towels to avoid adding extra water.
- Canned: Drain canned peaches very well, and know that the syrup they sit in will make your galette sweeter.
Coconut (or brown) Sugar: I like the mild, fruity flavor of coconut sugar, but light brown sugar substitutes one-to-one. If your fruit is very ripe, you can use less or even skip it.
Almond Flour (or almond meal): Optional, but a small amount acts as a barrier between the crust and fruit, soaking up excess juice. It also adds a welcome nutty flavor.
Buy it from the store, or make almond flour at home using blanched almonds.
Almond Slices: Also optional, they add a nice crunch to the crust. Skip them, or swap in other chopped nuts like pistachios or pecans, or seeds like pumpkin or sunflower seeds.
How To Make Blueberry And Peach Galette
This peach blueberry galette comes together in three simple steps: making the dough, preparing the fruit, and assembling before baking. Here is exactly how I do it.
Make the galette dough:
I have shared my foolproof galette dough technique two ways: in the food processor and by hand. The steps below use the food processor because it is faster, but if you would rather make it by hand, see my Galette Dough Recipe.
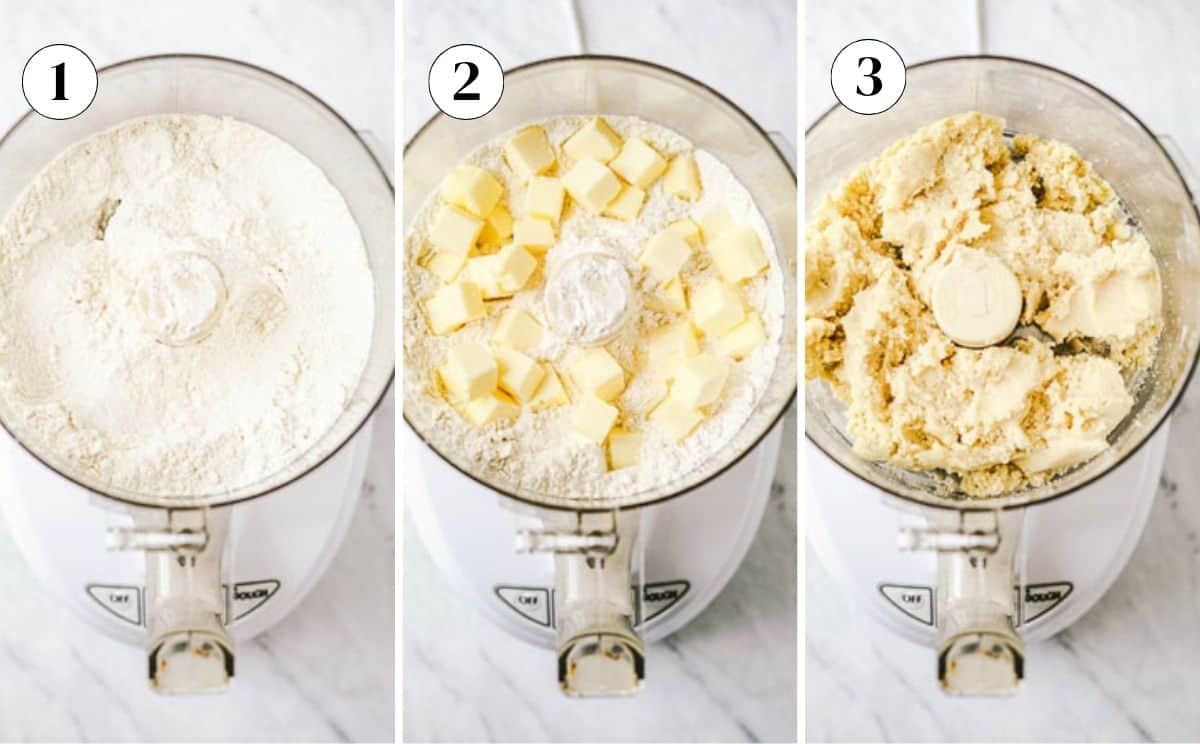
Step 1 – Mix the dry ingredients: Place the flour and salt in the bowl of a food processor fitted with the metal blade, then pulse 3 to 4 times to mix, ensuring the salt is evenly distributed throughout the dough.
Step 2 – Cut in the butter: Add the cold, cubed butter and run about ten 1-second pulses, until the mixture looks like coarse sand with butter pieces the size of small lentils. That balance is what gives you a crust that is both flaky and tender.
Step 3 – Add the ice water: With the machine running, add the ice water one tablespoon at a time until the dough starts to collect on the sides and form into a ball. That is your visual cue that the dough is ready.
Pro tip: Be patient with the dough. I list the water as 4 to 5 tablespoons, and over countless times making this, I have never needed more. Resist the urge to add liquid, give your food processor a minute, and trust the process.
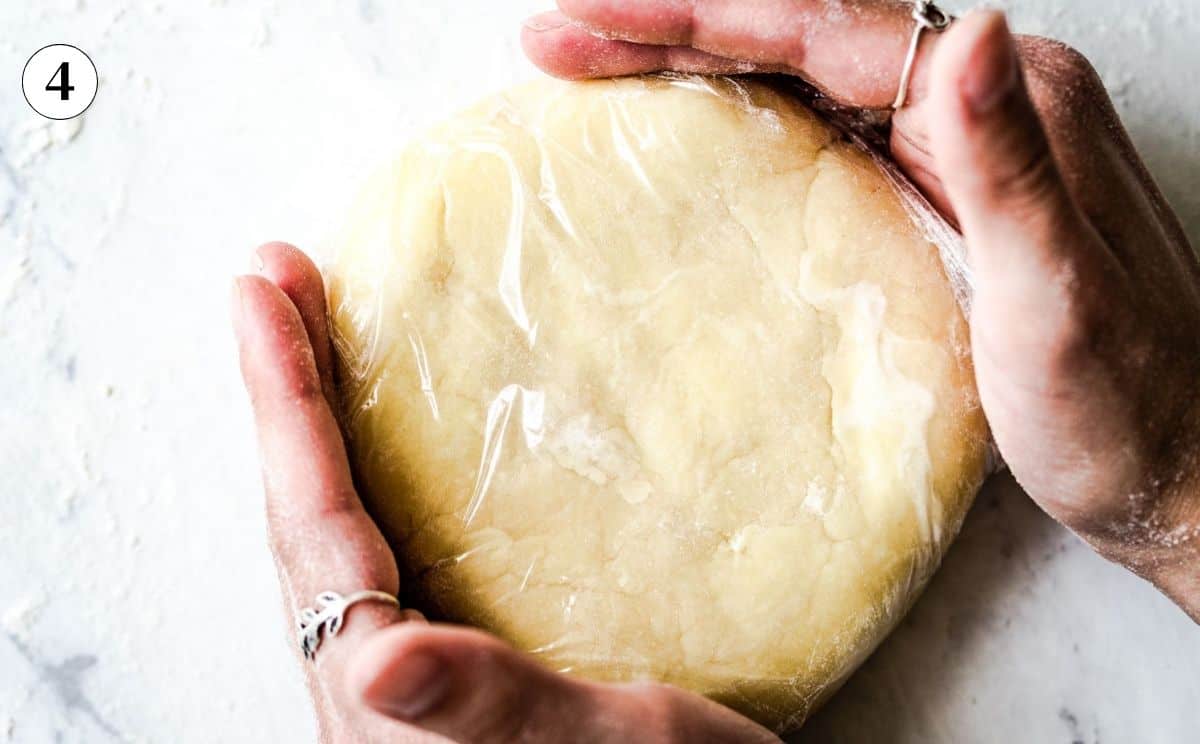
Step 4 – Shape and chill: Transfer the dough onto a lightly floured surface, shape it into a 4-inch disk, and wrap it tightly in plastic wrap. Let it chill in the fridge for at least 45 minutes (or up to 2 days). This resting time keeps the butter solid, which is key to creating those flaky layers.
Step 5 – Soften before rolling: Take the dough out of the fridge and let it rest on the counter for 10-15 minutes to make it easier to roll out. Keep in mind that if it has been chilling for more than 4 hours, it may take longer to soften.
Prepare the fruit filling:
Step 1 – Slice the fruit: Pit the peaches and plum (if using), and cut them
into ¼-inch (0.6 cm) thick slices and transfer them to a medium-sized bowl. Slice them to an even thickness so they bake at the same rate. Add the blueberries.
Step 2 – Macerate: Sprinkle the fruit with sugar and let it rest for a few minutes. As it sits, it softens and releases its juices. You will drain most of that liquid later, but the fruit keeps the concentrated flavor, which is what makes maceration worth the wait.
Assemble:
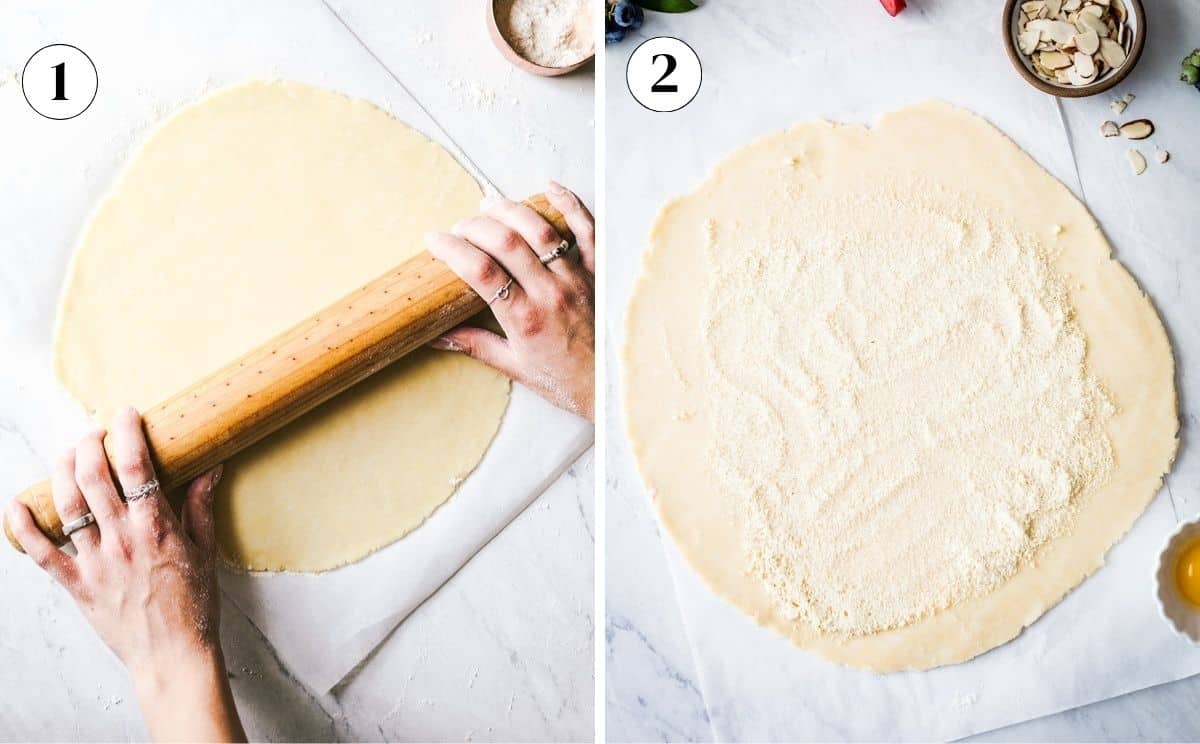
Step 1 – Roll the dough: Preheat the oven to 375°F (190°C). Unwrap the dough and lightly flour your counter. Roll it into a 12-inch (30 cm) circle, turning often for even thickness and a round shape. Drape the dough over your rolling pin to lift it onto a piece of parchment paper.
Step 2 – Spread it with almond flour: Sprinkle almond flour over the dough, leaving a 2-inch (5 cm) border around the edge. You want that room to fold the dough over the fruit later.
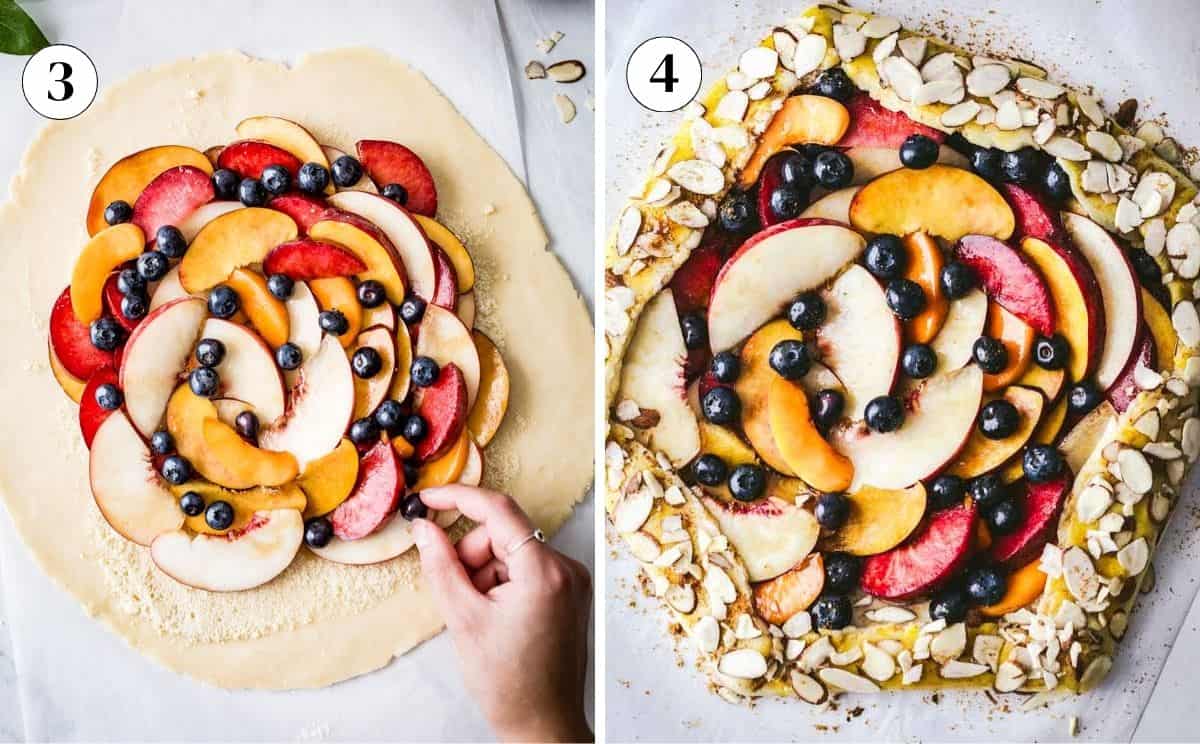
Step 3 – Mound the fruit filling: Reserve 2 tablespoons of the fruit juices and drain off the rest. Resist adding it all back; this is the number-one reason galettes end up with a soggy bottom.
Pile the drained fruit in the center, spreading it evenly and keeping that border clear.
Step 4 – Fold the edges: Fold the dough toward the middle, gently pleating every 2 to 3 inches (5 to 7 cm). Brush the crust with an egg wash (one beaten egg mixed with one tablespoon of water) and scatter the almond slices over the folded edges.
Will the sliced almonds burn? I worried about this at first, expecting them to scorch over the long bake. They did not. They turn even crunchier and perfectly toasted.
Step 5 – Chill the shaped galette: Using the parchment paper, transfer the galette to a baking sheet and refrigerate for 15 to 20 minutes.
This is an important step in that a cold crust hits the hot oven and sets quickly, so the bottom firms up before the fruit juices can soak in. That is my second defense against a soggy bottom, after draining the fruit.
Bake:
Step 1 – Bake: Put the galette in the oven straight from the fridge and bake for 50 to 55 minutes, or until the crust and sliced almonds turn golden brown.
Step 2 – Cool and serve: Transfer it onto a wire rack and let it cool on the counter for a few minutes.
Optionally, brush the fruit with diluted honey to rehydrate and add a glazed finish, as the long bake can dry it out.
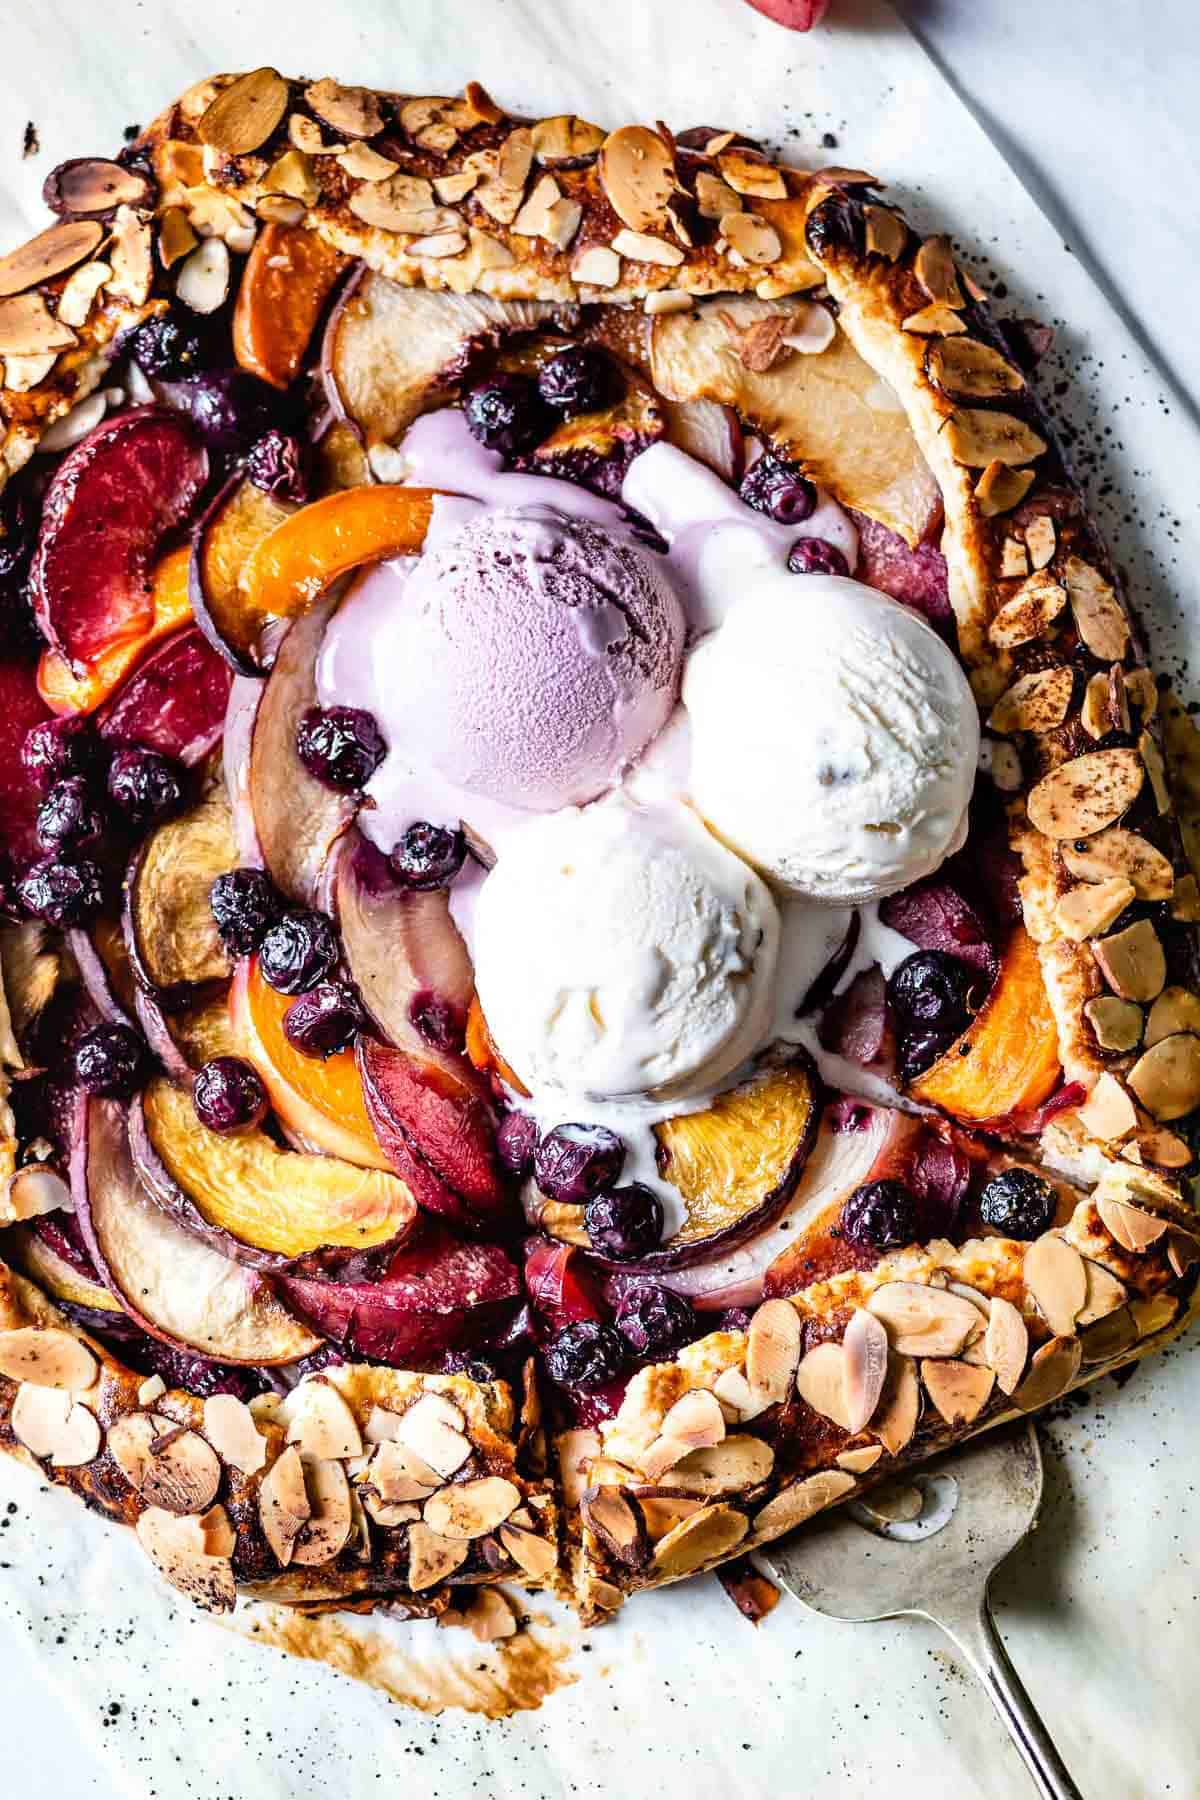
Serve while it is still warm or at room temperature, preferably with a scoop of vanilla ice cream on top.
Why Galettes Get a Soggy Bottom (and How I Prevent It)
It comes down to one thing: fruit releases a lot of liquid. If all that juice sits under the crust before the dough has a chance to set, the bottom of the crust goes soggy.
So my whole approach is about keeping that juice in check and setting the crust fast:
- Chill the shaped galette so it hits the oven cold and the bottom firms up before the juices can soak in.
- Drain the macerated fruit before adding it to the dough, so most of the liquid never touches the crust.
- Sprinkle almond flour on the dough as a barrier between the crust and the fruit, where it soaks up any juice that does make it through.
How To Make Ahead, Store And Reheat
Make-ahead: Assemble the galette up to a day ahead, cover it with plastic wrap, and refrigerate. When I have guests, I bake it straight from the fridge about an hour before serving, so it lands on the table warm and flaky right at dessert time.
Store: Let the leftovers cool to room temperature and store in an airtight container in the fridge for up to 2 days.
Reheat: You can enjoy this galette cold or reheat it in a preheated low-heat oven (300°F (149°C) oven for 5-8 minutes to bring the crust back to its buttery, flaky texture.
Freeze: I do not recommend freezing this baked peach-and-blueberry galette as the sliced fruit will lose its texture when thawed.
However, the dough can be made ahead and frozen for up to 1 month. Tightly wrap it in stretch film to prevent freezer burn. A day before you plan to assemble the galette, thaw it in the fridge overnight and use it in the recipe as written.
How To Serve
While you can enjoy this Peach Blueberry Galette on its own, here are a few of my favorite serving suggestions:
- With ice cream: A few scoops of Vanilla Ice Cream make the most of a warm galette. When I can find it, I reach for blackberry or blueberry ice cream instead, for a pop of color and an extra layer of flavor.
- With crème fraîche: For the French way, add a dollop of crème fraîche on the side. The tang balances the sweetness of the fruit.
Other Peach Recipes You Might Like:
While they are in season, here are a few other ways I like to use them:
- Another peach dessert: My Peach Blueberry Tart has a similar flaky crust finish and comes together in less than an hour.
- A 5-minute smoothie: My Peach Mango Smoothie works with fresh or frozen peaches.
- A savory surprise: If you have never used peaches in a savory recipe, try my Avocado Peach Salad for a modern twist on a summer salad.
This post may contain affiliate links. If you purchase through these links, I may earn a small commission, at no additional cost to you.

Peach Blueberry Galette Recipe
Ingredients
For The Galette Dough:
- 1 ½ cups all-purpose flour, (213 gr.) more to flour the surfaces
- ½ teaspoon kosher salt
- 10 tablespoons cold unsalted butter, (142.5 gr.) cut into small cubes
- 4-5 tablespoons ice-cold water
For The Filling:
- 2 peaches, medium-size* – sliced ¼ inch thick slices
- 1 plum, sliced ¼ inch thick slices – Optional
- ½ cup blueberries
- 1 ½ tablespoons coconut sugar, or brown sugar
- 2 tablespoons almond flour, or almond meal, optional
- 1 large egg, lightly whisked
- ½ cup sliced almonds, with or without the skin on
- 1 tablespoon honey, (optional)
Instructions
- To make the galette dough: Place flour and salt in the bowl of a food processor. Pulse for a few times to mix. Add in the cold butter cubes. Pulse 8-10 times until butter resembles small clumps.
- Turn the machine on and add in 4 tablespoons of ice-cold water in one tablespoon increments.
- At this point, it should start to come together and form into a ball. If not add in the rest of the water until it does.
- Transfer onto a lightly floured surface, form it into a 4-inch disk, and wrap with plastic. Place in the fridge for at least 1 hour or overnight.*
- Take it out of the fridge 10 minutes before you are ready to roll it out.
- To make the filling: Place peaches, plums, blueberries in a bowl. Sprinkle it with coconut sugar. Set it aside to macerate.
- Pre-heat the oven to 375 F degrees (190 C.) Prepare a sheet of parchment paper that will fit into the baking sheet.
- To assemble: Lightly flour your working surface. Roll the dough into a large 12-inch circle. Transfer onto the parchment paper and then onto the baking sheet.
- If you are using, sprinkle it evenly with almond meal leaving a 2-inch border on the sides.
- Reserve 2 tablespoons of the juices and drain the rest of the fruit.
- Spread the fruit on top (with the juices) slightly mounting in the middle, again leaving a 2-inch border around the edges.
- Roll the sides of the dough overlapping as you go around and pleating the dough.
- Whisk egg with a tablespoon of water to make egg wash.
- Brush the outer crust with egg wash and sprinkle with sliced almonds lightly pressing to make sure they stick.
- Place it in the fridge and let it sit in there for 10-15 minutes (no more than 24 hours*) so it is very cold before placing in the oven.
- Bake 50-55 minutes or the crust turns golden brown. Transfer the galette onto a wire rack to cool.
- If preferred, dilute honey with a tablespoon of water and lightly brush the top of the fruit.
- Serve while it is still warm.
Video
Notes
- The dough can be kept in the fridge upto 2 days or can be frozen (tightly wrapped) upto a month.
- Prep time includes 1 hour of dough resting in the fridge.
- Making ahead: * You can assemble the whole thing a day in advance, cover with stretch film, and refrigerate. Bake it an hour before you plan to serve it for the freshest taste.
- Storage: Leftover peach galette can be stored in an airtight container up to 2 days. Be sure to bring it to room temperature before storing.
- To reheat: Heat in a preheated 300 degrees F oven for 5-8 minutes before serving.
- Peaches: I prefer medium-ripened peaches for this recipe. If they are hard, I leave them out a day before I plan on making this recipe.
- Using Puff Pastry Instead: I highly recommend making your own galette dough, but if you prefer the convenience of store-bought puff pastry, you can use it as a substitute. Follow the rest of the recipe as written. The only difference is the baking time. Since puff pastry bakes faster than pie crust, I recommend baking it at 425°F (218°C) for 15–18 minutes or until the crust is golden brown.
Nutrition
Nutrition information is automatically calculated, so should only be used as an approximation.












Did I miss the part about the juice reserves?
Hi Sue,
I am sorry that it was not clear in the recipe.
You put it in the galette. You do need a bit of juice to keep the fruit from drying, but if you put all of it you run the risk of it getting soggy.
I added a note in the recipe card to clarify. Please let me know if I can help you further.
Delicious & loved by the whole family – thanks!!
Happy to hear that. Thanks Christina.
How do you store leftovers —room temp or frog?
Hi Cindy,
I would place it in an airtight container and keep it on the counter up to a day. If you don’t plan on consuming the next day, then I would place it in the fridge (in an airtight container) up to 2 days. When ready to serve, you could warm it up for 5-8 minutes or so in a preheated (300 degrees F) oven.
I hope this helps.
Cheers,
Ice
Can I use Almond flour instead of all-purpose flour? It looks like so much fun to make. Looking forward to your answer>
Hi Joan,
Sadly, I do not think that almond flour would behave the same way here.
I know that was not the answer you were looking for, but I think it would be too crumbly.
Hope this helps.
I continuously follow you as you have great recipe! I am mostly interested by low carb low or no sugar recipes and you had a few of those with almond flour, coconut flour, oats, etc and using sweeteners to replace sugar. Can you share please whether it is baking a dessert or preparing a meal, pizza, galette, etc thks so much, be well and keep safe, Cyril
This dessert is absolutely gorgeous! I’m going to go buy stone fruit tomorrow to make this! Thanks for the recipe!
This makes me so happy Amy. Thanks so much for coming by.
Cheers!
Ice
As I am a fan of Peaches: this is one of my favorites dessert. Thanks for the perfect recipe.
YAY! Music to my ears. Thanks Darly.
This has become our late summer fave dessert!
Thanks Cathy!
It was so delicious!! Can’t wait to make it again!
YAY! So happy to hear that. Thanks Toni!
I’m not ready for summer to end! I made this Labor Day weekend and it was delicious! I need to make it again!
This is music to my ears. Thanks Lauren.