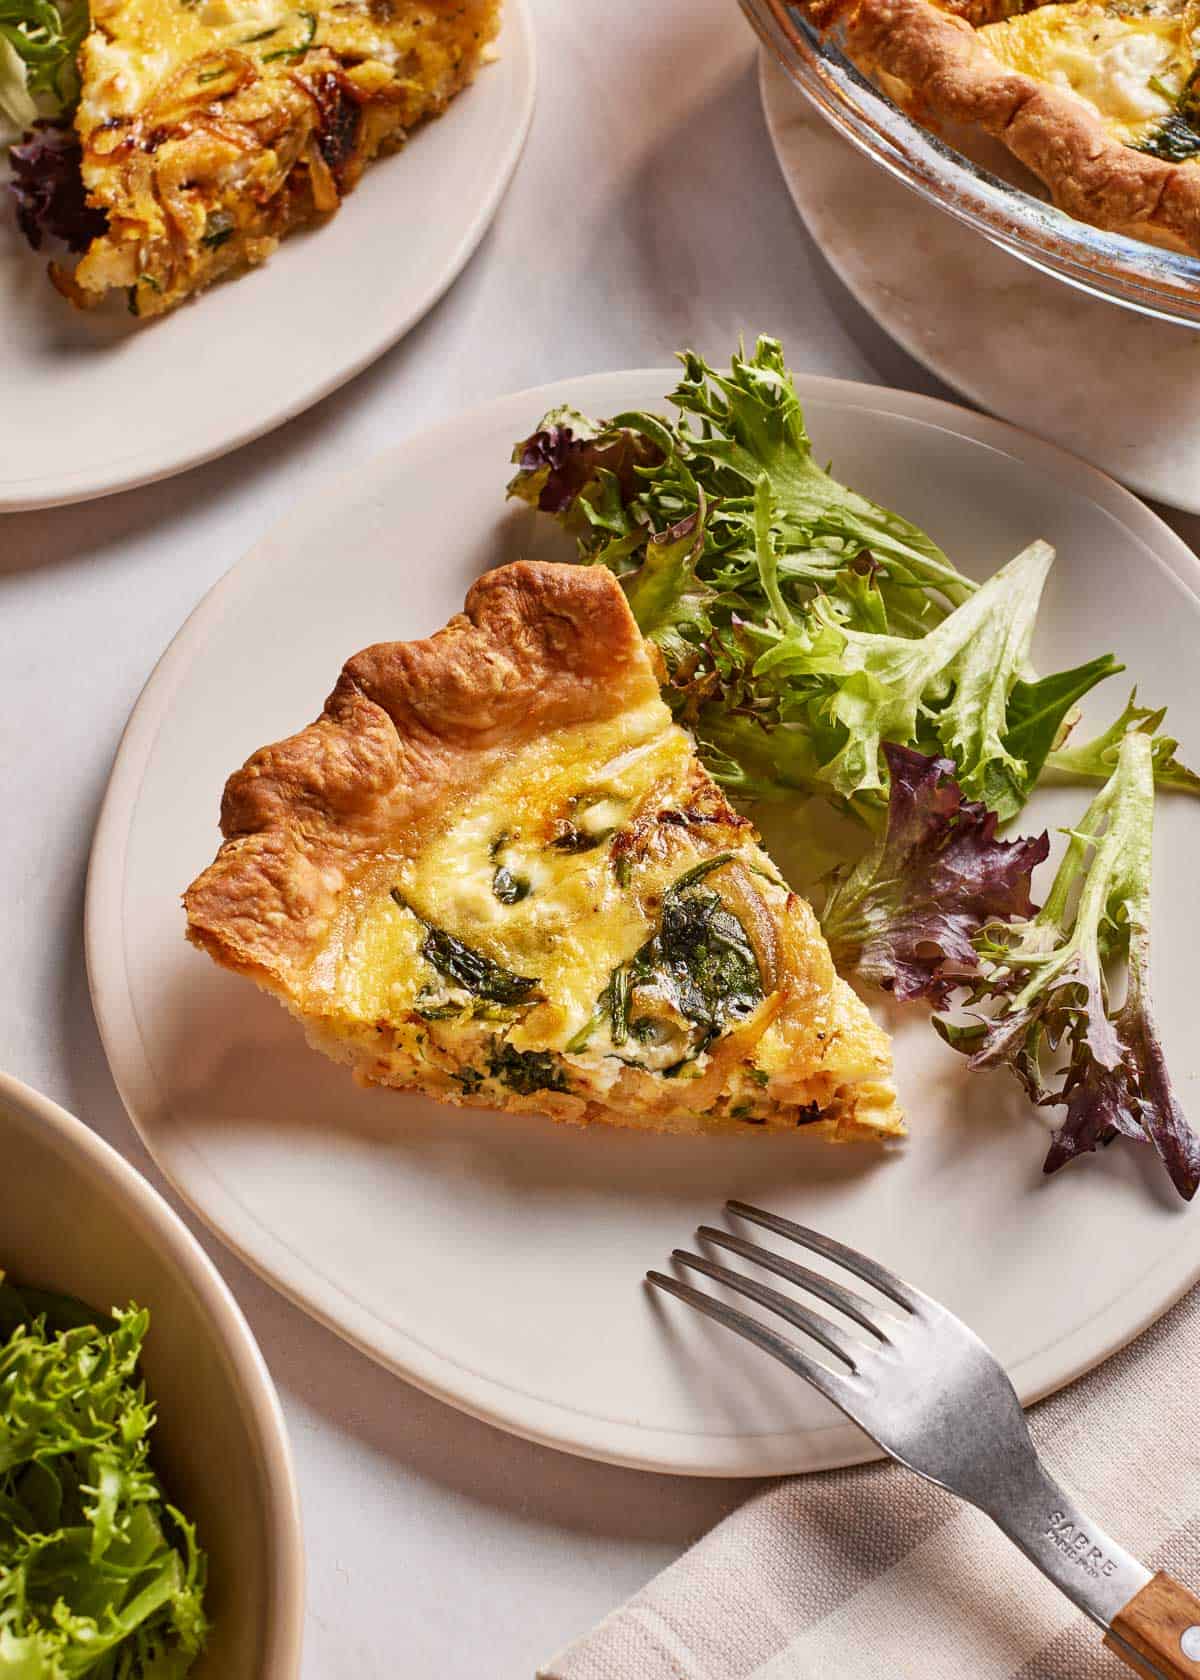
If you’re a fan of cooking with goat cheese, this quiche is a great addition to your collection—right alongside some of my other favorite goat cheese recipes.
What You Need to Know in a Nutshell:
Here are the key things to keep in mind when making this spinach and goat cheese quiche:
- Crust options: While I made my goat cheese quiche using a homemade pie crust, you can use a store-bought premade pie shell as well. If you choose to make your own, it can be made ahead and frozen. If preferred, you can use a gluten-free pie crust.
- Creamy custard base: This isn’t your average quiche. Unlike most recipes that use milk, this goat cheese quiche recipe uses heavy cream to create a custard that’s extra rich and velvety. The result is a filling that’s exceptionally smooth and creamy.
- Let it rest: The quiche might look a little soft in the center when it first comes out of the oven, but it firms up as it cools.
How To Make Goat Cheese Quiche?
This caramelized onion goat cheese quiche recipe comes together in a few easy steps. While it looks impressive, it’s quite approachable—especially if you prep the crust ahead. Let me walk you through how to make it:

- Gather your ingredients: You’ll find the full list of ingredients in the recipe card below. Below are a few helpful notes:
- Goat Cheese: Buy already crumbled goat cheese to save on time. Alternatively, you can also use herbed goat cheese that you can find in most supermarkets.
- Pie Crust: If you’re making your own crust (which I highly recommend if you have the time), you can prep it a few days ahead, cover it tightly with stretch film, and keep it in the freezer until you’re ready to use it. Store-bought is perfectly fine too, especially when time is tight.
- Fresh or frozen spinach: I used fresh spinach that was previously washed and spin-dried (a great time saver!). You can use an equal amount of frozen (and thawed) spinach, but make sure to remove the excess liquid before adding it into the filling. If preferred, you can omit using spinach and flavor the caramelized onion with a tablespoon of chopped fresh thyme.
- Optional additions: While my recipe for my goat cheese quiche only uses a combination of caramelized onions and spinach, you can add ¼ cup of drained sun-dried tomatoes, sauteed or roasted mushrooms, or a handful of thinly sliced prosciutto into the mixture.

- Make the pie dough: Start by mixing together the sour cream and ice water in a small bowl. In a food processor, combine the flour, sugar, and salt, then add cold butter. Pulse a few times until the butter is incorporated into the flour. Pour in the sour cream mixture and pulse again until the dough clumps together.
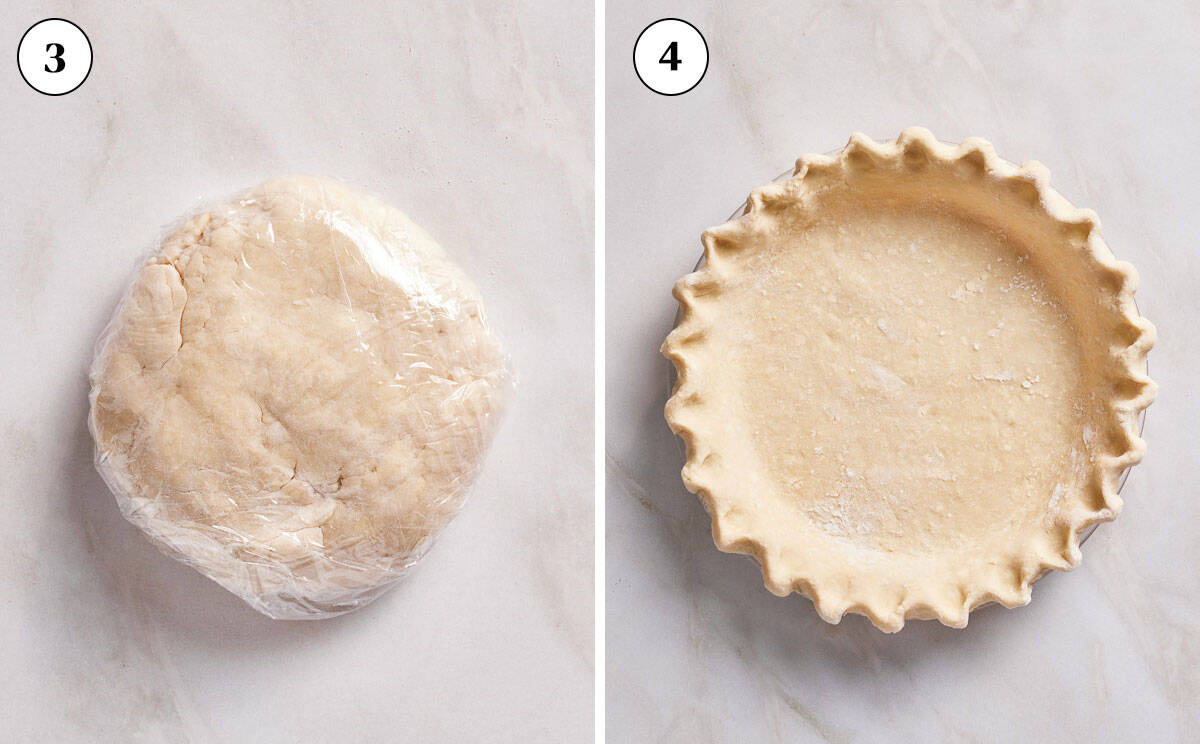
- Let it rest: Turn it out, form it into a 4-inch disk, wrap it up with stretch film, and transfer it into the fridge for at least an hour—or overnight if that works better for you.
- Roll and shape the crust: When you’re ready to bake, let the dough sit out for 10 minutes so it’s easier to roll. Roll it into an 11-inch circle on a lightly floured surface, then carefully transfer it to a 9-inch glass tart pan, gently pressing it into the bottom and up the sides.. Tuck any excess dough under itself to create a neat edge. If preferred, using your thumb and index finger on one hand and the knuckle of your opposite index finger, gently pinch the edge to form a fluted pattern. This optional step is a small touch, but it gives the quiche a lovely, classic look. Cover it and place it in the freezer for about 15–20 minutes so it holds its shape when baking.
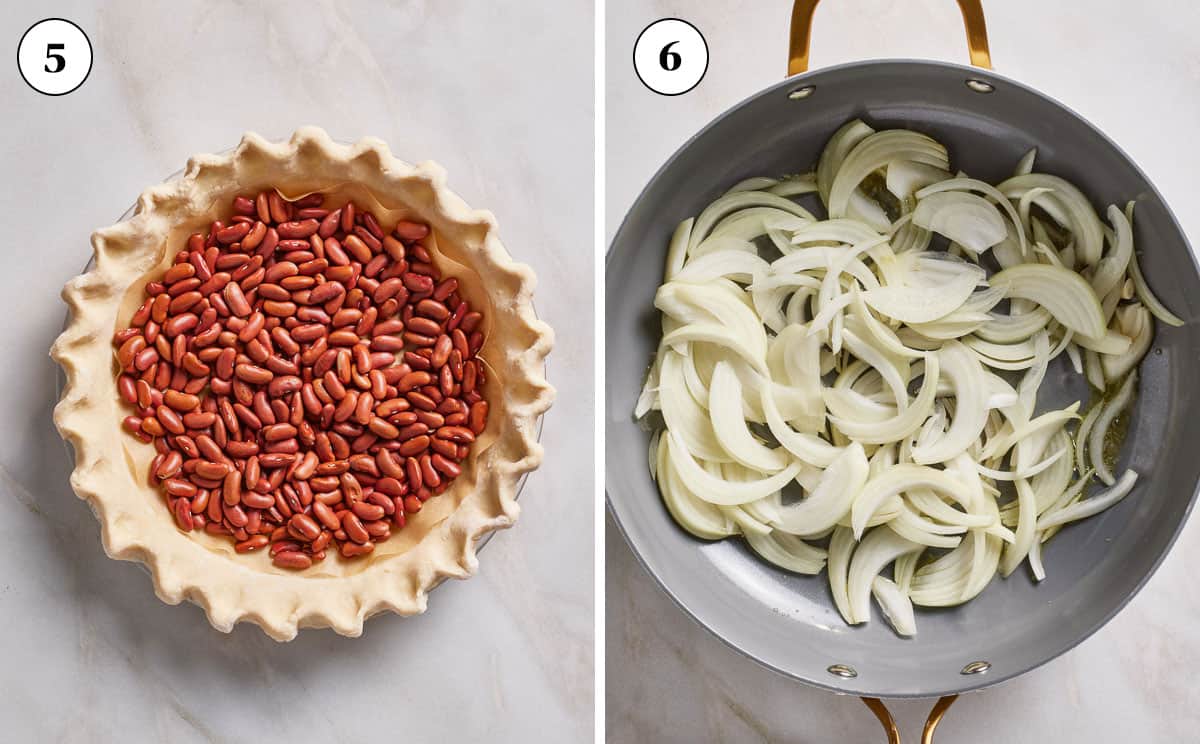
- Blind bake the crust: While the crust is chilling, preheat your oven to 375°F (190°C). Once chilled, line the crust with parchment paper (or aluminum foil) and fill it with pie weights (or you can use dried beans like I did). Bake for 30 minutes, then remove the weights and parchment and bake for another 5 minutes until the edges are lightly golden. Set it aside to cool a bit. (No need to turn off the oven.)
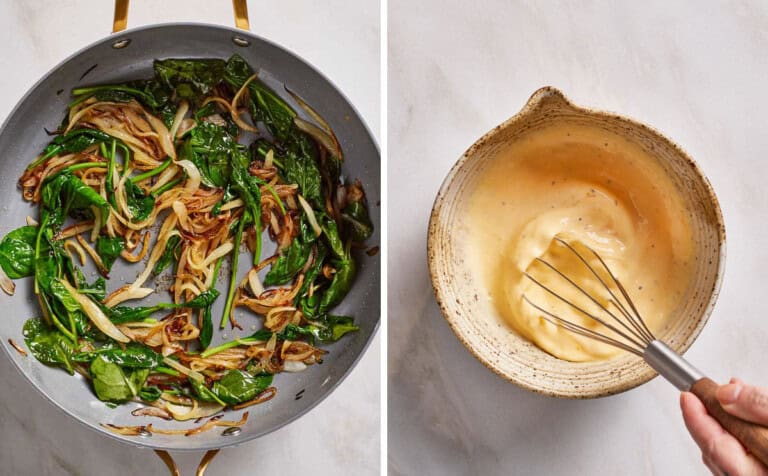
- Caramelize the onions: While the crust bakes, make caramelized onions—heat olive oil in a large skillet over medium heat. Add your sliced onions and cook them slowly—this takes about 15–20 minutes, but it’s worth it for that deep caramelized flavor.
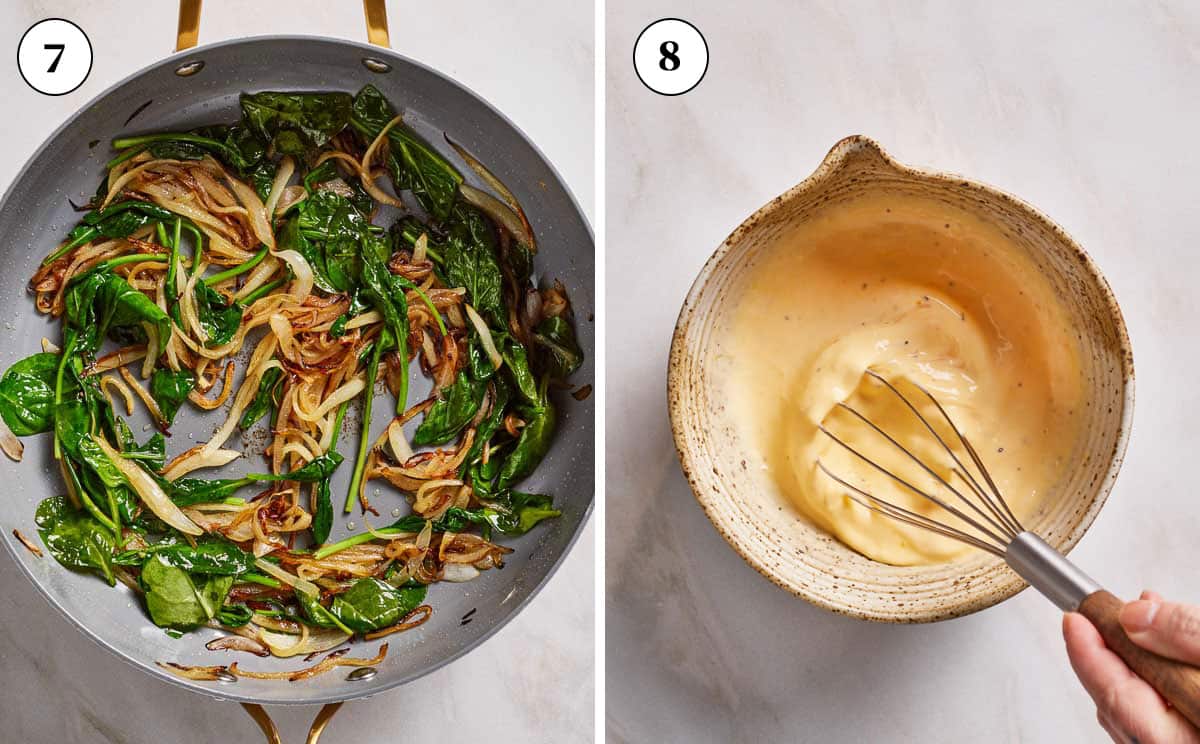
- Add spinach: Add baby spinach leaves and cook just until wilted, about 5–6 minutes more. Let the mixture cool slightly before using.
- Mix the custard: While the quiche filling is cooking, whisk together the eggs, heavy cream, salt, and pepper in a medium bowl until fully incorporated.
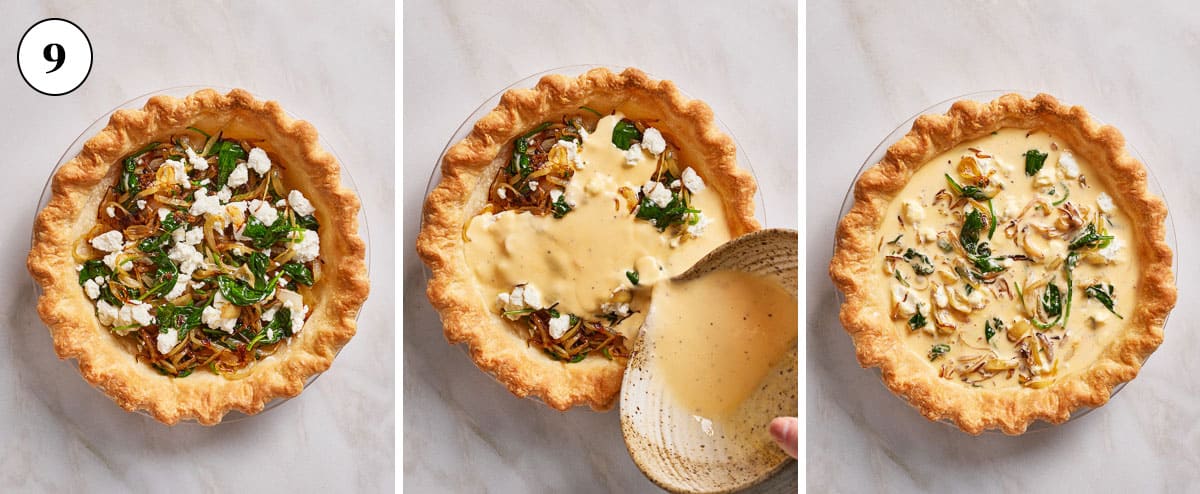
- Assemble the quiche: Layer the crumbled goat cheese evenly over the crust. Top with your onion and spinach mixture, then pour the custard over everything, ensuring it’s evenly distributed.
- Bake: Carefully transfer your chevre quiche to the oven and bake at 375°F (190°C) for 30–35 minutes. The edges should be set, and it’s totally okay if the center has a slight jiggle—it will finish setting as it cools.
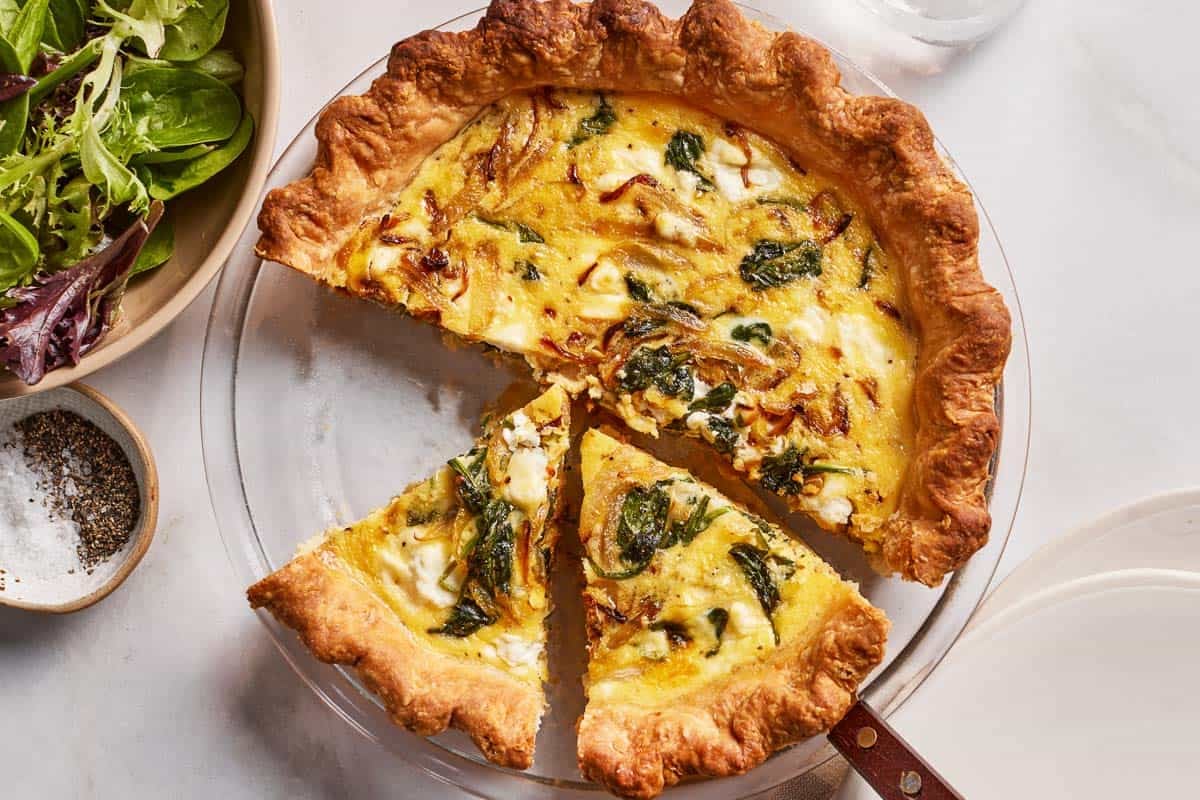
- Cool and serve: Let your spinach goat cheese quiche sit on the counter for about 15 minutes before slicing. It will be easier to cut and serve, and the flavors will settle nicely. Enjoy it warm or at room temperature.
Aysegul’s Expert Tips:
While this goat cheese and spinach quiche recipe is pretty straightforward, I’d like to share a few tips that can help make the process even easier and ensure your quiche turns out perfectly every time:
- Do not skip the blind baking: This step is essential for avoiding a soggy bottom. Make sure that the pie crust is fully baked before adding the filling.
- Glass vs Metal Pie Plate: This recipe was tested using a glass 9-inch pie dish. If you are using a metal pie plate, check the doneness of the crust 5-10 minutes before the suggested baking time. Consider using some foil around the edges if the crust starts to brown too fast before the filling is set.
- Using store-bought pie crust: If you opt for premade frozen pie crust, let it sit at room temperature for about 10–15 minutes, just until it’s soft enough and follow the baking instructions as written. You don’t want it to be too warm, or it may lose its shape.
- If the center looks a little soft, that’s expected: When the quiche comes out of the oven, the middle may look slightly undercooked. That’s completely normal—it will continue to set as it cools on the counter. Just give it about 15 minutes before slicing.
What to Serve it With?
While this spinach and goat cheese quiche is perfect on its own, you can easily turn it into a brunch feast by pairing it with one of the dishes below:
- Salad: A simple green salad like my Spring Mix Salad or Boston Lettuce Salad makes a delightful pairing that turns this dish into a light yet satisfying meal.
- Fruit: If you are serving it for brunch pair it with fresh fruit or a simple breakfast fruit salad for a refreshing contrast. You can also serve it alongside my Yogurt Parfait topped with fresh berries for a light and colorful addition.
- Other Baked Goods: A batch of my Almond Flour Blueberry Muffins or a slice of my Zucchini Bread adds a sweet note to the spread and makes the whole meal feel extra special.
Other Goat Cheese Recipes You Might Like:
The “all butter pie crust” part of this quiche is adapted from Cook’s Illustrated Cookbook (affiliate link).
Photos by Tanya Pilgrim.

Goat Cheese Quiche with Caramelized Onions and Spinach
Ingredients
For The Crust:
- 4 teaspoons sour cream*
- 4 tablespoons ice water
- 1 ¼ cups all-purpose flour, 177 g.
- 1 ½ teaspoons sugar
- ½ teaspoon kosher salt
- 8 tablespoons unsalted butter, cold – cut into small pieces, 114 g.
For The Filling:
- 1 tablespoon olive oil
- 2 small onions, sliced thinly into half-moon slices (400 gr)
- 5 ounces baby spinach leaves, rinsed and spin dried, 142 g.
- ½ cup heavy cream
- 3 large eggs
- 1/2 teaspoon kosher salt
- 1/4 teaspoon black pepper, freshly ground
- 4 oz. goat cheese, crumbled, 113g
Instructions
- To make the crust, mix 4 teaspoons of sour cream and 4 tablespoons of ice water in a bowl until combined. Set it aside.
- Place 1 ¼ cups all-purpose flour, 1 ½ teaspoons sugar, and ½ teaspoon kosher salt into a food processor. Pulse 3-4 times to combine.
- Scatter the small pieces of butter on the flour mixture and process for 10 1-second pulses until the butter is incorporated into the flour with small pieces of butter still remaining.
- Pour the sour cream mixture over the top and pulse 6 or 7 1-second pulses.
- Stop the machine and pinch the dough with your fingers. If it holds together, you are done. If not, add 1 tablespoon of ice-cold water and pulse until dough forms large clumps and no dry flour remains, 3 to 5 pulses.
- Transfer the dough onto your kitchen counter, turn it into a 4-inch disk, and wrap it tightly with stretch film. Refrigerate for at least an hour or overnight.
- Before rolling it out, let it sit on the counter for 10 minutes.
- When ready to bake, preheat the oven to 375 F Degrees (191 C).
- Lightly flour your work surface and roll the dough into an 11-inch circle. Carefully transfer it over a 9-inch tart pan. Tuck the excess 1-inch pieces underneath to form a neat and even edge.
- Cover it with plastic wrap and place it in the freezer for 15-20 minutes until thoroughly chilled and firm.
- Take it out of the freezer. Place a sheet of parchment paper (or aluminum foil) over the dough and fill it with pie weights or a cup of dry beans.
- Transfer it to the preheated oven and bake for 30 minutes.
- Remove the pie weights and the parchment paper, and bake for another 5 minutes until lightly browned. Take it out of the oven and set it aside. Do not turn the oven off.
- To make the filling: While the crust is baking, heat 1 tablespoon of olive oil in a large skillet over medium heat. Add sliced onions, and, stirring often, cook for 15-20 minutes or until they turn golden brown.
- Add baby spinach and cook until wilted, stirring often, about 5 minutes. Set aside aside to cool.
- To make the filling, mix together the ½ cup heavy cream, 3 large eggs, ½ teaspoon kosher salt and ¼ teaspoon black pepper in a small bowl.
- To assemble the quiche, scatter 4 ounces of crumbled goat cheese pieces, caramelized onion, and spinach mixture over the pie crust.
- Pour the heavy and egg mixture over it.
- Bake for 30-35 minutes. When you first take it out of the oven, it may look like the middle part of the quiche is not fully cooked. This is normal. It will continue to cook as it cools on the kitchen counter.
- Allow it to cool for 10-15 minutes, slice, and serve while still warm.
Notes
- Yields: This goat cheese quiche recipe makes a 9-inch quiche that yields 8 slices. The nutritional values below are per slice.
- Using store-bought frozen crust: You can skip making your own and use a pre-made frozen pie crust instead. When shopping, look for one that is 9 inches wide and about 1¼ inches deep—this size works best with the amount of filling in this recipe. Anything smaller or larger might not hold the filling properly or bake evenly.
- Using sour cream: It might seem like an unusual (and tiny) addition, but that little bit of sour cream is what makes this all-butter crust tender, flaky, and surprisingly easy to work with. It helps even beginner bakers get great results—no fuss, no cracking, just a beautifully baked crust. While I highly recommend sour cream, an equal amount of full-fat Greek yogurt would be a good substitute.
- Make-Ahead Instructions: You can prep all the components—crust, caramelized onions, and filling—a day in advance. Wrap each tightly and store them in the fridge, then assemble the quiche just before baking.
- Storage: Leftovers can be stored in an airtight container in the refrigerator for up to 3 days. Reheat in a low-heat (300°F (148°C) oven for 10-15 minutes or until warmed to your liking.
- Freezing: While I always prefer serving this quiche freshly baked—when the crust is crisp and the filling is at its creamiest—freezing is a great option if you need to make it ahead, especially when cooking for a crowd. To freeze, let the quiche cool completely to room temperature after baking. Then, wrap it tightly with stretch film or foil and freeze for up to one month. When you’re ready to serve, unwrap it and let it thaw on the kitchen counter for about 4 hours. Reheat in a 300°F (148°C) oven for 20–25 minutes or until heated through.
Nutrition
Nutrition information is automatically calculated, so should only be used as an approximation.






Absolutely fantastic! I cheated and used a premed pie crust for ease and also added some ham. My family raved about it! This recipe will be added to the Chritmas morning rotation. Thank you!
So happy to hear that Amanda. Thanks for coming by!
I stumbled upon this recipe when trying to come up with ideas of what to make with farm fresh eggs. I cheated a bit as I used store bought crust and added mushrooms (cooked them with the caramelized onions. I also didn’t have fresh thyme so I substitues with dried.Will 100% make again!!! Delicious !
Can I make this using a 9-inch quiche pan? Or is this single serving only?
Hello Phuong,
You can make both in small pans or a 9-inch quiche pan. The instructions are on the recipe card.
I hope this helps.
So sad! You wrote in recipe 1 egg yolk but I think you meant more?? I made two for a brunch with 1 yolk each according to what’s written here.
Hi Sarah,
No need to be sad. You only need 2 eggs and 1 egg yolk ( the plural was a typo from my end and I corrected it). To be honest, you would even be fine even if you didn’t use the egg yolk. I like that adding an additional yolk makes it even more creamy and delicious to the batter but again you’d be fine without it.
So, if you made it with 2 eggs and 1 egg yolk, you should be fine.
Please let me know if I can help in any other way.
Best,
Aysegul
Wow – this quiche was outstanding! I was worried about the crust because I just don’t have good luck with ANY scratch crust but this came out great. I was so proud of myself! lol Great recipe and the flavors of the goat cheese, thyme and caramelized onions was perfect. Thanks for a great recipe and great directions!
Hello Sheri,
Between you and I, I struggle with making pie crust from scratch as well. So, I had people like us in mind when I was testing and writing this recipe.
I am thrilled to hear that you liked the flavor profile.
Thanks for coming by and taking the time to leave a review.
Cheers!
Aysegul
It was a huge hit at my house! SO delish!
YAY! This is music to my ears. Thanks for letting me know.
My go-to main dish for brunch.
So happy to heat that Sommer. Thank you!