
While there are many varieties of kale to choose from, for all respective purposes, we are specifically referring to curly kale, Tuscan kale (dinosaur kale), and red kale, which are all easy to find in the supermarket or grow in your garden.
Keep It As a Bunch
Once people learned that this nutrient-dense veggie packs a ton of health benefits, the popularity of this leafy green soared. Kale is a superfood, and because of this, we want to make sure we are keeping all those nutrients intact while also enjoying its flavor and texture.
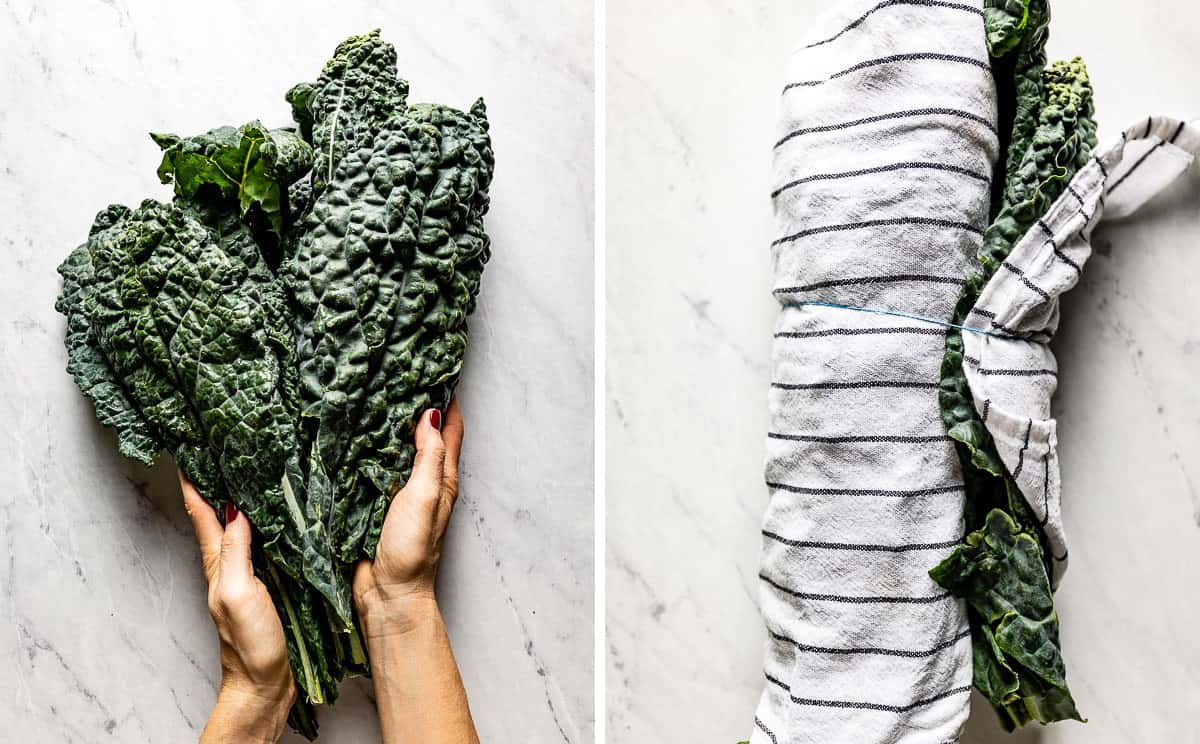
If you want to keep the fresh kale in a bunch, do not wash it. Simply wrap it in a kitchen towel (or a few sheets of paper towels) and place it in a plastic storage bag. Change the paper towels every few days until you are ready to use the kale.
Wash, Portion & Wrap
Proper kale storage will ensure the leaves last for at least 5-6 days, if not longer. You can store kale with stems as a whole or give it a rough chop and store it in the fridge to have it ready to use in recipes throughout the week. Here’s how I like to do it when I get home from the grocery store:
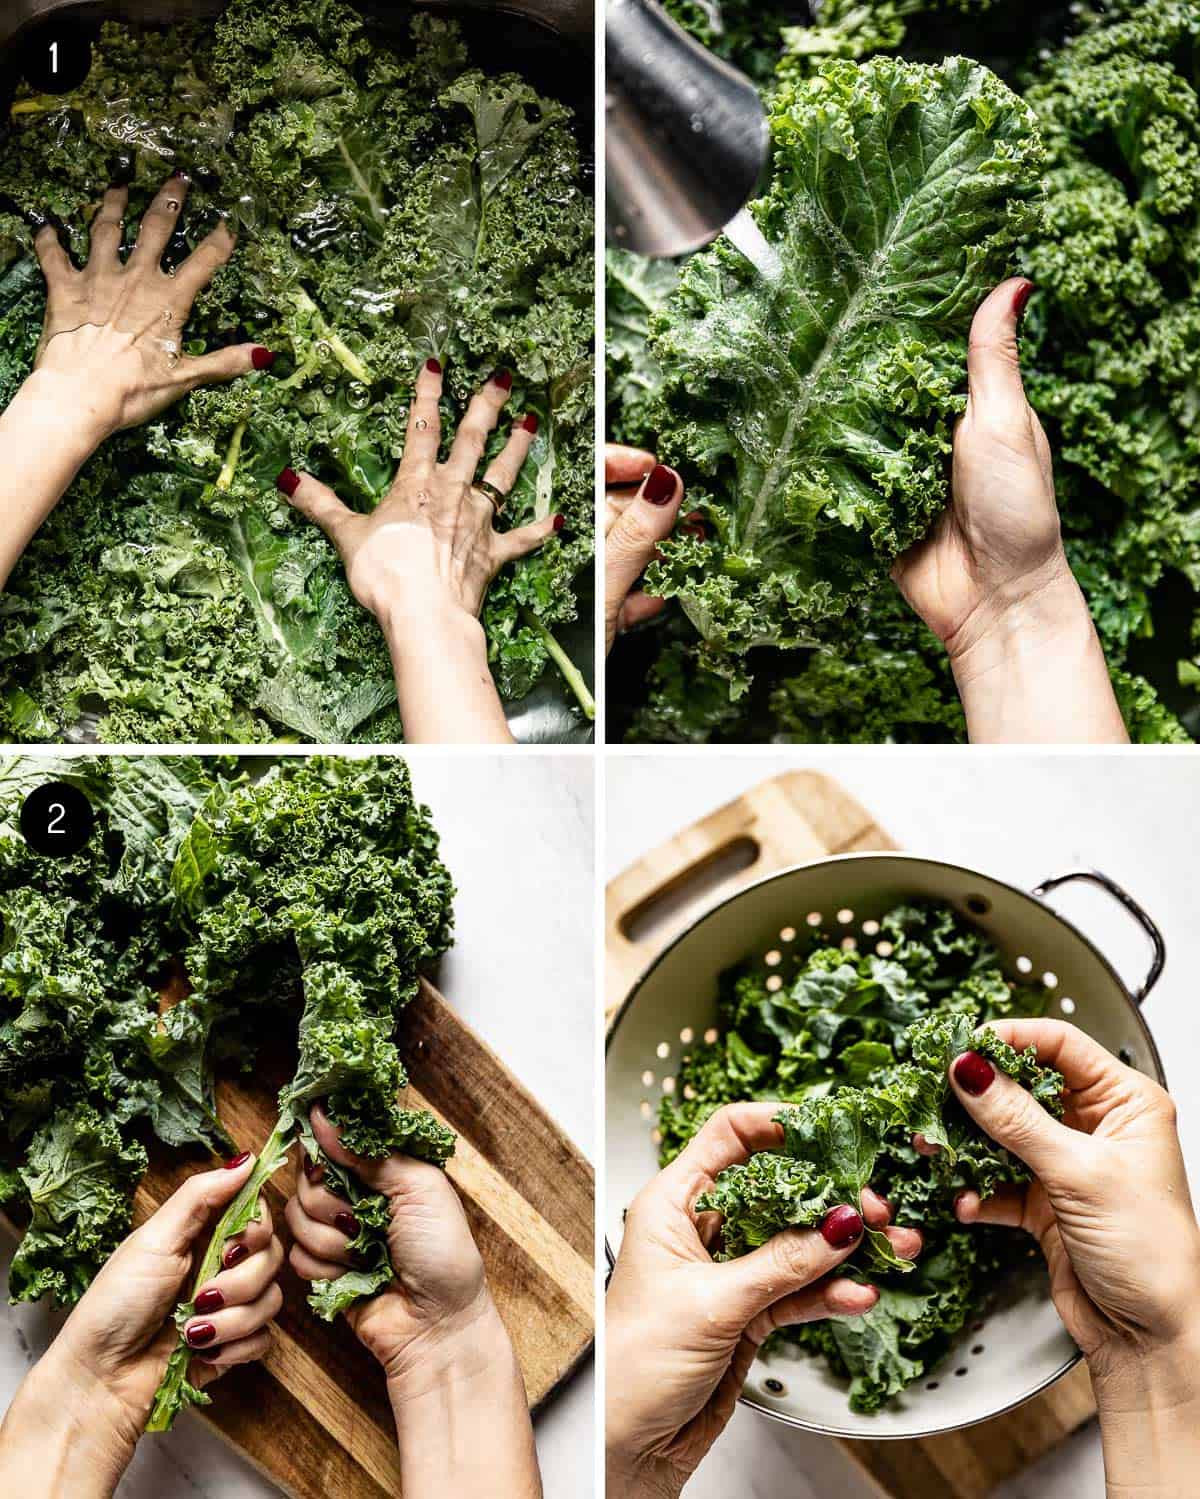
- Wash the kale thoroughly in your kitchen sink. Fill your sink with enough cold water so that the kale floats about 3 inches off the bottom. Submerge the kale and swish it around so that the dirt falls to the bottom. Rinse each leaf under the tap and shake off the excess water.
- Remove the stem. Pull the leaves off the stem by running your hand down the length of each stem. If preferred, break large leaves by hand into smaller pieces.
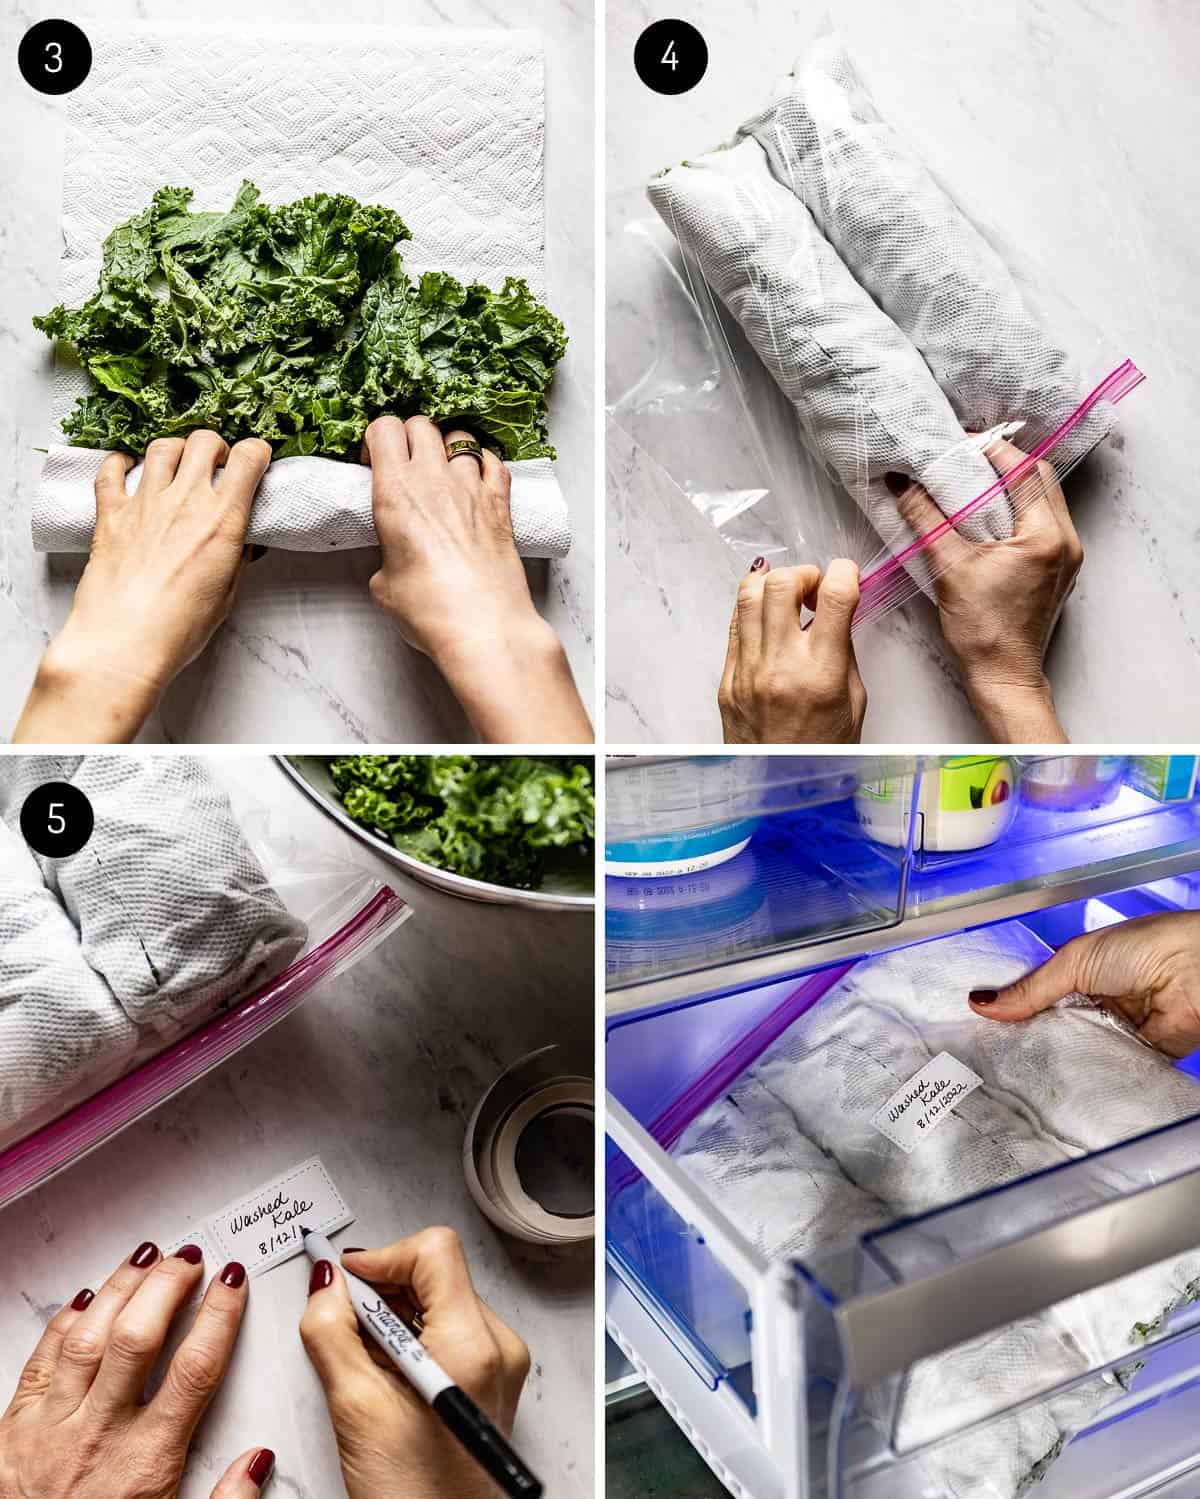
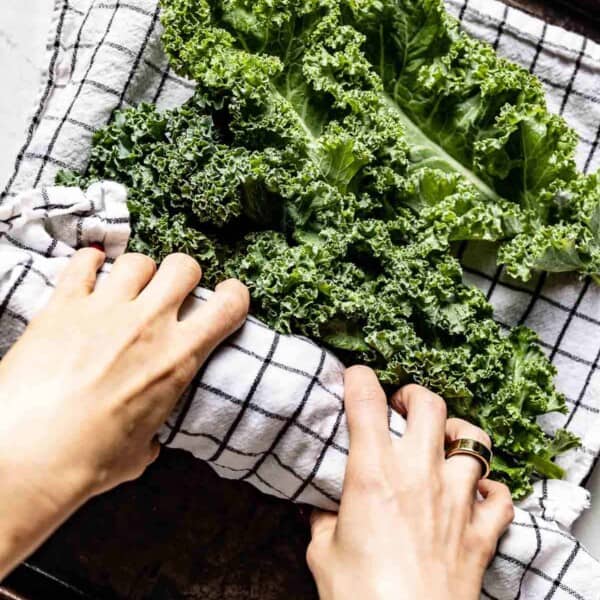
- Dry the leaves. A salad spinner is the most effective way to dry kale leaves. If you don’t own one, lay a clean kitchen towel or a couple of layers of paper towel out on your counter. Scatter the leaves in a single layer, top with another clean towel, and roll like a jelly roll. Press down slightly, so the towels absorb the liquid, then unroll.
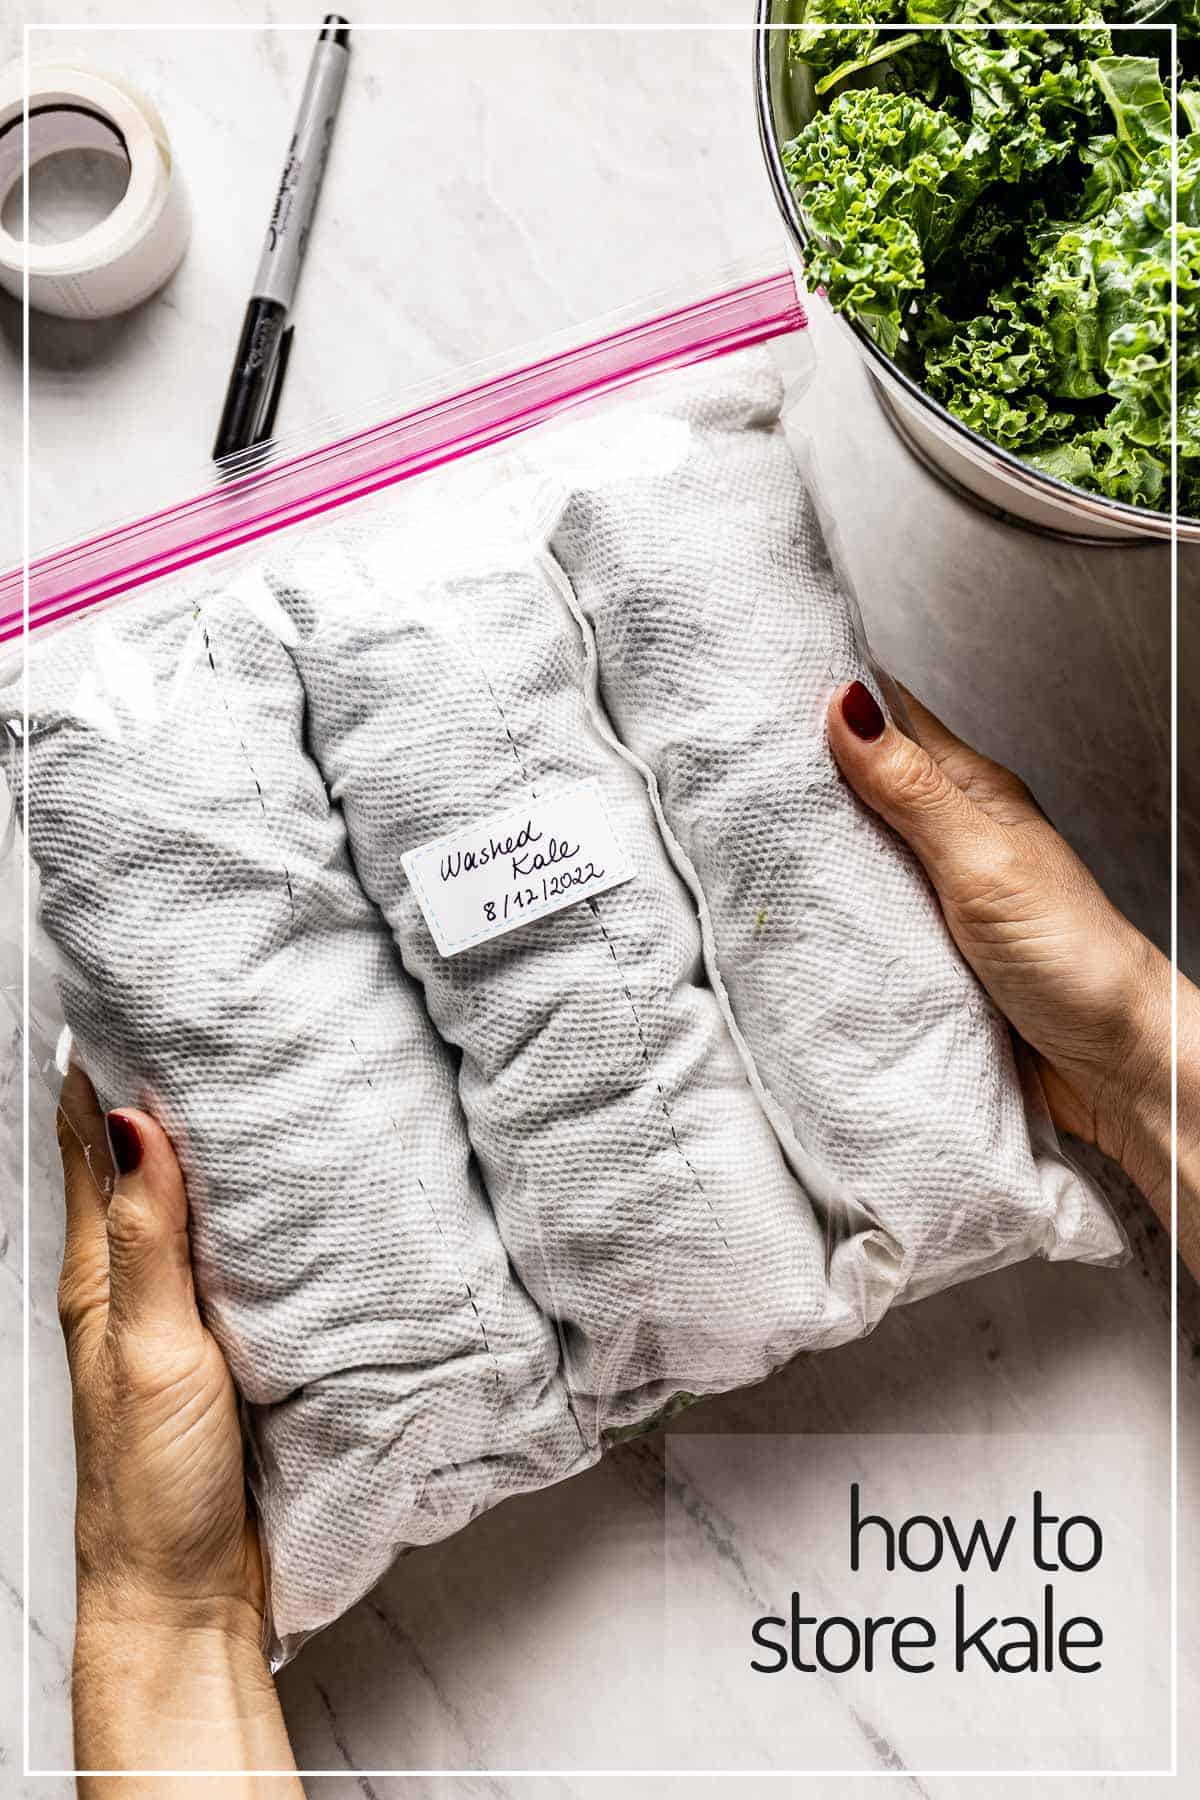
- Portion and wrap. Lay the kale leaves on a layer of clean paper towels, about 2-3 at a time. Roll up the paper towel and place it in a plastic storage bag. Continue this process with the rest of the leaves, using multiple plastic bags, if necessary.
- Store in the fridge. Label and store the plastic bag in your refrigerator, preferably in the vegetable/crisper drawer. Avoid the coldest part of the fridge (the back). Also, make sure to keep away from ethylene producing fruits and vegetables, such as apples, bananas, and avocados. This will make the kale go bad faster.
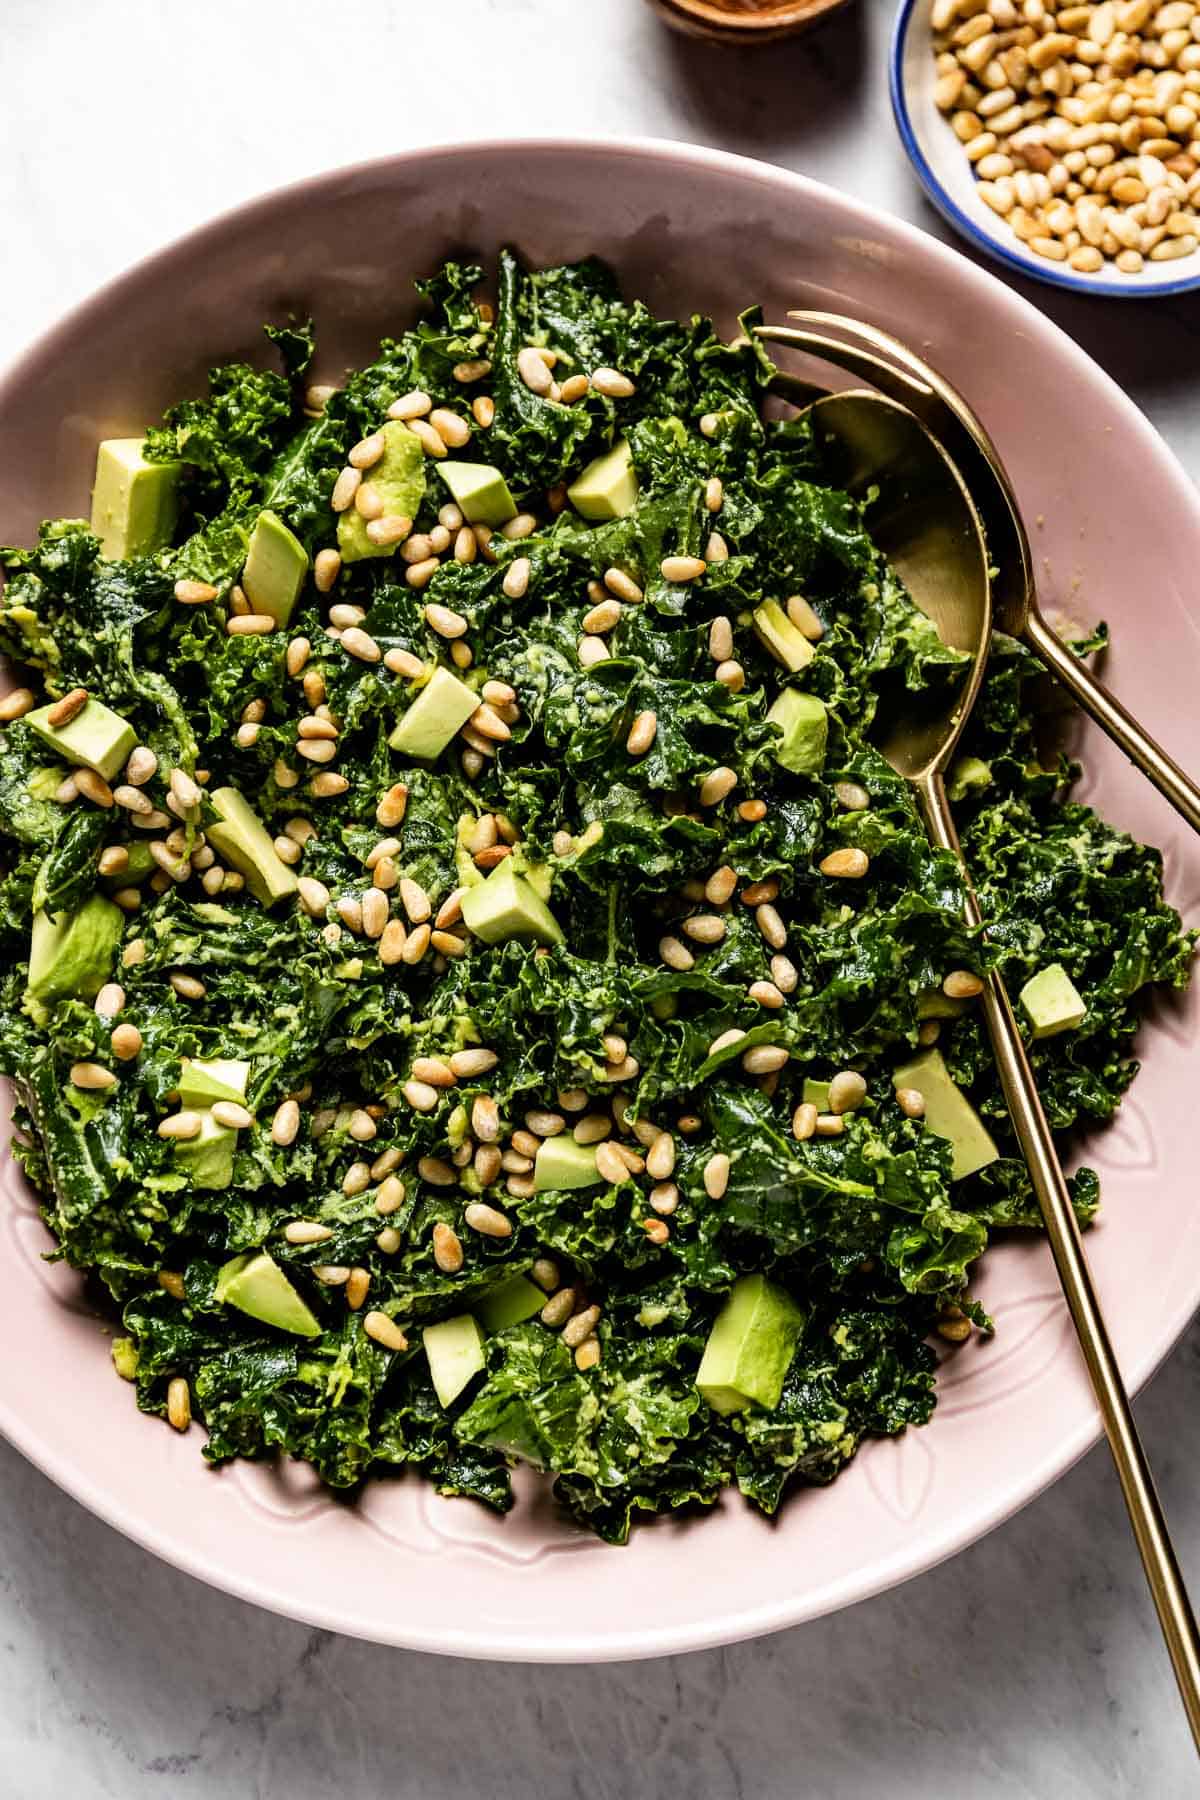
Now you have a hearty green washed and ready for a kale salad, like Kale Avocado Salad, Quinoa Kale Salad, Brussel Sprouts Kale Salad, or Harvest Salad with Kale.
Blanch & Freeze Kale
If you need to store kale for the long term, you can freeze it. The best way to store kale in the freezer is to blanch it first to get rid of its natural enzymes. Blanched Kale is ideal to use in recipes, but it is also a crucial step if you are planning to freeze it. Here’s how to do it:
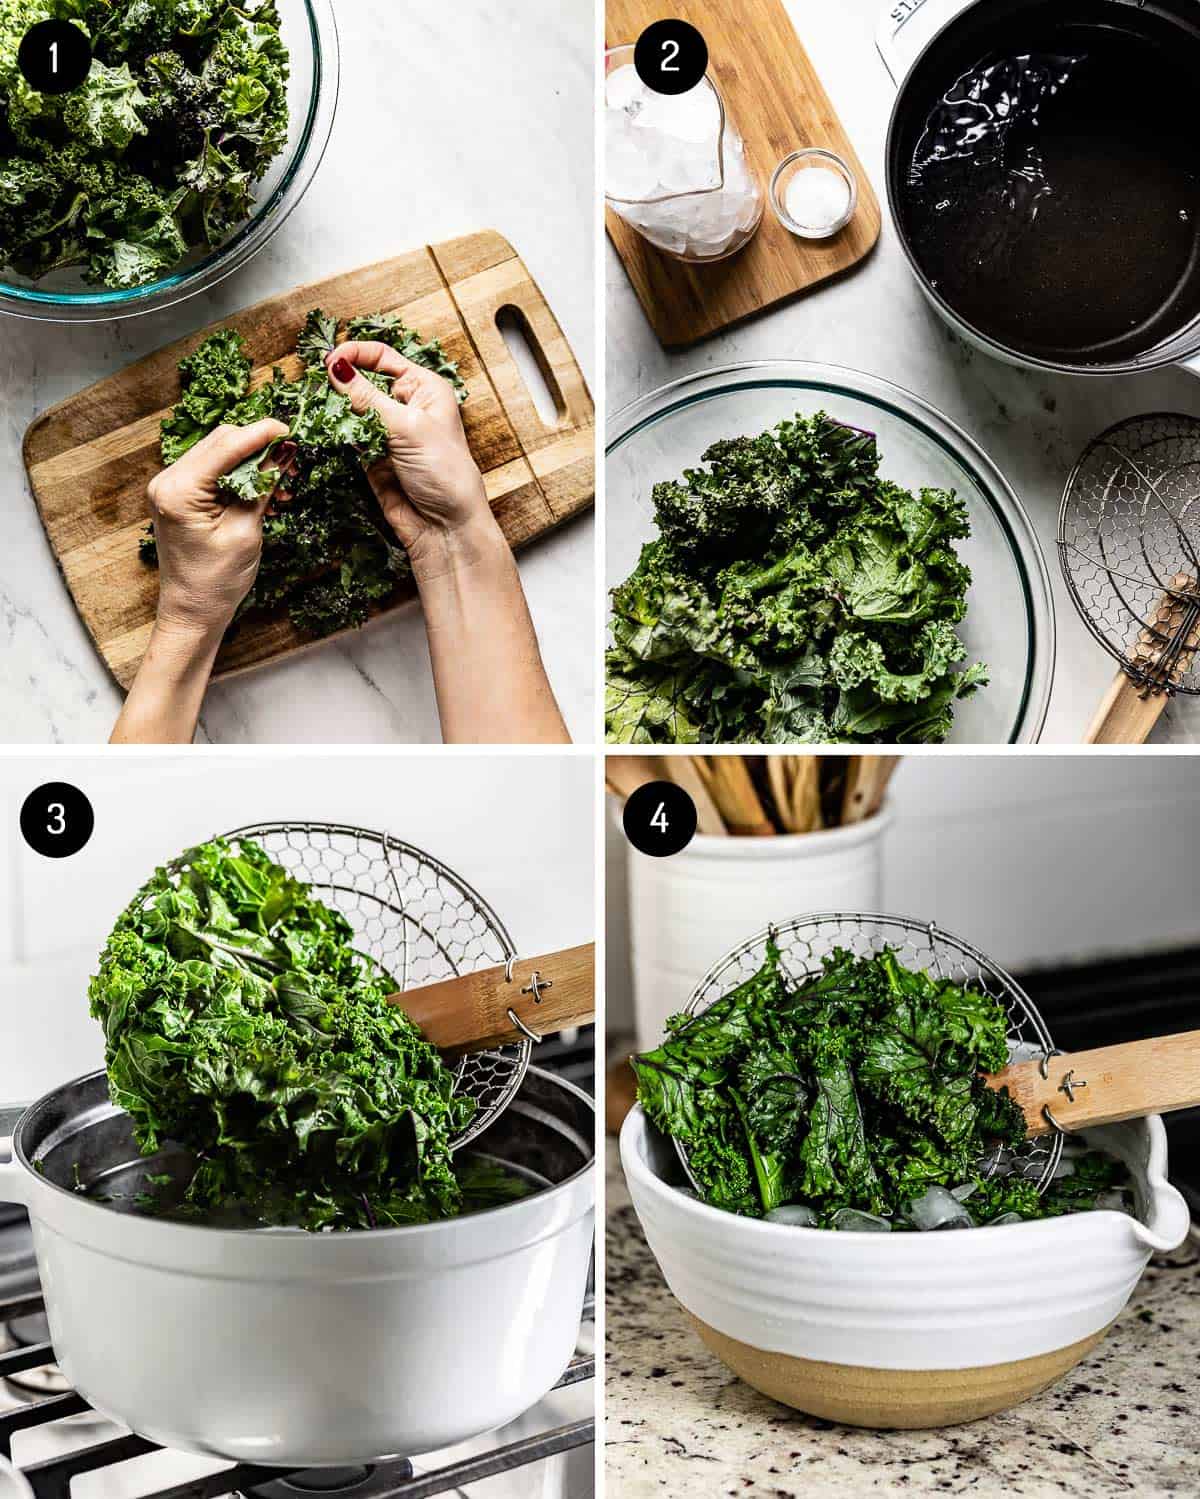
- Wash and destem the kale. Thoroughly rinse the kale leaves under cool running water to get rid of excess debris and dirt. Pull the leaves off the stem by running your fingers down the length of each stem. Give them a rough chop. I find that small pieces of kale are easier to blanch than large ones. And if you need a refresher on the best way to chop them, be sure to check out my guide on how to cut kale.
- Prepare a pot of boiling water. Bring a large pot of water to a boil. Liberally salt the water. While the water is boiling, prepare an ice bath by setting a large bowl of ice water right next to the pot of boiling water.
- Blanch. Drop the chopped kale leaves in the boiling water, in batches if necessary. Boil for 1-2 minutes, or until the color brightens.
- Drain and shock. Remove the leaves from the boiling water with a slotted spoon or strainer and place them directly in the ice bath. Leave until cool enough to handle, about 30 seconds.
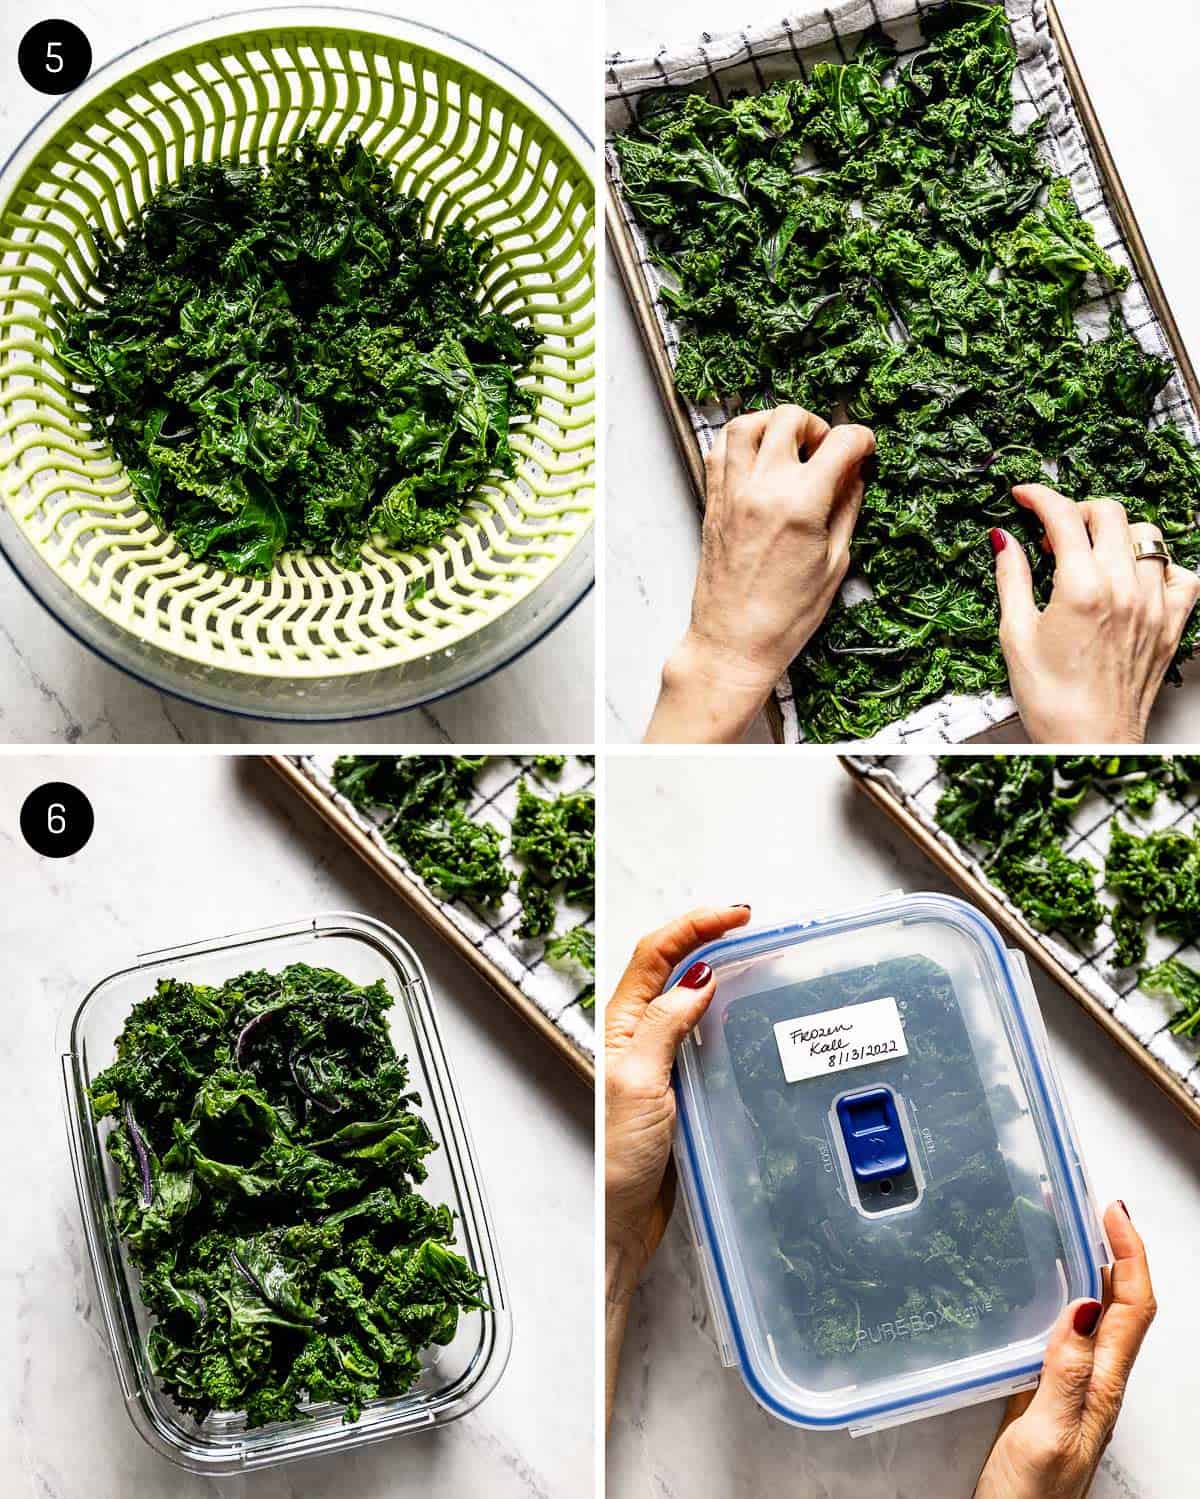
- Dry the leaves and freeze. Dry the leaves with a salad spinner or between a few layers of clean kitchen towels, squeezing out the water as necessary. Place in a single layer on a baking tray small enough to fit in your freezer. Freeze until solid, about 1-2 hours.
- Store in the freezer. Once frozen, transfer to a freezer safe airtight container (affiliate link) or freezer bag, making sure to push out all the air to prevent freezer burn. Label, date, and freeze for up to 6 months.
Thaw
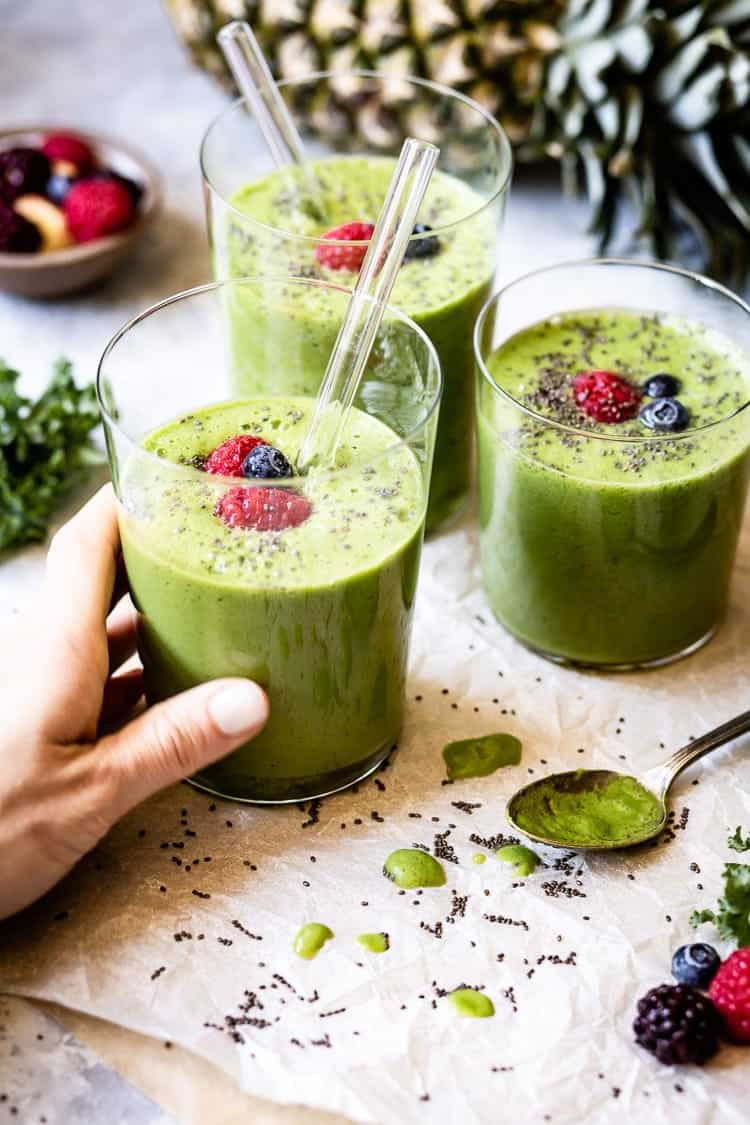
You can add frozen kale to recipes without thawing. You can add it to green smoothies like kale pineapple smoothie and green turmeric smoothie, soups like Tuscan Kale Soup, chicken vegetable soup, butternut squash lentil stew, and pastas like zucchini fettuccine with kale right from frozen – no need to thaw!
But if you need to thaw, simply remove the bag of kale from the freezer and keep it in the fridge or at room temperature for 3-4 hours. Use it as soon as it is thawed. I do not recommend leaving it out too long as you will end up with soggy leaves.
Dry Kale
Dried kale is a bit different from fresh or frozen, but a great alternative if you want to puree the kale into a powder and add it to recipes. Here’s how to dry kale at home as a whole bunch or individual leaves:
How to air-dry kale in a bunch:
- Wash the kale leaves and stems under running water. No need to remove the stems.
- Drain. Allow the kale to drain and air dry in a large colander to evaporate excess water.
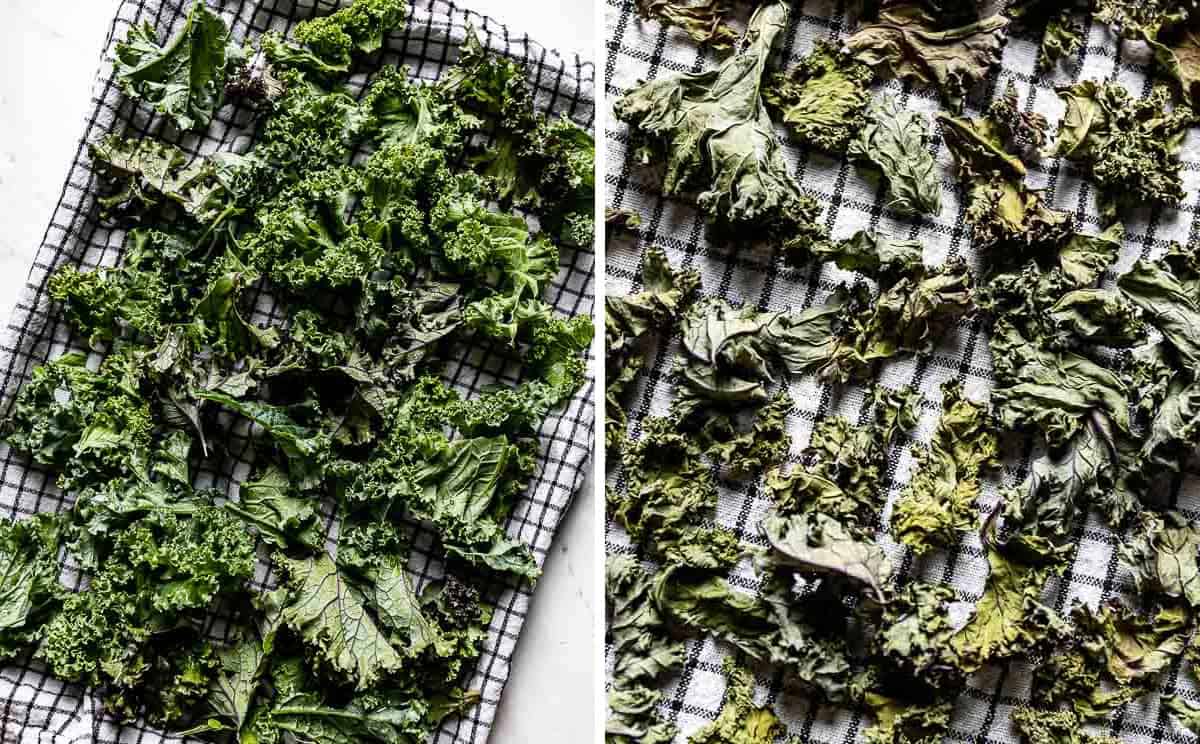
- Tie and hang. Tie the stem ends together with a rubber band. Hang upside down in a warm place that isn’t directly in front of the sun. Keep a bowl or bucket underneath to catch any falling leaves.
- Air dry. Leave to dry for a few days. The kale is ready when it is hard, brittle, and easily cracks in your hand.
How to air-dry kale leaves:
- Wash and remove the stems. Thoroughly rinse the kale in a kitchen sink full of water and remove the stems.
- Spin. Dry the leaves in a salad spinner. Don’t worry if they are not completely dry.
- Air dry. Lay the leaves out in a single layer on a baking sheet, leaving space in between. Allow drying in a window sill under direct sunlight until crunchy and brittle. Use a layer of cheesecloth to cover the kale, if desired.
Expert Tips
- How to select good kale? Kale will have a longer shelf life when picked at the peak of freshness. If possible, shop for this cruciferous vegetable at your local farmers’ market or buy organic at your local grocery store.
When buying kale, look for:- Tender, bright-dark green leaves with no signs of yellowing, browning, tiny holes, or black spots
- Smaller leaves will have a more tender texture and milder flavor
- Opt for whole kale bunches rather than pre-chopped bagged kale
- When storing kale, less moisture is key: Extra moisture or water will deteriorate raw kale much faster than kale that is super dry. Wrapping in multiple layers of paper towels helps keep moisture at bay.
- Cut only if necessary: Chopping kale before storing diminishes the nutritional value slightly. That being said, if you are planning to consume it rather soon, it is a great meal prep trick to get ahead.
FAQs
Kale has gone bad when the leaves are wilted, yellowed, or withered. Or when the leaves are mushy, slimy and have an off odor.
Yes, it does. If you are not planning to use it right away, you should place your kale in the fridge using one of these easy kale storage methods.
When stored properly, kale should last at least 5-6 days in the fridge.
As long as it is stored properly, blanched kale will keep in the freezer for up to 6 months.
Cooked kale will keep for up to 5 days in an airtight container in the fridge.
For a plastic free option, store kale in a glass container with a layer of paper towels to absorb any excess moisture.
More Helpful Kale Articles
Need to sharpen your kale preparation and cooking skills? Below are a few other helpful articles to help you incorporate more kale into your diet.
- Types of Kale: Learn about the different varieties of kale, along with their unique appearance and how to use each one.
- How To Cut Kale: Learn how to properly chop kale the right way. Plus, learn how to use stems to avoid any food waste.
- Blanching kale is an easy way to extend the life of kale to not only keep it fresh longer but also freeze it for long-term use.
- Massaged Kale: If you are having a hard time getting your family to eat kale salads, then you should know how to tenderize the tough leaves of kale. Simply follow my foolproof method to massage kale to minimize the bitter flavor and make it more palatable.
If you find this guide on How To Store Kale or any one of our other How-To Guides on Foolproof Living helpful, please take a minute to leave a rating and a review. Doing so helps others who are planning to follow the processes outlined in this post.

How to Store Kale to Make it Last Longer
Ingredients
- 1 bunch kale
- Water
Instructions
- Wash kale thoroughly in your kitchen sink or using a large bowl with water: Fill your sink (or a large bowl) with enough cold water so that the kale floats about 3 inches off the bottom. Submerge the kale and move it around so that the dirt falls to the bottom. Rinse each leaf under the tap and shake off the excess water.
- Remove the stem: Pull the leaves off the stem by running your hand down the length of each stem. For ease of storing, if preferred, break large leaves by hand into smaller pieces. Alternatively, you can tear each leaf by hand.
To Store Kale in the Fridge:
- Dry as much as you can: Lay a clean kitchen towel or a couple of sheets of paper towels out on the kitchen counter. Scatter the leaves in a single layer, top with another clean towel, and roll like a jelly roll. Lightly press down so the towels absorb the liquid, then unroll.
- Portion and wrap: Place the kale leaves on a layer of clean paper towels. Roll up the paper towel and place it in a plastic storage bag. Continue with the rest of the leaves, using multiple plastic bags, if necessary.
- Store in the fridge: Label and store the plastic bag in your refrigerator, preferably in the crisper drawer. Avoid the coldest part of the fridge (the back). Also, make sure to keep away from ethylene-producing fruits and veggies (i.e apples, bananas, and avocados.)
To Blanch and Freeze Kale:
- Prepare a pot of boiling water: Bring a large pot of water to a boil. Liberally salt the water. While the water is boiling, prepare an ice bath by setting a large bowl of ice water right next to the pot of boiling water.
- Blanch: Drop the chopped kale leaves in the boiling water, in batches if necessary. Boil for 1-2 minutes, or until the color brightens.
- Drain and shock: Remove the leaves from the boiling water with a slotted spoon or strainer and place them directly in the ice bath. Leave until cool enough to handle, about 30 seconds.
- Dry the leaves and freeze: Dry the leaves with a salad spinner or between a few layers of clean kitchen towels, squeezing out the water as necessary. Place in a single layer on a baking tray small enough to fit in your freezer. Freeze until solid, about 1-2 hours.
- Store in the freezer: Once frozen, transfer to an airtight container or freezer bag, making sure to push out all the air to prevent freezer burn. Label, date, and freeze for up to 6 months.
Notes
- When buying kale look for:
- Tender, bright-dark green leaves with no signs of yellowing, browning, tiny holes, or black spots
- Smaller leaves will have a more tender texture and milder flavor
- Opt for whole kale bunches rather than pre-chopped bagged kale
- When storing kale, less moisture is key: Extra moisture or water will deteriorate raw kale much faster than kale that is super dry. Wrapping in multiple layers of paper towels helps keep moisture at bay.
- Cut only if necessary: Chopping kale before storing diminishes the nutritional value slightly. That being said, if you are planning to consume it rather soon, it is a great meal prep trick to get ahead.
Nutrition
Nutrition information is automatically calculated, so should only be used as an approximation.


Wonderful information for people wanting to introduce kale to their heart-healthy diet! Thank you!!
I am thrilled to hear you enjoyed this post Lyndi.
What a great post with excellent, detailed instructions as usual Aysegul.
Thank you
Thank you Ozlem. I am happy to hear that you liked it.